


Hardware Installation
2-6
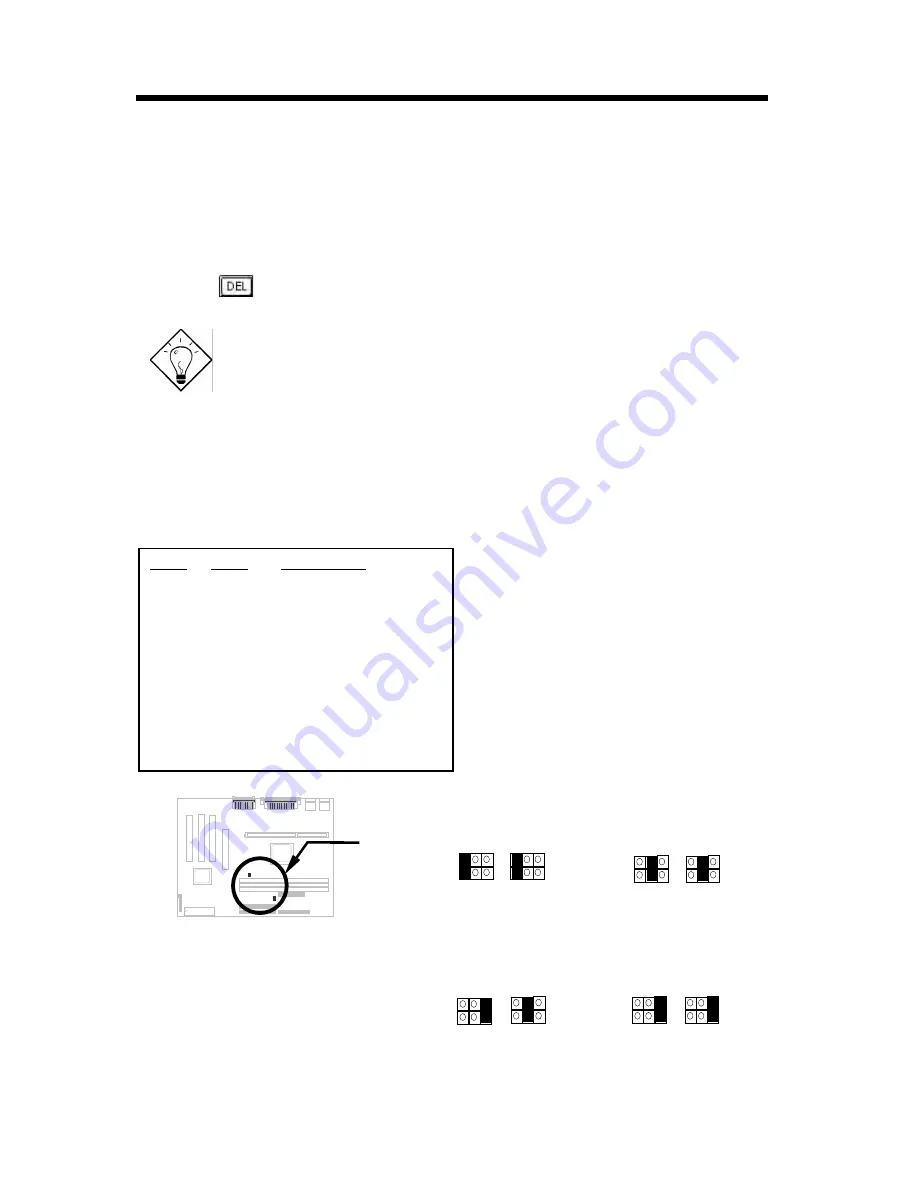
The procedure to clear CMOS:
1. Turn off the system and unplug the AC power.
2. Remove ATX power cable from connector PWR2.
3. Locate
JP14
and short pins 2-3 for a few seconds.
4. Return
JP14
to its normal setting by shorting pins 1-2.
5. Connect ATX power cable back to connector PWR2.
6. Turn on the system power.
7. Press
during bootup to enter the BIOS Setup Utility and specify a new
password, if needed.
Tip:
If your system hangs or fails to boot because of over-
clocking, simply use the <Home> key to restore the default
setting (233MHz). By this smart design, it would be more
convenient to clear CPU frequency setting. For using this
function, you just need to press the <Home> key first and
then press the Power button at the same time. Note: do not
release the <Home> key until the POST screen appears.
2.2.4 Host/PCI Clock
JP23
1-2
3-4
3-4
5-6
JP29
1-2
3-4
5-6
5-6
Host Clock
Auto (default)
133~ 150MHz (4X)
100 ~ 124MHz (3X)
66 ~ 83MHz (2X)
This jumper is used to specify the
relation of PCI and host clock.
Generally speaking, we suggest you not
to change the default setting Auto. But
for overclocking, changing these jumper
settings becomes a prerequisite. For
example, you must set JP23 to “3-4”
and JP29 to “5-6” if you want to
overclock a 66MHz FSB clock CPU to
100MHz or higher.
JP29 JP23
1 3 5
2 4 6
1 3 5
2 4 6
Auto (Default)
JP29 JP23
1 3 5
2 4 6
1 3 5
2 4 6
133-150 MHz (4X)
JP29 JP23
1 3 5
2 4 6
1 3 5
2 4 6
JP29 JP23
1 3 5
2 4 6
1 3 5
2 4 6
Содержание MX64
Страница 14: ...Hardware Installation 2 7 100 124 MHz 3X 66 83 MHz 2X...
Страница 33: ...Software Installation 3 8...


