AOpen AX64 Скачать руководство пользователя страница 7

If you encounter any trouble to boot you system, follow the 
procedures accordingly to resolve the problem. 

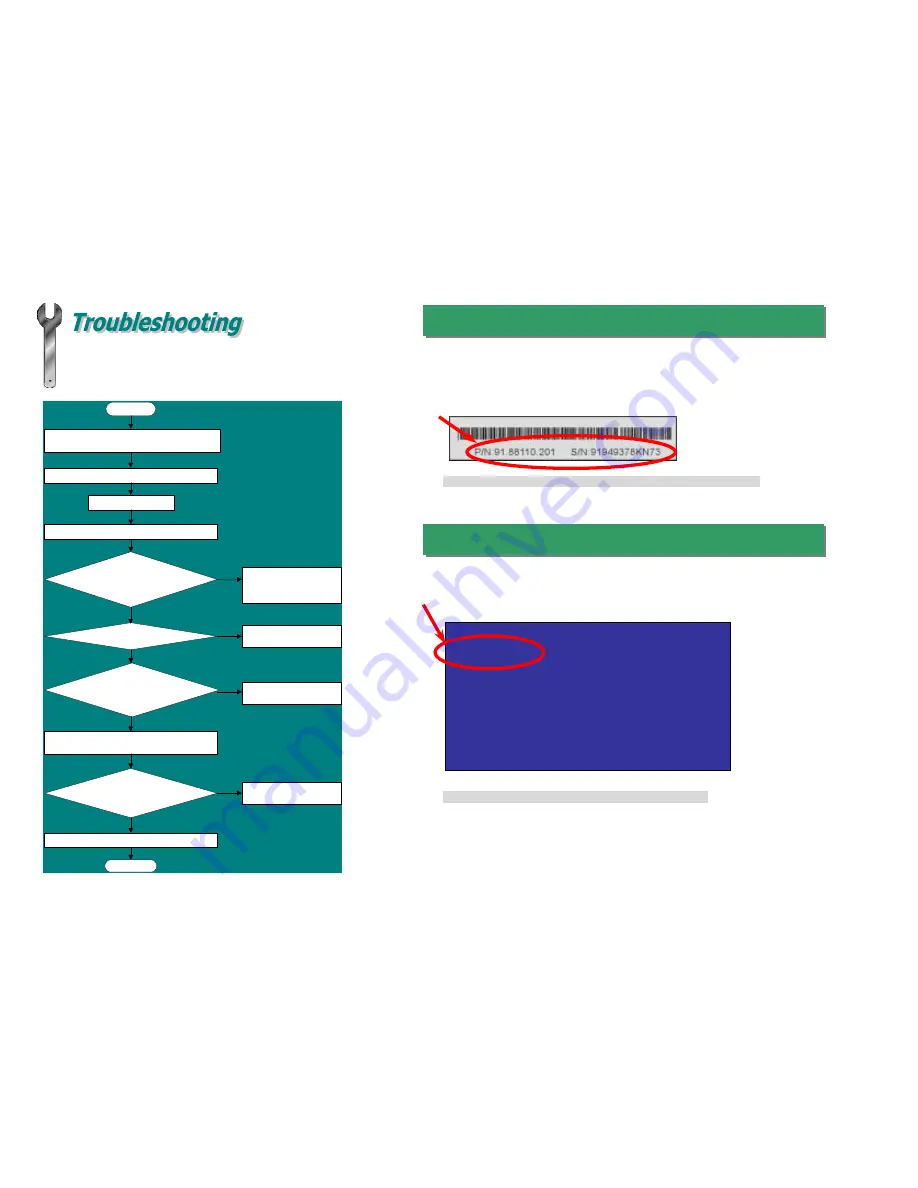
Part Number and Serial Number 

The Part Number and Serial number are printed on bar code label. You can find this 
bar code label on the outside packing, on ISA/CPU slot or on component side of 
PCB. For example: 

Model name and BIOS version 


AX64 R1.20

 Jan.04.2000 AOpen Inc. 


Award Plug and Play BIOS Extension v1.0A 

Copyright © 1998, Award Software, Inc. 


Model name and BIOS version can be found on upper left corner of first boot screen 
(POST screen). For example: 

P/N: 91.88110.201

 is part number, 

S/N: 91949378KN73 

is serial number. 

AX64

 is model name of motherboard, 

R1.20

 is BIOS version. 


Make sure if the jumper settings for CPU and DRAMs are correct.


Clear CMOS.


Install the VGA card. Then connect your monitor and keyboard.


Turn on the power, and check if the power supply and 


CPU fan work properly.


Start

The problem was probably caused by

power supply or motherboard failure.

Please contact your reseller or local
distributor for repairing.


Check if there is display.

Perhaps your VGA card or monitor is

defective.


No


                    Yes


No


                    Yes

Press Ctrl, and Alt key at the same time, hold them and then


press Del to see if the system reboots.


No


It is very possible that your keyboard is

defective.

During system rebooting, press Del to enter BIOS Setup. Choose


“Load Setup Default".


      Turn off the system and re-connect the IDE cable.


      Check if the system can reboot successfully.

The problem should be caused by the

IDE cables or HDD itself.

Re-install Windows 95, Windows 98 or Windows NT.


                    Yes

                    Yes

End

No


Turn off the power and unplug the AC power cable, then remove all of


the addon cards and cables, including VGA, IDE, FDD, COM1, COM2

and Printer..


Содержание AX64

Страница 1: ...umper less Design Over current Protection Thermal Protection CPU Fan Connector System Voltage Fan Monitoring ATX Power Connector AC Power Auto Recovery JP23 29 FSB PCI Clock Ratio Housing Fan WOM Wake...

Страница 2: ...ur earth Tip When should I Clear CMOS 1 Boot fail because of overclocking 2 Forget password 3 Troubleshooting You can clear CMOS to restore system default setting To clear the CMOS follow the procedur...

Страница 3: ...Z 4 5x Pentium 650E 100MHZ 6 5x Pentium 667EB 133MHZ 5x Pentium 700E 100MHZ 7x Pentium 733EB 133MHZ 5 5x Pentium 750E 100MHZ 7 5x Pentium 800E 100MHZ 8x Pentium 800EB 133MHZ 6x Note Some CPU fans do n...

Страница 4: ...ing Front Panel Cable Locate the power switch cable from your ATX housing It is 2 pin female connector from the housing front panel Plug this connector to the soft power switch connector marked SPWR 1...

Страница 5: ...Menu from Bonus CD Disc You can use the autorun menu of Bonus CD disc Choose the utility and driver and select model name Warning Please avoid of using Load Turbo Defaults unless you are sure your sy...

Страница 6: ...single file to complete the flash process 1 Get new BIOS upgrade program from AOpen s web site For example AX64 109 EXE It is recommended to save it to a bootable DOS floppy diskette for error recover...

Страница 7: ...Install the VGA card Then connect your monitor and keyboard Turn on the power and check if the power supply and CPU fan work properly Start The problem was probably caused by power supply or motherbo...

Страница 8: ...BIOS utility and drivers http www aopen com tw tech download default htm 3 3 News Group Your problem probably had been answered by our support engineer or professional users on the news group http www...

Отзывы: