background image

SYSTEM SETUP

3

WIRELESS OPERATION

10

Diversity Wireless by Anchor Audio

Anchor Audio UHF wireless is a 16 channel, diversity wireless
system that utilizes two independent antennae to receive signal.  The
diversity feature means that the receiver will process the stronger of
the two antenna signals, effectively minimizing dropouts and
interference from other transmitting sources.  The antennae are
mounted internally so there are no obstructions or risk of damage.

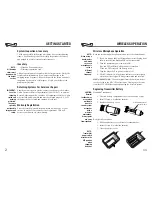
Receiver Channel Selection

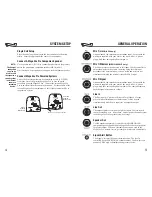
Before you use your UHF wireless system, you will
need to select a wireless frequency channel.  The
wireless receiver is mounted inside the MegaVox Pro
and can be set to any of 16 available channels.

1. Locate the Wireless Channel selector on the

back panel.

2. Using the supplied screwdriver, set the

frequency of the receiver to 1 thru 16.

Transmitter Channel Selection

Handheld Transmitter:

1. Unscrew battery cover on

lower end of microphone.

2. Set the channel selection

dial to match the channel
setting on the receiver.

3. Replace the battery cover.

Body-pack Transmitter:

1. The channel selection dial

is located on the side of
the transmitter.

2. Set the channel selection

dial to match the channel
setting on the receiver.

NOTE:

Be sure that

the MIC/LINE

switch is in

the “MIC”

position when

a mic is

plugged into

the TX.

NOTE:

If you

experience

ongoing

interference

with your

wireless

system, the

selected

frequency

may be

incompatible

with other RF

systems in

your area.  

Try a different

channel.

Setting Up The MegaVox Pro

For best results, it is recommended that the PA system be placed
above the heads of the audience and above the height of the tallest
obstruction using a speaker stand or table.  This will benefit the
listeners in the rear while minimizing the risk of overpowering the
listeners in front.

Sound System Placement

The ideal placement of the PA system is between the crowd and the
presenter, facing the crowd.  This will give the audience a direct
signal path and keep the person with the microphone behind the
sound system, helping to prevent feedback from occurring.  

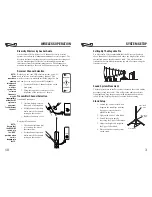
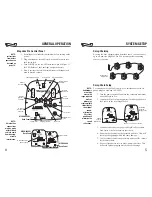
Stand Setup

1. Loosen the Lower Collar Knob.

2. Separate the stand legs until the

leg support cross braces are
parallel to the floor.

3. Tighten the Lower Collar Knob.

4. Extend the center pole by

loosening the Upper Collar Knob.

5. Adjust the height and retighten

the Upper Collar Knob.

6. Place the Anchor sound system

on the stand.

Upper Collar

Knob

Cross Braces

Lower Collar

Knob

Содержание MegaVox PRO MEGA-6000

Страница 1: ...battery life short in external speaker cable or speaker total external speaker impedance 8Ω batteries not fully charged batteries need replacement Distorted sound poor connection on input cable input signal too strong Excessive hum or noise input cable not shielded Having trouble with the wireless system Condition Possible Cause No sound RX ON indicator lights wireless volume control low or off no...

Страница 2: ...umidité ATTENTION Pour diminuer le risque d incendie remplacer par des fusibles de même type voir caractéristiques EXPLANATION OF GRAPHICAL SYMBOLS The lightning flash with arrowhead symbol within an equilateral triangle is intended to alert the user to the presence of uninsulated dangerous voltage within the product s enclosure that may be of sufficient magnitude to constitute a risk of electric ...

Страница 3: ...end 50 EX50PP Shielded speaker cable with 1 4 male phone plugs on each end 50 Getting Started 2 System Setup 3 5 Precautions 6 Battery Operation 7 General Operation 8 9 Wireless Operation 10 11 Accessories 12 Specifications 13 Troubleshooting Guide back cover Thank you for choosing an Anchor Audio portable sound system Our products incorporate state of the art design and the finest quality of mate...

Страница 4: ...hey were specially designed to ship your unit safely Wireless Microphone Operation Both the receiver and microphone must be set to the same channel 1 If you are using a body pack transmitter insert the plug from the mic into the jack marked MIC on the transmitter 2 Turn the transmitter power switch to ON The red LED will flash when the mic is turned on If the red LED stays on the battery is low 3 ...

Страница 5: ...transmitter 2 Set the channel selection dial to match the channel setting on the receiver NOTE Be sure that the MIC LINE switch is in the MIC position when a mic is plugged into the TX NOTE If you experience ongoing interference with your wireless system the selected frequency may be incompatible with other RF systems in your area Try a different channel Setting Up The MegaVox Pro For best results...

Страница 6: ...drive Anchor s model MEGA 6001 companion speaker in addition to MegaVox Pro s built in speakers for greater output When an external speaker is powered by the MegaVox Pro battery service per charge will decrease considerably Signal Alert Button The Signal Alert provides an air horn type tone The level is controlled by the MIC SIGNAL volume control Caution this can produce VERY high or harmful sound...

Страница 7: ...MEGA 6000 Back Panel Daisy Chaining By using the Line Output method described above you can connect up to six powered MegaVox Pro PA Systems together expanding your coverage area Daisy Chain Setup To connect your MegaVox Pro units use a shielded cable with 1 4 phone plugs on each end EX 50PP 1 Turn the power switch off and turn the volume to maximum on each MegaVox Pro 2 Connect the Line Out on th...

Страница 8: ... full volume of continuous music input usually longer for speech applications NOTE When an external speaker is powered by the MegaVox Pro battery service per charge will decrease considerably NOTE MegaVox Pro is an AC DC powered unit that can be used while charging IMPORTANT For longer battery life always store your system with the battery in a fully charged condition or the charger plugged in Fee...

Отзывы: