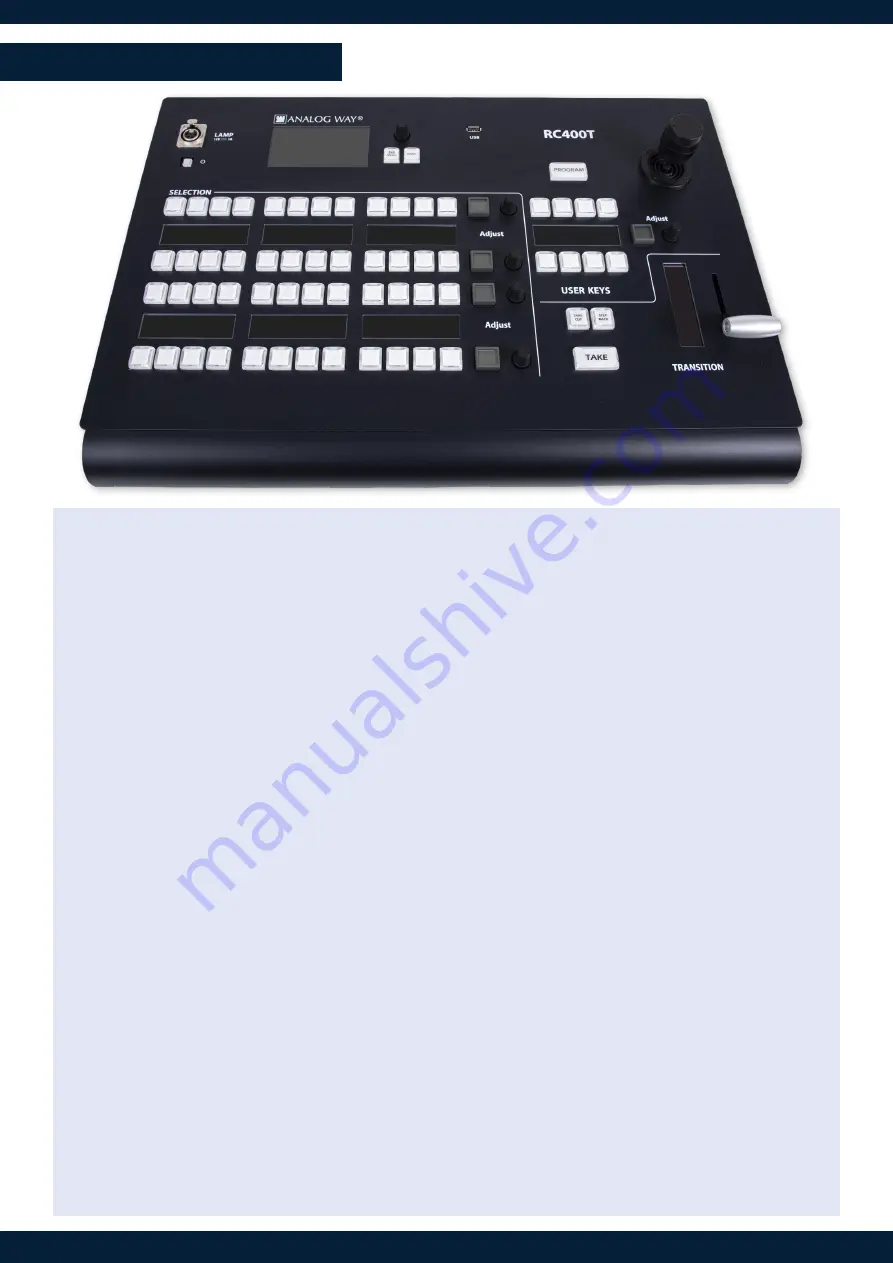
CONTROLLER DESCRIPTION
• Top area
The top area is used mainly for configuring the
RC400T
(status, network, upgrade, factory reset, etc.).
Use the rotary encoder to move the selection and use the buttons to
Confirm
/
Cancel
the choices.
The
Program/Preview
key toggles between Program and Preview modes (this key is related to the Selec
-
tion area). Note that the three-axis joystick will be fully functional in a future version.
• XLR lamp (optional)
The XLR lamp is used to light the
RC400T
if needed.
To turn the lamp on, go to
Front panel settings
and enable
Power on light
.
• Selection area - Multi-purpose area
The Selection area is used for Screen composition. Select Screens, Aux Screens, Layers, and assign Sources
or reload Memories. The Selection area is composed of 4 identical rows of keys. Each row is composed
of 12 LED keys with labels in OLED displays, one LCD key and one rotary encoder. Each row can display a
predefined group of items depending on the mode selected by the user. Note that the
Program/Preview
key affects the entire Selection area.
• User keys area
The User keys area is composed of 8 LED keys, one OLED display, one LCD key and one rotary encoder.
This area has been designed to be evolutive and user customizable. The user keys are predefined slots for
features or actions set by the user (remove a source content, set transition time, disable the T-bar, etc.).
More features will be coming in future versions and users are welcome to request new User keys features.
•Transition area
The Transition area is composed of one
T-bar
and 3 LED keys:
Take Cut
,
Step Back
and
TAKE
:
-
Take Cut
triggers an immediate transition from Preview to Program without effects or duration.
-
Step Back
reloads the former Program to the Preview.
-
TAKE
triggers the transition from Preview to Program with effects, duration, etc.
The
T-bar
is a manual Take triggered by the user for a smooth transition.
The transition applies only to Screens selected in the Selection area.


