UG-1571
Rev. 0 | Page 11 of 18
USING THE EVALUATION BOARD
POWERING UP THE EVALUATION BOARD
The ADP5360CB-EVALZ evaluation board is supplied fully
assembled and tested. Before supplying power to the evaluation
board, follow the procedures detailed in the Input Jumpers
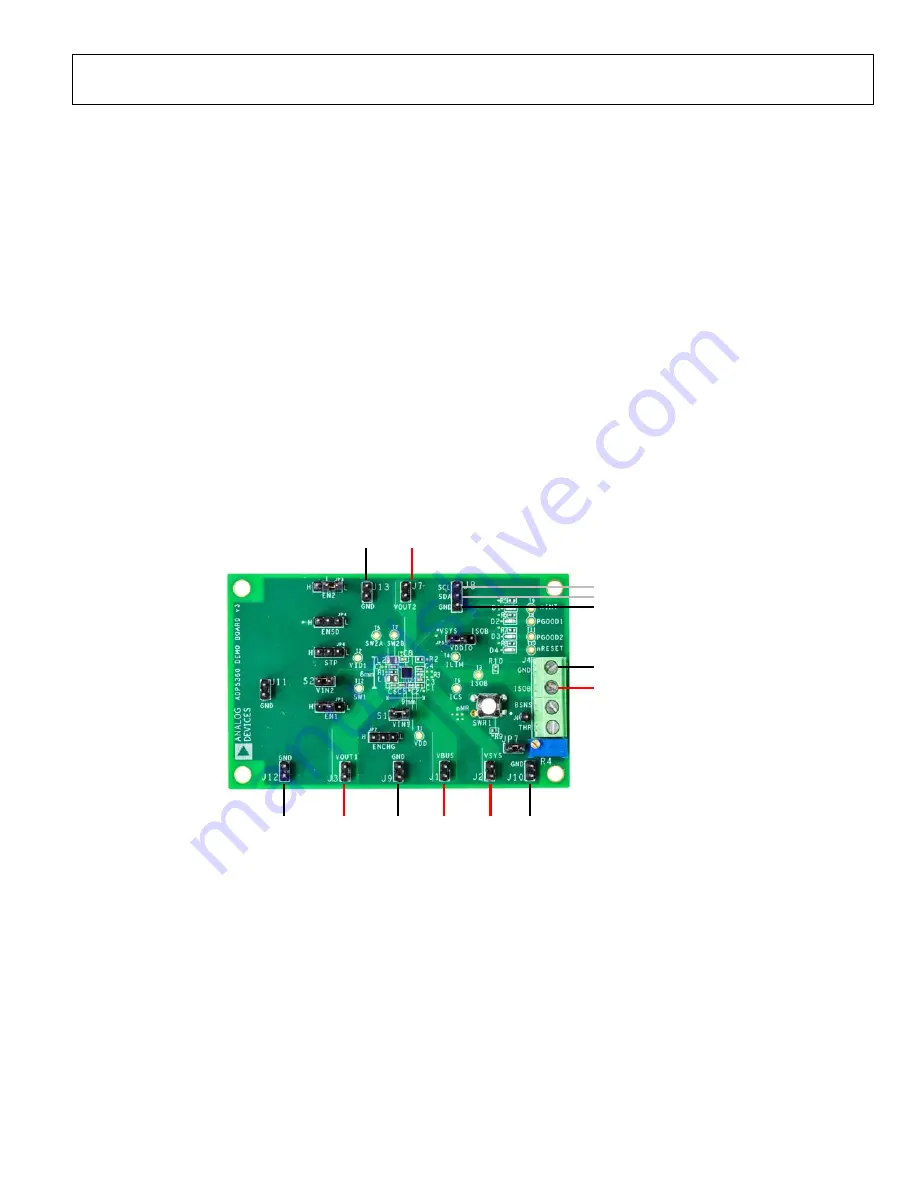
section and Quick Start section. See Figure 17 for component
locations.
Input Jumpers
Because VIN1 and VIN2 must be connected to VSYS, the input
jumpers, S1 and S2, are shunted by default.
Set the ENSD jumper high to enable
shutdown mode.
After a Li-ion battery or battery simulator is connected to the
ADP5360CB-EVALZ board, set the ENSD jumper low to
disable shutdown mode.
Either set the ENCHG jumper to the high side or set the
EN_CHG bit (see Figure 10) high in the GUI to enable the
charger.
Set the EN1 jumper to the high side and click
EN_BUCK
in the
Buck Setting
section (see Figure 12) to set the EN_BUCK bit
high to enable the buck regulator.
Either set the EN2 jumper to the high side or set the
EN_BUCKBST bit in the
Buck Boost Setting
section (see
Figure 12) high to enable the buck boost regulator.
Set the VDDIO jumper to VSYS or ISOB to select the logic
voltage source.
Quick Start
Adhere to the following steps to construct a typical test setup:
1.
cable from the PC USB
port to the ADP5360CB-EVALZ evaluation board.
2.
Set the dc power supply to 5 V and connect the power
supply to the on-board VBUS and GND to a dc power
supply. Skip this step if the charge function does not need
to be evaluated.
3.
Use a charged battery or a battery simulator to connect to
the ISOB and GND nodes.
4.
Start the GUI software.
BUCK OUTPUT
BUCK-BOOST OUTPUT
DC 5V SUPPLY
SYSTEM OUTPUT
TO USB I
2
C DONGLE
BATTERY OR
BATTERY SIMULATOR
2060
3-
01
7
Figure 17. ADP5360CB-EVALZ WLCSP Board Connection Diagram


