background image

Overview

4

NXR-ZGW/-ZRP

NXR-ZRP (FG5791-02) Specifications (Cont.)

Other AMX Products:

• Mio Modero R-3 Remote (

FG148-03

)

• Mio Modern R-4 Remote (

FG148-04

)

• NXR-ZGW NetLinx ZigBee Gateway (

FG5791-01

)

• NXA-WAP 2403A 3 dBI Antenna (

FG2255-20

)

• NXA-WAP 2405A 5.5 dBI Antenna (

FG2255-21

)

• NXA-WAP 2413A Mounting Bracket (

FG2255-24

)

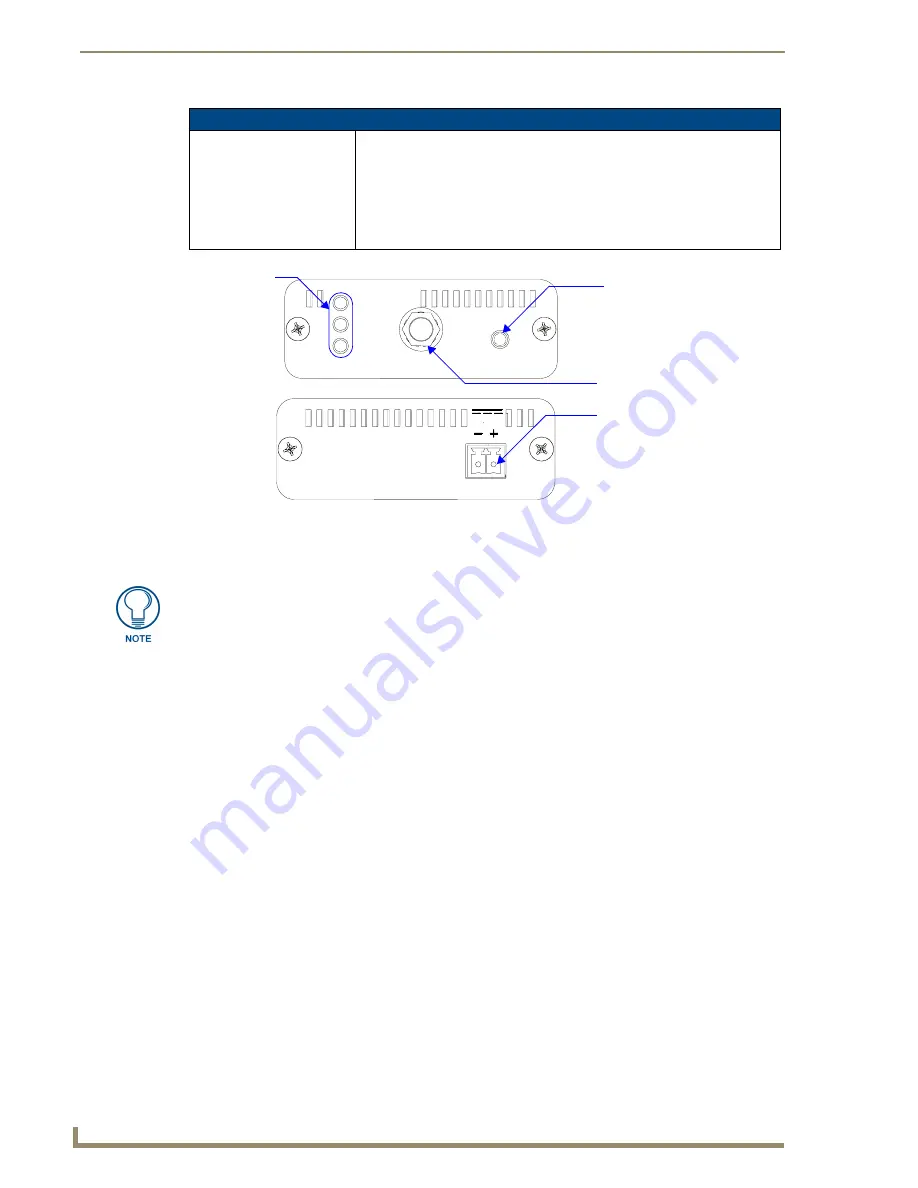
FIG. 2  

Front and Rear Components of the NXR-ZRP

PWR

12VDC

RESET

ANT

RF

ICSP

PWR/STATUS

(Front)

(Rear)

Reset Button

Antenna Mount

2-pin 3.5mm Phoenix

Connection LEDs

power connector

Connection to the Repeater device from either the NXR-ZGW or the Mio Modero

®

 R-

3 or R-4 requires download and installation to the repeater of ZigBee Module 
firmware version 1.01.12, available from 

www.amx.com

.

Содержание NetLinx NXR-ZGW

Страница 1: ...Operation Reference Guide Control System Accessories NXR ZGW ZRP NetLinx ZigBee Compatible Gateway and Repeater Last updated 7 30 2008 ...

Страница 2: ... or after the RMA is cancelled will be refused AMX is not responsible for products returned without a valid RMA number AMX is not liable for any damages caused by its products or for the failure of its products to perform This includes any lost profits lost savings incidental damages or consequential damages AMX is not liable for any claim made by a third party or by an AMX Dealer for a third part...

Страница 3: ...the AMX SOFTWARE including without limitation any if any service packs or hot fixes provided to Licensee after the expiration of the ninety 90 day Limited Warranty period are not covered by any warranty or condition express implied or statutory LICENSEE REMEDIES AMX s entire liability and Licensee s exclusive remedy shall be repair or replacement of the AMX Software that does not meet AMX s Limite...

Страница 4: ......

Страница 5: ...for the 2 pin 3 5 mm mini captive wire connector 10 Using the PSN NetLinx connector for power 11 Table top installation of the NXR ZGW and NXR ZRP 11 Rack mounting the NXR ZGW and NXR ZRP 11 Setting up a Network 13 NXR ZGW Browser based Configuration Manager Pages 15 Summary of Gateway Settings 15 Checking the firmware version 16 Checking the ZigBee firmware version 16 Determining the IP settings ...

Страница 6: ...oving a device from the Access List 24 Locating the device 24 Changing a Connected Device description 24 Changing a device s ZigBee networking information 25 Utilities 26 Device Firmware 26 Allowing firmware updates to individual devices 26 Allowing firmware updates to all devices on a network 26 Connection Log 27 Determining the connection status of a device 27 Finding the device s ICSP number 27...

Страница 7: ...pecifications Management Built in browser based management with User Name Password authentication IP configuration Static IP or DHCP client default is static 192 168 1 140 Communications The NXR ZGW communicates with a Netlinx master over TCP IP encapsulating the ICSP protocol via a physical Ethernet connection The ICSP device number can be set via the browser based management system Front Compone...

Страница 8: ...ZGW CE IEC 60950 TELEC Operating Storage Environments Operating Temperature 30 C 22 F to 70 C 158 F Relative Humidity 5 to 85 non condensing intended for indoor use only Included Accessories 2 4GHZ MONO RSMA 3 5IN 2 0DBI Antenna 70 0012 SA Rubber feet Velcro mounting strip Power Supply 24 5791 SA Other AMX Products Mio Modero R 3 Remote FG148 03 Mio Modero R 4 Remote FG148 04 NXR ZRP NetLinx ZigBe...

Страница 9: ...ystem Front Components LEDs PWR STATUS A green LED that blinks to indicate the device is programmed and communicating properly Power ON but no master connection is indicated with a solid light Power OFF is indicated with no light ICSP The LED is solid when ICSP connection is in place with the NetLinx master RF The LED is solid when end devices are connected end devices not connected is indicated w...

Страница 10: ...I Antenna FG2255 21 NXA WAP 2413A Mounting Bracket FG2255 24 FIG 2 Front and Rear Components of the NXR ZRP PWR 12VDC RESET ANT RF ICSP PWR STATUS Front Rear Reset Button Antenna Mount 2 pin 3 5mm Phoenix Connection LEDs power connector Connection to the Repeater device from either the NXR ZGW or the Mio Modero R 3 or R 4 requires download and installation to the repeater of ZigBee Module firmware...

Страница 11: ...sign of your system Additional repeaters may be added to extend the range of your PAN but care should be taken to understand the associated increases in bandwidth consumption and message latency The topology information is contained in the Browser based Configuration Manager pages please refer to the NXR ZGW Browser based Configuration Manager Pages section on page 15 for more information A repeat...

Страница 12: ...PAN ID with which to contend Multiple PAN ID installations A more commercial application of the NXR ZGW is having multiple gateways and specific devices operating in close proximity of each other End devices and repeaters of different networks can operate side by side without interference if they have different PAN ID numbers See Setting up a Network section on page 23 for setting the PAN ID and a...

Страница 13: ...authority to operate the equipment FIG 4 Multiple PAN ID Network CAT5 Ethernet connection NXR ZGW Coordinator 2 hops 1 hop PAN ID 1 PAN ID 2 NXR ZGW Coordinator 1 hop NXR ZRP Router NetLinx Master NXR ZRP Router 3 hops NetLinx Master CAT5 Ethernet connection Mio R 4 Mio R 4 Mio R 4 Mio R 4 Mio R 4 Mio R 4 Mio R 4 Mio R 4 This device has been evaluated and found to be compliant with the FCC Rules f...

Страница 14: ...Overview 8 NXR ZGW ZRP ...

Страница 15: ...evices Try to place the antenna in a position that can best cover your wireless network Normally the higher you place the antenna the better the performance you receive Try to place the gateway and repeater devices a reasonable distance away from each other to minimize antenna feedback FIG 5 displays the coverage for various positioning of the antenna FIG 5 Horizontal and Vertical Antenna Radiatio...

Страница 16: ...he device Connecting the NXR ZGW to a LAN Insert one end of the CAT5 Ethernet cable into the rear RJ 45 jack illustrated in FIG 1 and connect the other end of the same cable to a master See Mesh Network Arrangements section on page 6 for possible network configurations Connecting Power to the NXR ZGW and NXR ZRP The NXR ZGW receives power via either PoE or 2 pin 3 5 mm mini captive wire connection...

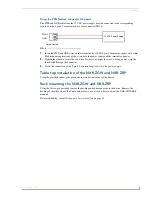
Страница 17: ...ue the screws doing so may strip the threads and damage the connector 3 Verify the connection of the 2 pin 3 5 mm mini captive wire to the power supply Table top installation of the NXR ZGW and NXR ZRP Using the provided rubber pads place one in each bottom corner of the device Rack mounting the NXR ZGW and NXR ZRP Using the Velcro pad provided remove the backing and adhere one side to the device ...

Страница 18: ...Installation 12 NXR ZGW ZRP ...

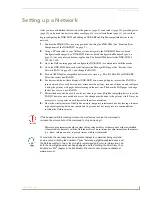
Страница 19: ...ne of them on and configure it using the gateway web pages before turning on the next one Then use the PAN pages to change the devices over to a new PAN ID 7 This method may also be used if you do not want to go to each ZigBee compatible device to set the PAN ID however once each device is set the change must be done to the gateway itself It may be necessary to cycle power on each device for them ...

Страница 20: ...Setting up a Network 14 NXR ZGW ZRP ...

Страница 21: ...user Upon accessing the Configuration Manager the user must enter a username and password The default entries are Admin and 1988 changing the password as soon as possible is highly recommended Copyright c 2007 GoAhead Software Inc All Rights Reserved FIG 7 Summary Page Summary Page Firmware The version of the software running on the device ZigBee Firmware The version of software running on the Zig...

Страница 22: ...nager 2 The ICSP device number is listed under the section System Connection Device ID Determining the PAN settings of the NXR ZGW 1 Browse to the Summary of Gateway Settings page of the NXR ZGW Browser based Configuration Manager 2 The PAN settings are listed in the aptly named section PAN Settings Rebooting the Configuration Manager 1 Browse to the Summary of Gateway Settings page of the NXR ZGW...

Страница 23: ...mic the DHCP server automatically provides the IP address 3 If configured for Static type the IP address in the field provided 4 If necessary type the subnet mask and gateway in the fields provided 5 Click Accept 6 In the The system will need to reboot for changes to take effect window click OK FIG 8 IP Settings Page IP Address IP Dynamic IP address and subnet mask are requested from the DHCP serv...

Страница 24: ...e and password for access to the NXR ZGW web server pages Setting a new username and password 1 In the menu on the top of the NXR ZGW Browser based Configuration Manager select User Settings under the section Configuration 2 In the text field next to New Username type the new name 3 In the text field next to New Password type the new password 4 Confirm the password in the field Re type Password 5 ...

Страница 25: ... PAN ID field enter the default PAN ID for the repeater 3FFF 3 Click Accept 4 Select the Connections tab the repeater should appear on the router 5 Click on the EUI 64 link to open the Device Details page 6 In the PAN ID field enter the desired PAN ID for the repeater within the network 7 Click Update Settings 8 Repeat steps 1 6 for each repeater to be added to the network 9 Select the Network tab...

Страница 26: ...f the signal strength of other gateways with different PAN IDs You have to change your Gateway to PAN ID 3FFF The repeater will connect to the Gateway You then can reset PAN IDs to your preferred setting see below through the Gateway Browser Based Configuration Manager 1 Set gateway to PAN ID 3FFF See the PAN Device Details section on page 23 for more information 2 Reboot the Gateway 3 In the menu...

Страница 27: ...on Pan 2 The device s description is located in the table under Description Determining the device type 1 In the menu on the top of the NXR ZGW Browser based Configuration Manager select Connections under the section Pan 2 The device type is located in the table under Type FIG 11 Connections Page Connections Page No The Netlinx ID number EUI 64 The 64 bit ZigBee EUI address of the device Descripti...

Страница 28: ...to the gateway and back again Determining the device link quality 1 In the menu on the top of the NXR ZGW Browser based Configuration Manager select Connections under the section Pan 2 The link quality is located in the table under the LQI column The status of the channel is as follows green is good all the way to red not recommended Checking the device link status 1 In the menu on the top of the ...

Страница 29: ... the networked device is active or asleep Device Networking EUI 64 The 64 bit ZigBee EUI address of the device Node ID The 16 bit ZigBee short address of the device Link Quality The quality of the connection to the network Traffic The traffic byte count of the device Latency A measure of the amount of time in milliseconds for a message round trip from the device to the gateway and back Device Info...

Страница 30: ...Details page will refresh showing the new On status Locating the device 1 From the PAN Device Details page check to see if the Locate button in the Device Options section reads Active or Inactive 2 If the button reads Inactive click it once This will open a window reading This will change Locate to Active Any changes entered to the Connected Devices Section below will be lost Are you sure you wish...

Страница 31: ...AN ID number for a particular device if the device is currently active To enter a new PAN ID number enter the new number in the PAN ID field 2 Click the Accept button A new window opens that reads Are you sure you wish to accept these new changes Click OK to accept the new changes 3 If the device is active the PAN Device Details page will refresh displaying the completed changes ...

Страница 32: ... the NXR ZGW Browser based Configuration Manager select Device Firmware under the section Utilities 2 In the Allow Updates column click All On or All Off to allow or block upgrades to all devices on the network The page will automatically refresh displaying the new status of all network devices 3 Some devices cannot have their firmware update status changed these devices will continue to read Off ...

Страница 33: ...NXR ZGW Browser based Configuration Manager select Connection Log under the section Utilities 2 The EUI address of each device is located in the column EUI 64 Finding the device s ICSP number 1 In the menu on the top of the NXR ZGW Browser based Configuration Manager select Connection Log under the section Utilities 2 The ICSP number of each device is located in the column Device FIG 14 Connection...

Страница 34: ...cription 1 In the menu on the top of the NXR ZGW Browser based Configuration Manager select Traffic Log under the section Utilities 2 The description of each device is located in the column Description Determining the device type 1 In the menu on the top of the NXR ZGW Browser based Configuration Manager select Traffic Log under the section Utilities 2 The type of each device is located in the col...

Страница 35: ...rowser based Configuration Manager select Traffic Log under the section Utilities 2 The traffic byte count of each device is located within the columns RX and TX RX lists received traffic while TX lists transmitted traffic Clicking on the EUI 64 number in the Traffic Log page will open the device s PAN Device Details page see FIG 12 ...

Страница 36: ...NXR ZGW Browser based Configuration Manager Pages 30 NXR ZGW ZRP ...

Страница 37: ...ing The NXR ZGW via An IP Address Before beginning this section verify that your device is powered and connected to the NetLinx Master through an Ethernet connection Preparing the Master for communication via an IP 1 Obtain the IP Address of the NetLinx Master from your System Administrator If you do not have an IP Address for the Master refer to your particular Master s instruction manual for mor...

Страница 38: ...btained from the Master 10 Click OK three times to close the open dialogs and save your settings 11 Click Yes to interrupt the current communication from the Master and apply the new settings 12 Select Tools Reboot the Master Controller to access the Reboot the Master dialog then click Reboot to reboot the Master and incorporate any changes 13 Once the dialog replies with Reboot of system complete...

Страница 39: ...with the Master listed in the OnLine Tree tab of the Workspace window The Port field is greyed out 8 Click the Reboot Device checkbox This causes the NXR ZGW device to reboot after the firmware update process is complete 9 Click Send to begin the transfer The file transfer progress is indicated on the bottom right of the dialog FIG 17 Do not pull power from device during transfer it can take appro...

Страница 40: ...field This green field indicates that Studio is waiting to detect the device value of the NXR ZGW associated with the ID button on the target NXR ZGW 5 Press the target NXR ZGW s ID button to begin process of reading the current device value of the NXR ZGW and then assigning it to the new value entered in step 2 Once the swap has been successfully made a red Successful Identification Made field ap...

Страница 41: ...Device Configuration 35 NXR ZGW ZRP ...

Страница 42: ...registered trademarks of AMX AMX reserves the right to alter specifications without notice at any time It s Your World Take Control 3000 RESEARCH DRIVE RICHARDSON TX 75082 USA 800 222 0193 469 624 8000 469 624 7153 fax 800 932 6993 technical support www amx com ...

Отзывы: