


74
Ethernet port.
b) Make sure that the other end of the Ethernet cable (RJ-45) is properly connected to the
computer LAN card or to you Cable/xDSL Ethernet port.
c) Make sure your computer LAN card is properly installed and configured.
d) Make sure your Cable/xDSL broadband access is working and configured correctly.
e) Contact your local dealer for technical support if the Ethernet LED is still failed to light up after
the above procedures.
3. The Router LED does not light up.
Ans. Check the following:
a) Double click to enable the Management Utility and click the
“Rescan” tab under the Network
configuration homepage. The Management Utility will automatically detect all other Router
Adapters on your router network.
b) Try to plug a second Router Adapter into a nearby power outlet and check whether the Router
LED lights up or not.
c) Contact your local dealer for technical support if the Router LED is still failed to light up after the
above procedures.
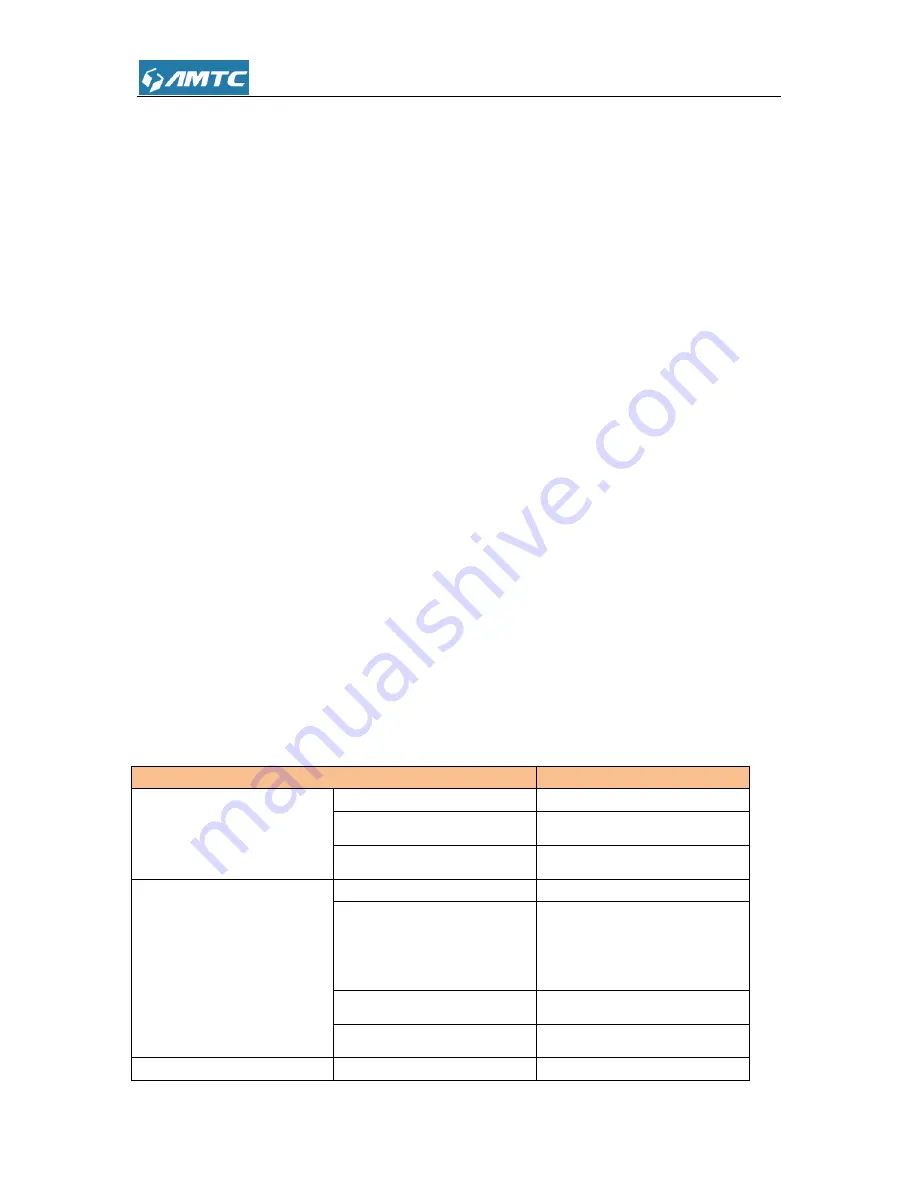
3 Factory default settings
The table below lists the factory default settings of your device.
Item
Default settings
Router Login
Login IP Address
192.168.2.1
Login User Name
admin
Login Password
admin
Network Settings
Internet Connection Type
Mode Auto-switch Enabled
MTU
1492 (PPOE)
1500 (DHCP/Dynamic and
Static IP)
WAN Speed
Auto
DNS
Disable
LAN Settings
IP Address
192.168.2.1
Содержание PW5002
Страница 12: ...12 Click Network and Internet Click Network and Sharing Center ...
Страница 13: ...13 Click Change adapter settings Click Local Area Connection and select Properties ...
Страница 65: ...65 Appendix 1 Configure PC TCP IP Settings Windows 7 Click Start Control Panel ...
Страница 66: ...66 Click Network and Internet Click Network and Sharing Center ...
Страница 67: ...67 Click Change adapter settings Click Local Area Connection and select Properties ...
Страница 68: ...68 Select Internet Protocol Version 4 TCP IPv4 and click Properties ...
Страница 69: ...69 Select Obtain an IP address automatically and click OK ...
Страница 70: ...70 Click OK on the Local Area Connection Properties window to save your settings ...
Страница 77: ...77 Select the wireless network and click Remove network ...


