background image


Place the tile to be cut, finished side down, on a 

flat surface.  Place the tile bridge, in the desired 

location, on back of the tile.  Make sure the edges of the tile bridge will rest on the grid portion of the 
ceiling.  Mark the speaker hole with pencil, using the hole of the tile bridge as the template. 


Place the marked tile onto an empty open box or trashcan, to catch any debris.  Please make sure to 
have appropriate clearance for the saw blade and cut the hole with a “plunge’ hand or power saw. 
 
Replace cut ceiling tile in ceiling.  Lay the tile bridge in the ceiling, lining up the hole in the tile bridge 
with the hole that was cut in the ceiling tile.  

IT IS EXTREMELY IMPORTANT 

to make sure the tile 

bridge is oriented so it is supported by the lip of the grid. 


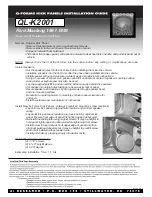
Fully insert the speaker from below through the hole in the tile and its tile bridge support, making sure 
to hold the speaker carefully to avoid damaging the speaker cone.  Start tightening the screws on the 
face of the speaker can.  Continue, checking to make sure the dog ears (flippers) are fully extended, 
and that the tile bridge is sitting flush against the tile.  Make sure to keep a secure hold on the 
speaker until the dog ears are fully tightened, clamping securely onto the tile bridge and ceiling tile.  

DO NOT OVER TIGHTEN!  

Secure the speaker to structure above the ceiling with provided metal 

strap.   


Содержание DS61-A

Страница 1: ...her apparatus including amplifiers that produce heat 9 Use only attachments accessories specified by manufacturer 10 If the speakers have not been used for some time unplug the speakers Or when there is a lightning storms please unplug the speakers for safety Parts Check List 1 Speaker total with one main PoE operated speaker with three 1 passive speaker with enclosures The speaker enclosures are ...

Страница 2: ...le in the tile bridge with the hole that was cut in the ceiling tile IT IS EXTREMELY IMPORTANT to make sure the tile bridge is oriented so it is supported by the lip of the grid Fully insert the speaker from below through the hole in the tile and its tile bridge support making sure to hold the speaker carefully to avoid damaging the speaker cone Start tightening the screws on the face of the speak...

Страница 3: ...e handy box with the cover provided Three Light Indicators When RJ45 connection is made you should be seeing some lights blinking on the right side of the RJ45 connection handy box as shown From top to bottom it will be Power Dante and Status Power This shows the power coming from PoE network switch If there is no power present then the light will not turn green The speaker must be running from Po...

Страница 4: ...ut Painting the Grille Use the paint masking card board provided if you need to paint the grille after the installation Insert the paint mask between the grille and speaker enclosure then snap the grille After the spray paint is done make sure to take the paint masking card board out by unsnapping the grille If needed use flat screw driver to pop the grille off from the side of the grille Take the...

Отзывы: