background image

M 9 6 8 5 9 9   Rev. 1. 2

7010.201

Certified to comply with ANSI A112.18.1

Installation

Instructions

GREEN TEA

Centerset Lavatory Faucet

with 

Speed Connect™ Drain 

Adjustable Wrench

 Screwdriver

Channel Locks

Recommended tools

Tubing Cutter

1

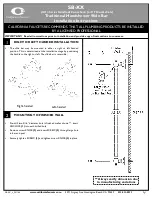
INSTALL FAUCET

SINK OR

MOUNTING

SURFACE

POP-UP

CABLE

Insert FAUCET 

(1)

 and CABLE CONNECTOR 

(2)

 FLEXIBLE INLET TUBE I 

(3)

and HOSE 

(4)

 through mounting holes of Sink or Mounting Surface. 

Fig.


A.

Assemble LOCKNUTS 

(6)

 onto SHANKS 

(5)

 from under

side of Sink. Hand tighten firmly. 

Fig.


B.


2

1

5

3

4

6

6

5

Turn off hot and cold water

supplies before beginning.

CAUTION

(HAND TIGHTEN)

To ensure that your installation proceeds smoothly-please read these instructions carefully before you begin.

Fig.


A.

Fig.


B.

1

Congratulations on purchasing your American Standard
faucet with Speed Connect drain, a feature found only on
American Standard faucets.

*Your new American Standard faucet is designed to work only with the Speed Connect drain. 

Speed Connect Drain*

•  Fewer parts, installs in less time
•  Never needs adjustment
•  Guaranteed to seal properly the first time, every time.

Содержание GREEN TEA 7010.201

Страница 1: ...onto SHANKS 5 from under side of Sink Hand tighten firmly Fig B 2 1 5 3 4 6 6 5 Turn off hot and cold water supplies before beginning CAUTION HAND TIGHTEN To ensure that your installation proceeds sm...

Страница 2: ...BODY Fig B 2 4 3 TIGHTEN LOCKNUT 1 REMOVE FLANGE Remove CLEAR PLASTIC COVER 1 Remove CARDBOARD SPACER 2 from under DRAIN POP UP 3 2 2 3 3 1 1 Tighten LOCKNUT 1 firmly with Adjustable Wrench or Channel...

Страница 3: ...OP UP DRAIN to waste outlet Fig A From under mounting surface connnect FLEXIBLE INLET TUBE 1 to HOSE END 2 and tighten with wrenches Attach WEIGHTS 3 to HOSE 4 at bottom of loop in Hose 4 as shown SPO...

Страница 4: ...h a 2 5mm hex wrench 4 1 6 2 3 5 11 5 64 HEX WRENCH 2 5mm HEX WRENCH M968599 Rev 1 2 2 1 1 TEST INSTALLED FITTING With HANDLES 1 in OFF position turn on WATER SUPPLIES 2 and check all connections for...

Страница 5: ...ow CABLE ADJUSTMENT PROCEDURE If you need to remove the Stopper Follow STOPPER REMOVAL PROCEDURE If you would like the ability to remove your Stopper simply by lifting it out of the drain Follow STOPP...

Страница 6: ...e Plastic Loop at the bottom of the Stopper and notice that the Loop is on one side of the Stopper Fig H To install the stopper in Unlocked mode insert the Stopper into the Drain so that the Plastic L...

Страница 7: ...40 0070A PUTTY PLATE M918331 0070A M916570 YYY0A HANDLE KIT A918049 0070A ADAPTER M921371 0070A ADAPTER 7 M962552 0070A CAM ASSEMBLY M952425 YYY0A DRAIN ASSEMBLY M962621 0020A HOSE WEIGHT M962544 YYY0...

Отзывы: