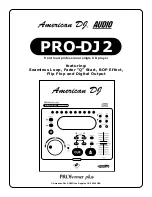


(1)
8 times over sampling 1 bit D/A converter
(2) Auto
cue
(3)
1/75th second frame search
(4)
Realtime cue (“Cue on the Fly”)
(5)
6 different speed scan
(6) Pitch
display
(7)
10 number buttons for direct track access
(8)
30 programmable tracks
(9)
10 cue points can be memorized
(10) Digital
output
RCA coaxial
(11)
Fader “Q” Start Function, controls play and stop function via
a compatible ADJ “Q Deck” mixer. (a)
(12)
Large bright LCD Screen can be viewed from
(a)
SLEEP MODE PROTECTION: After 15 minutes in PAUSE or CUE Mode the CD drive mechanism will automatically go
in to sleep mode. This function shuts down the laser pick-up diode extending the life of the unit. During sleep mode the LCD
screen will flash repeatedly indicating sleep mode is activated - This is not a malfunction, to restart the drive simply press
the Cue or Play/Pause Buttons
(b)
60 SECOND TRANSPORT PROTECTION: Will automatically close transport if left open for more than 60
seconds to prevent someone from walking by and breaking the transport.
(c)
FLIP-FLOP: On the rear of the PRO DJ2 there is a control input jack, use a standard stereo mini plug to plug in one PRO
DJ2 to another, via the control jacks. Set both of the CD players to single play mode. Play Disc 1, Disc 2 will immediately
begin to play when the track ends on disk 1. Disc 1 will return to cue mode and will begin to play at the end of disc 2 track.
This function will continue until the jacks are disconnected but may be overriden at any time through manual operation.
(e)
BOP EFFECT: A Bop Effect is a stutter, creating a sound similar to a CD skipping. The Bop Effect can be created in 3 ways.
(f)
Memory Backup: This will automatically save your last setting (repeat, SGL, CTN) even if you unplug AC- current. It will
also hold your cue points in memory if you accidentally open transport or shut off power. Memory cues are erased automati-
cally when a new CD is inserted in to the drive, or by holding down the MEMORY BUTTON (2) down for 3 - 4 seconds.
(g)
“Q” Start Control: This feature is used with American DJ “Q-Series” mixers featuring Fader Start. Connect the standard
mini plugs supplied, from CD1 output on CD player to the “A” player control input on the rear of mixer. Then connect the
other mini plug from CD 2 output on CD player to the “B” player control input on the rear of mixer. By moving the mixer
fader from left to right you can start and pause Disc1 and Disc 2 respectively. In other words, when the cross-fader of the
mixer is to the left, and you move it 20% to the right, Disc 2 will begin to play. When the cross-fader is to the right, and you
move it 20% to the left, Disc 1 will begin to play. You can create great effects similar to scratching with this feature. After
storing cue points on each side of the CD player, different songs or samples can quickly be recalled by moving the mixer
cross-fader back and forth. New cue points can be easily selected on the CD player (1,19,20). “Q” Start control is easy to
use and mastering this feature will help you create amazing effects with your music.
(1) By Rapidly Pressing the CUE BUTTON (9)
a.
While in play mode, rapidly press the CUE BUTTON (9)
in sync with the music (figure 2).
(2) By Tapping the DIRECT TRACK ACCESS BUTTONS (1)
a. While in play mode, press the IN CUE BUTTON (5a)
(see figure 4).
b. Press the MEMORY BUTTON (2) (figure 6) to set a CUE
POINT in memory. MEMORY LED will light (figure 7).
c.
Press desired DIRECT TRACK ACCESS BUTTONS (1)
(see figure 5).
d.
Press RECALL BUTTON (3) (see figure 7).
e.
Once RECALL LED lights, rapidly press the DIRECT
TRACK ACCESS BUTTON (1) previously selected in
step c.(figure 5).
(3) By Tapping the BOP BUTTON (12).
a.
Press the IN BUTTON (5a) to set a cue point.
b.
Turn the RECALL FUNCTION ON (3).
c.
Press the BOP BUTTON (12), while in play mode to
return to the cue point instantly without music interruption.
d.
Rapidly press the BOP BUTTON (12) in sync with the
music to create different effects.
NOTE: The second and third ways of creating a BOP EFFECT are
superior methods because there will be no interruption of music.
MAIN FEATURES
American DJ
®
AUDIO • PRO-DJ2 INSTRUCTIONS MANUAL • PAGE 7
fig.3
fig.4
fig.6
fig.5
fig.7
fig.2
wide angles.
(13)
60 seconds transport protection (b)
(14)
Seamless Loop
(15)
CD Recordable (CDR) compatible
(16)
Flip-Flop, Relay Playback when used in pairs (c)
(17)
+/- 8%, 12%, 16% selectable on Pitch Slider
(18)
Sleep Mode after 15 min. (d)
(19) Bop
Effect (e)
(20)
Jog Wheel Pitch Bend +/- 16%
(21)
Memory Backup, Default to last setting (f)
(22)
Instant Start
(23)
“Q” Start Control (g)
(24)
Light weight and compact design.
Содержание PRO-DJ2
Страница 12: ...experience the designed for the working dj ...


