background image

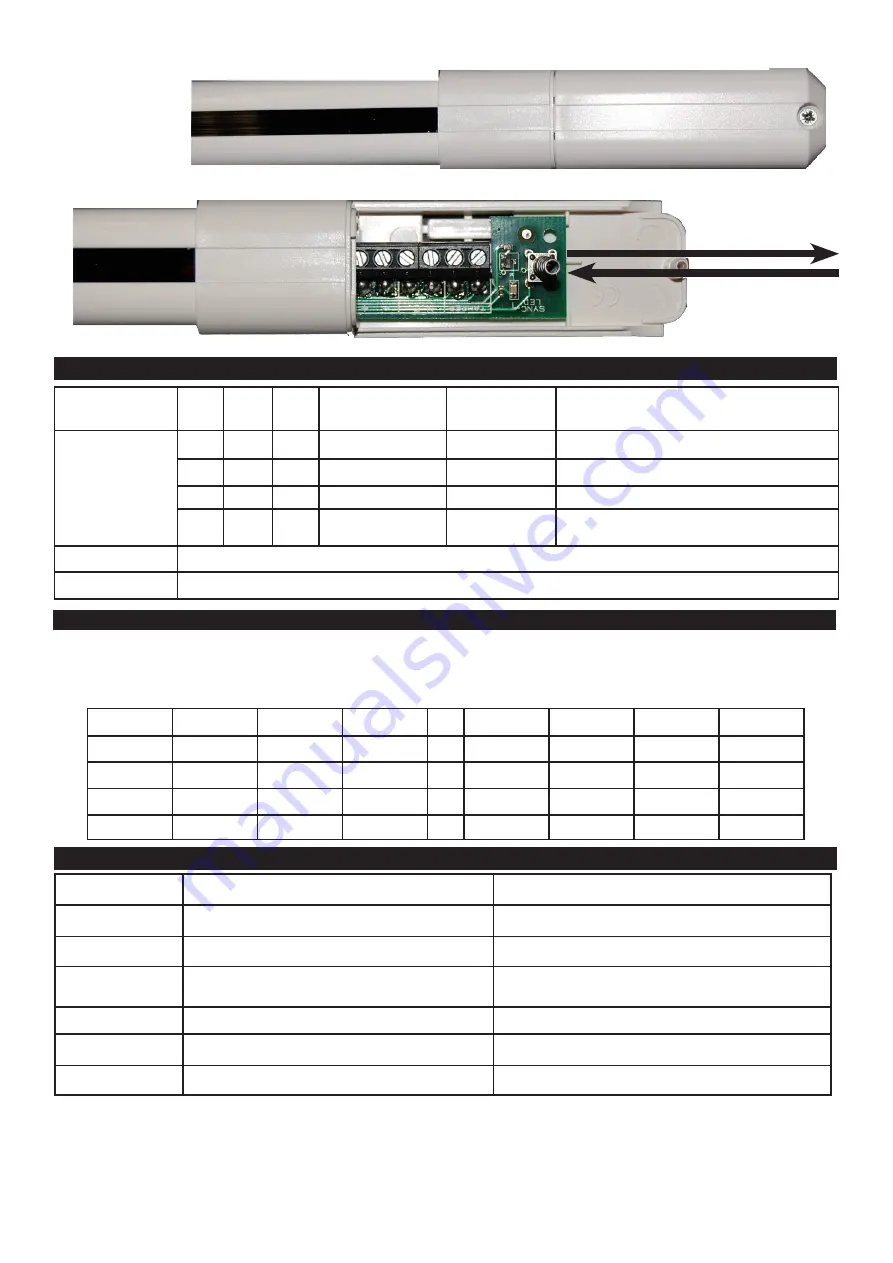
DIP - SWITCH 

5 POLI


(FIG2):

DIP

1

DIP

2

DIP

3

INTERNO

ESTERNO

ESTERNO CON SOLE FRONTALE

DIP

off

off

off

0.5 

⇨ 6 m

0.5 

⇨ 2 m

0.5 

⇨ 2 m

off

off

on

⇨ 8 m

⇨ 4 m

⇨ 3 m

off

on

on

⇨ 12 m

⇨ 6 m

⇨ 6 m

on

off

off

12 

⇨ 15 m

⇨ 12 m

⇨ 10 m

DIP 4 

⇒ on 

antistrappo disabilitato                                        

⇒ off  

antistrappo abilitato

DIP 5 

⇒ on   

antiapertura e antistrappo disabilitati        

⇒ off   

antiapertura e antistrappo abilitati

DIP - SWITCH:

OFF

ON

1

segnalazione acustica (buzzer) disabilitata

segnalazione acustica (buzzer) abilitata

2

antistrisciamento lato morsetti  disabilitato

antistrisciamento lato morsetti  abilitato *

3

antistrisciamento lato opposto morsetti  

disabilitato

antistrisciamento lato opposto morsetti abilitato *

4

sensibilità normale

sensibilità alta**

5

antiapertura e antistrappo abilitati

antiapertura e antistrappo disabilitati

6

antistrappo abilitato

antistrappo disabilitato

 questa funzione è utilizzata per permettere ad animali di piccola taglia (es. gatti ) di passare attraverso una finestra 

protetta da una barriera armata.

✸✸

 questo parametro diminuisce il tempo di reazione delle barriere al mascheramento dei fasci infrarossi e dell’antistri-

sciamento, pertanto è necessario utilizzarlo con cautela, e in ambienti non esposti direttamente ai raggi solari.

✸✸✸ I tappi sono realizzati in modo tale da non aderire completamente alle barriere per permettere la traspirazione 

all’interno e quindi impedire il formarsi di condensa causata dalle variazioni termiche.

5. CONFIGURAZIONE DIP SWITCH TRASMETTITORE - PORTATA E TAMPER

7. CONFIGURAZIONE DIP - SWITCH RICEVITORE:

6. 

CONFIGURAZIONE DIP SWITCH TRASMETTITORE - SETTAGGIO N° OTTICHE

DIP 1

DIP 2

DIP 3

N° OTTICHE

DIP 1

DIP 2

DIP 3

N° OTTICHE

Off

Off

Off

2

On 

Off

Off

6

Off

Off

On

3

On

Off

On

7

Off

On

Off

4

On

On

Off

8

Off

On

On

5

On

On

On

8

DIP - SWITCH 

3 POLI (FIG.2):

Attenzione

:  dopo aver effettuato la configurazione dei DIP è necessario 

togliere e ridare alimentazione alle barriere. 

Содержание FLEX 500 - 2000

Страница 1: ...erative 30 C a 55 C Colori Bianco Testa di moro Alluminio Antistrisciamento Antiapertura Antistrappo Portata in condizioni normali min max da 0 5m a 15m Portata al sole da 0 5m a 6 12m Rel allarme 1 R...

Страница 2: ...esta funzione utilizzata per permettere ad animali di piccola taglia es gatti di passare attraverso una finestra protetta da una barriera armata questo parametro diminuisce il tempo di reazione delle...

Страница 3: ...a indicando la qualit della ricezione vedi tabella TABELLA QUALITA RICEZIONE 1 lampeggio ricezione non perfetta funzionamento non ottimale 2 lampeggi ricezione sufficiente funzionamento normale 3 4 la...

Страница 4: ...n cui il prodotto venga manomesso da persone non auto rizzate Si raccomanda di verificare il corretto funzionamento del sistema d allarme almeno una volta al mese tuttavia un sistema di allarme elettr...

Страница 5: ...ide fix the support cap to the wall To access the DIP SWITCHES and the Clamps it s just necessary to remove to upper caps Do not cover or paint the plastic housing of the items Avoid the direct contac...

Страница 6: ...ugs are not completely waterproof in order to avoid condensed water to stay inside and allow the beams to transpire 5 TRANSMITTER DIP SWITCH CONFIGURATION RANGE ADJUSTMENT 7 RECEIVER DIP SWITCH CONFIG...

Страница 7: ...ty of reception see table TABELLA QUALITA RICEZIONE 1 flash bad reception operation not optimal 2 flashes good reception sufficiently good operation 3 4 flashes perfect reception optimal operation PRO...

Страница 8: ...e frequent testing and due to but not limited to any or all of the following tampering electrical or communication disrup tion or improper use it is possible for the product system to fail to prevent...

Отзывы:

Похожие инструкции для FLEX 500 - 2000