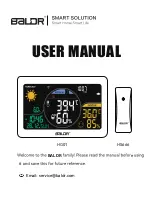
background image

F009RT/WT Professional Weather Station User Manual 


1


Introduction


Thank you for your purchase of the F009RT/WT Weather Station. The following user guide 

provides step by step instructions for installation, operation and troubleshooting.   


2


Warnings


and


Cautions


Warning: 

Any metal object may attract a lightning strike, including your weather station 

mounting pole. Never install the weather station in a storm.   

Warning: 

Installing your weather station in a high location may result in injury or death. 

Perform as much of the initial check out and operation   


3.


Quick


Start


Guide


Although the manual is comprehensive, much of the information contained may be intuitive. In 

addition, the manual may not flow properly because the sections are organized by components.   

The following Quick Start Guide provides only the necessary steps to install, operate the weather 

station, along with references to the pertinent sections. 


Required


Step Description


4.3

Assemble and power up the sensors 

4.4.2

Power up the display console and synchronize with wind  sensor,  rain 

sensor and thermo-hygrometer sensor 

6

Mount the sensor array 

8.2

Set date and time on console 

4.3


4


Getting


Started


The FT0200 weather station consists of a display console (receiver), a sensor array with 

thermo-hygrometer, rain gauge, wind sensor, and mounting hardware.   


4.1


Parts


List


The FT0200 weather station consists of the following parts (as referenced in Figure 1 and Figure 2).   

QTY Item 

Содержание F009RT/WT

Страница 1: ... information contained may be intuitive In addition the manual may not flow properly because the sections are organized by components The following Quick Start Guide provides only the necessary steps to install operate the weather station along with references to the pertinent sections Required Step Description 4 3 1 Assemble and power up the sensors 4 4 2 2 Power up the display console and synchr...

Страница 2: ...ts M5 4 Pole mounting nuts M5 bolts 5 2 Pole mounting nuts M3 bolts 3 4 Tapping screw Figure 1 U bolts and nuts bolts and nuts bolts and nuts Tapping screw Figure 2 4 2 Recommend Tools z Precision screwdriver for small Phillips screws z Compass or GPS for wind direction calibration z Adjustable Wrench Rain Gauge Drawer Filter Fixed mount Wind Vane Wind Cups Sensor Mounting Bracket Solar Panel Bubb...

Страница 3: ...sembly Set Up 4 3 1 Insert batteries into the anemometer transmitter Locate the battery boor on the wind transmitter push and open the battery compartment arrow direction as show in Figure 3 Figure 3 Inserting 4xAAA batteries in the battery compartment as show in Figure 4 Figure 4 ...

Страница 4: ...ght for 3 seconds and then flash once per 16 seconds thereafter Each time it flashes the sensor is transmitting data Note If the wind sensor does not power up after inserting the batteries press the reset button shown in Figure 4 3 2 Insert batteries into the rain gauge transmitter Rotate and detach the upside bucket arrow direction as show in figure 5 Figure 5 Locate the battery boor on the rain ...

Страница 5: ... to relocate the transmitters or receivers to avoid intermittent communication 3 Line of Sight Rating This device is rated at 300 feet line of sight no interference barriers or walls but typically you will get 100 feet maximum under most real world installations which include passing through barriers or walls 4 Metal Barriers Radio frequency will not pass through metal barriers such as aluminum si...

Страница 6: ...nd vane that indicates South as shown in Figure 14 Align this S marker in the direction of South Figure 14 Fasten the wind transmitter to mounting pole brackets with foot mounting two 3 bolts and M3 nuts as shown in Figure 15 Tighten the mounting pole to your mounting pole purchased separately with the four 5 Bolts and M5 Nuts assembly as shown in Figure 16 Figure 15 ...

Страница 7: ...tallation Take out of the upside rain bucket before fasten to your mounting pole or bracket purchased separately Tighten rain gauge transmitter to your mounting pole or bracket with two U bolts and four M5 nuts as shown in Figure 17 Figure 17 ...

Страница 8: ...e is usually combined with the anemometer Wind direction is the direction from which the wind is blowing 12 Specifications 12 1 Wireless Specifications Line of sight wireless transmission in open air 300 feet Frequency 433 MHz Update Rate 60 seconds for rain sensor and thermo hygrometer sensor 16s for wind sensor 12 2 Measurement Specifications The following table provides specifications for the m...

Страница 9: ...mote not reporting in to console There are dashes on the display console If any of the sensor communication is lost dashes will be displayed on the screen To reacquire the signal press and hold the CHANNEL button for 3 seconds choose the lost sensor and press SET button and the remote search icon will be constantly displayed Once the signal is reacquired the remote search icon will turn off and th...

Страница 10: ... to match the indoor and outdoor temperature to a known source Indoor and Outdoor Humidity do not agree Allow up to one hour for the sensors to stabilize due to signal filtering The indoor and outdoor humidity sensors should agree within 10 the sensor accuracy is 5 Use the calibration feature to match the indoor and outdoor humidity to a known source Display console contrast is weak Replace consol...

Страница 11: ...ot The electrical and electronic wastes contain hazardous substances Disposal of electronic waste in wild country and or in unauthorized grounds strongly damages the environment Reading the User manual is highly recommended The manufacturer and supplier cannot accept any responsibility for any incorrect readings and any consequences that occur should an inaccurate reading take place This product i...

Страница 12: ... separation between the equipment and receiver Connect the equipment into an outlet on a circuit different from that to which the receiver is connected Consult the dealer or an experienced radio TV technician for help 14 Warranty Information Ambient LLC provides a 1 year limited warranty on this product against manufacturing defects in materials and workmanship This limited warranty begins on the ...

Страница 13: ...he product itself and does not cover the cost of installation or removal from a fixed installation normal set up or adjustments claims based on misrepresentation by the seller or performance variations resulting from installation related circumstances ...

Отзывы: