
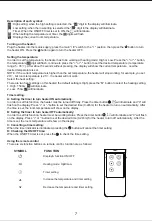

Main power switch “I/0”
Display & function ON/ OFF
Heating mode: High/Low
Timer setting
Increase the temperature and timer setting
Decrease the temperature and timer setting
M
+
-
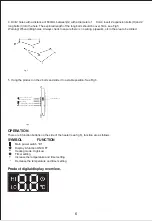
OPERATION
SYMBOL FUNCTION
Product digital display overview.
There are 6 function buttons on the side of the heater (see fig 6), function are as follows:
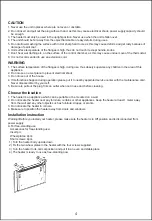
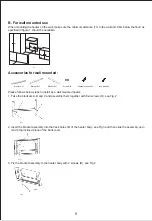
4. Drill 2 holes with a distance of 638mm between(G) with a diameter of
�
8 mm; insert 2 expansion bolts (H)and 2
long bolts (I) into the hole. The explored length of the long bolts should be over 5mm. see Fig 5
Warning! When drilling holes, Always check to ensure there is no wiring, pipework, etc in the area to be drilled.
5. Hang the product on the 2 bolts and slide it to a stable position. See Fig 6
Fig.5
Fig.6
DISPLAY&FUNCTION ON/OFF
HEATING MODE: HIGH/LOW
Timer setting
Temperature/timer increase
Temperature/timer decrease
M
MAIN POWER SWITCH
638
6


