


01
02
03
04
05
06
07
08
09
10
11
12
13
14
15
16
17
18
19
20
21
22
23
24
ENERGY SAVING FUNCTION
The Refer Button queries the 7-day timer setting. This will not turn on the timer function but will only show the
previous setting. Press the or key to query the day of the week. Press the or key to
query the start up and shutdown time.
Press key once to enter the query mode, press the key again to exit query mode.
Press the key once, 7 days from Monday to Sunday will display on the LCD screen of the remote control,
press key within 5 seconds to enter 7 day timer function . When “Sun” is flashing use the or key
to select the day that you want to set
,
pressing the key to confirm. Then “ON” will be displayed on the
LCD screen of the remote control, at the same time, the hour on the digital clock flashes, press the or
key to set the hour and then the minute you want the fireplace to turn on. After setting the start up time, “OFF”
will be displayed on the LCD screen. Use the or key to set the shutdown time the same as setting the
start up time. After setting the shutdown time, “AUTO” will be displayed on the LCD screen of the remote
control. The digital temperature flashes, at this time you can set the desired temperature with or
keys. The fireplace will beep to acknowledge the settings. Now, the 7 day function has been set, the fireplace
will save the setting and run automatically.
When the 7 day timer is set, the icon will be displayed on the LCD screen of the remote control. Press the
0
key again to cancel the 7 day timer function, the will disappear.
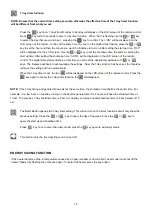
7 day timer function
NOTE: Ensure that the current time setting accurate, otherwise the effective time of the 7 day timer function
will be different from what you set.
NOTE:
If the 7 day timing and general timing exist at the same time, the shutdown time shall be the earlier time. For
example, it is now 6 am on Tuesday, turning on the heaters general timer for 4 hours, will have the shutdown time of
10 am. The previous 7 day shutdown time is 8 am on Tuesday, so today's heater shutdown time is 8 am instead of 10
am.
If the heater detects a drop in temperature caused by an open window or door whilst in heat mode it will shut off the
heater followed by flashing the ember bed light. To restart the heater press the any button.
This button turns the fire crackling sound on and off.


