Amano PIX-10, Руководство по эксплуатации
Описание: Amano PIX-10 - надежный электронный устройство для учета времени. Чтобы ознакомиться с функционалом и настройками устройства, загрузите бесплатное руководство по эксплуатации на нашем сайте. Документы доступны для скачивания на {веб-сайте}. Управляйте своим временем с уверенностью благодаря Amano PIX-10.
Поделиться
Скачать


Отзывы:
Нет отзывов
Похожие инструкции для PIX-10
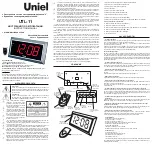
UTL-11
Бренд: Uniel Страницы: 2

TC-135K
Бренд: Tokai Страницы: 42

10473107
Бренд: IKEA Страницы: 12

63-955
Бренд: Radio Shack Страницы: 4

CR-777
Бренд: Durabrand Страницы: 8

RC 830D
Бренд: Trevi Страницы: 12

DuraTime HP
Бренд: BRG Страницы: 85

60.3055
Бренд: TFA Страницы: 22

60.2005
Бренд: TFA Страницы: 2

60.2528
Бренд: TFA Страницы: 50

IPD-CR10
Бренд: König Electronic Страницы: 10

KT2064
Бренд: Hello Kitty Страницы: 12

TMR-200
Бренд: Casio Страницы: 2

PQ-60
Бренд: Casio Страницы: 2

RC 80D4 DAB
Бренд: Trevi Страницы: 36

DR900
Бренд: LEXIBOOK Страницы: 24

TimeProjector RP200
Бренд: LEXIBOOK Страницы: 47

SIP292
Бренд: Sylvania Страницы: 1


