24
When installing a new filter or reinstalling an old one,
always make certain the air flow arrows on the filter point
in the proper direction. If using the unit filter rack, the
airflow arrows must point toward the indoor blower.
To inspect the filter in the filter rack, proceed as follows:
1. Disconnect power to the unit.
2. Locate the filter access door (Figure 9) and remove
the four sheet metal screws.
3. Pull out the filter and inspect. Clean or change as
necessary.
4. Insert the filter into the filter rack channels and lower
into place. Make sure the filter slides completely to
the bottom so no part of the filter is left outside the
back panel.
5. Return the filter access door to its original position
and secure it with the four sheet metal screws.
6. Reconnect the power.
Maintaining Cabinet Finish
Use a fine grade automotive wax on the cabinet finish to
maintain the original high luster. This is especially im-
portant in areas with high ultraviolet radiation.
Clean Outside Coil (Qualified Servicer Only)
The coil with the outside air flowing over it should be
inspected annually and cleaned as frequently as neces-
sary to keep the finned areas free of lint, hair and de-
bris.
Blower Motor
The air circulating blower motor bearings are perma-
nently lubricated.
Figure 21
Blower Motor and Housing
(NOTE: Brushless Permanent Magnet (BPM) blower mo-
tors are permanently lubricated and do not have oil ports.
Oil cannot be added to these motors.
Induced Draft Motor Lubrication
The induced draft motor is permanently sealed and does
not require additional oiling.
XIII. Maintenance
WARNING
To avoid personal injury or death due to
electrical shock, disconnect electrical
power before performing any mainte-
nance.
Important Note: Touching the ignitor body with bare fin-
gers, rough handling, or vibration could result in early
ignitor failure. Only a qualified servicer should ever
handle the ignitor.
Have the furnace checked at least once a year before
the heating season begins, to be sure that the combus-
tion air inlet and flue outlet hoods are not blocked by
debris, which would prevent adequate combustion air
and a properly operating vent system.
Replacing Or Cleaning Filter
A return air filter is not supplied with this unit; however,
there must be a means of filtering all of the return air.
The filter(s) may be located in the return air duct(s), re-
turn air filter grille(s) or in the filter rack in the unit. Con-
sult with your installing dealer for the actual location of
the return air filter(s) for your unit.
Dirty filters are the most common cause of inadequate
heating or cooling performance. Filter inspection should
be made at least every two months; more often if nec-
essary because of local conditions and usage.
Dirty throwaway filters should be discarded and replaced
with a new, clean filter. Dirty permanent filters should be
washed with water, thoroughly dried and sprayed with a
filter adhesive before being reinstalled. (Filter adhesives
may be found at many hardware stores.) Permanent fil-
ters should last several years. However, should one
become torn or uncleanable, it should be replaced.
If the installation has the return air filter located in the
unit filter rack and it must be replaced, use the appropri-
ate Amana filter or a permanent filter that is properly
sized as follows:
Model
Amana Part #
Required Permanent
Filter Size
PGC24, 30, or 36
C4855623
26" X 20" X 1"
PGC42, 48, 60
or PGB58
C4855627
32-5/8" X 22-3/8" X 1"
Содержание PGB58B
Страница 8: ...8 Figure 1 Required Clearances For All Installations...
Страница 29: ...29 XVI Wiring Diagram PGC24 36...
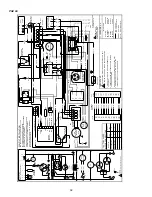
Страница 30: ...30 PGC 42...
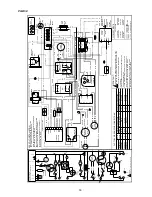
Страница 31: ...31 PGC 48...


