background image

8

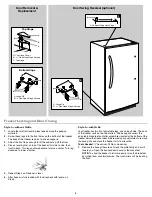
Freezer Shelves

Store similar foods together and adjust the shelves to fit different 
heights. This reduces the time the freezer door is open and saves 
energy.

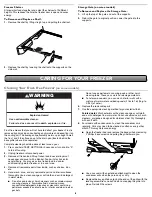
To Remove and Replace a Shelf:

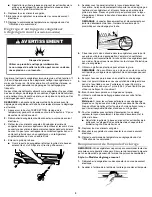
1. Remove the shelf by lifting straight up, and pulling the shelf out.

2. Replace the shelf by lowering the shelf onto the supports on the 

side wall.

Storage Gate (on some models)

To Remove and Replace the Storage Gate:

1. Lift up the top of the gate and out of the supports. 

2. Return the gate to original position. Lower the gate into the 

supports.

Cleaning Your Frost-Free Freezer 

(on some models)

Frost-free means that you will not have to defrost your freezer. Frost is 
removed by air moving and collecting any moisture and depositing it on 
the cooling coil. The cooling coil periodically warms up enough to melt 
the frost, and it then flows down to the drain pan (located behind the 
base grille) where it is evaporated.

Complete cleaning should be done at least once a year.

1. Press and hold TEMP SETTING for 3 seconds or turn knob to “0” 

to turn off cooling.

2. Unplug freezer or disconnect power.

3. Remove all frozen food. Wrap frozen food in several layers of 

newspaper and cover with a blanket. Food will stay frozen for 
several hours. You may also store frozen food in a cooler, 
additional refrigerator-freezer, or in a cool area.

4. Remove all removable parts from inside, such as shelves, bins, 

etc.

5. Hand wash, rinse, and dry removable parts and interior surfaces 

thoroughly. Use a clean sponge or soft cloth and a mild detergent 
in warm water. 

Do not use abrasive or harsh cleaners such as window sprays, 
scouring cleansers, flammable fluids, cleaning waxes, 
concentrated detergents, bleaches or cleansers containing 
petroleum products on plastic parts, interior and door liners or 
gaskets. 

Do not use paper towels, scouring pads, or other harsh 
cleaning tools. These can scratch or damage materials. 

To help remove odors, you can wash interior walls with a 
mixture of warm water and baking soda (2 tbs to 1 qt [26 g to 
0.95 L] of water).

6. Replace the removable parts.

7. Use the appropriate cleaning method for your exterior finish.

Painted metal: Wash exteriors with a clean sponge or soft cloth 
and a mild detergent in warm water. Do not use abrasive or harsh 
cleaners, or cleaners designed for stainless steel. Dry thoroughly 
with a soft cloth. 

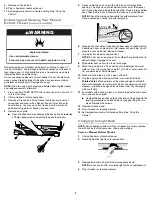
8. For models with condenser coils, clean the condenser coils 

regularly. Coils may need to be cleaned as often as every other 
month. This may help save energy.

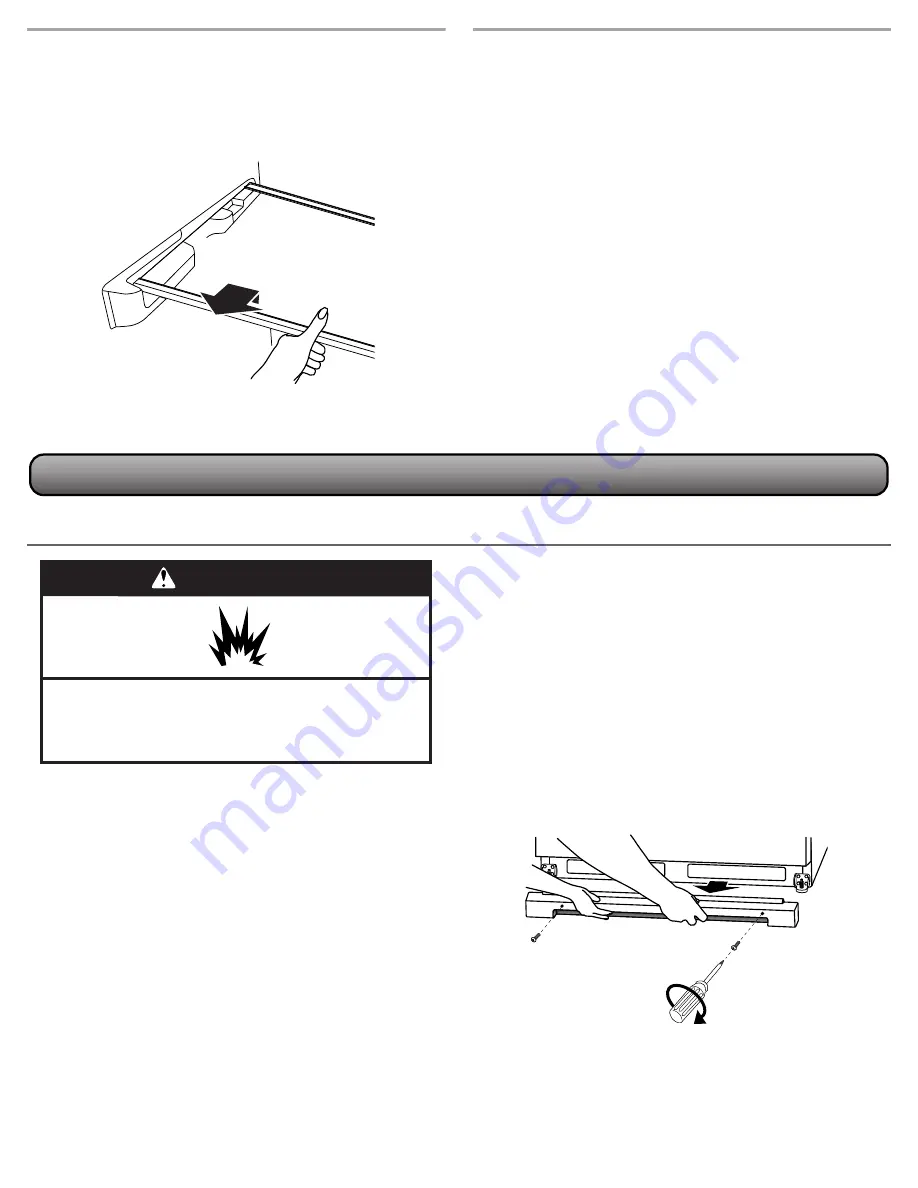
Open the freezer door and remove the base grille by removing 
2 Phillips-head screws and pulling the grille toward you.

Use a vacuum with an extended attachment to clean the 
condenser coils when they are dusty or dirty.

Replace the base grille by aligning the ends of the grille with the 
leveling assemblies on each side and snapping the grille into 
place. Reinstall the screws.

CARING FOR YOUR FREEZER

WARNING

Explosion Hazard

Use nonflammable cleaner.

Failure to do so can result in death, explosion, or fire.

Содержание AZM12X17DW

Страница 1: ...nd serial numbers These numbers can be found inside your freezer Model Number Serial Number User Guide Upright Freezer TABLE OF CONTENTS SAFETY You can be killed or seriously injured if you don t imme...

Страница 2: ...operating Use nonflammable cleaner Keep flammable materials and vapors such as gasoline away from freezer Use two or more people to move and install freezer Keep key away from children Remove doors o...

Страница 3: ...If the freezer is to be against a wall leave extra space on the hinge side so the door can open wider Electrical Requirements Before you move your freezer into its final location it is important to m...

Страница 4: ...the decals covering the holes on the opposite side of the bottom hinge 4 Reinstall the bottom hinge pin in the alternate hole in the hinge bracket See Graphic 2 5 Reinstall the hinge bracket to the c...

Страница 5: ...ach side The back of the freezer rests on two fixed rollers The base grille covers the adjustable brake feet and roller assemblies located at the bottom of the freezer below the freezer door Before ma...

Страница 6: ...ed 6 Replace the base grille by aligning the ends of the grille with the leveling assemblies on each side and snapping the grille into place Reinstall the Phillips screws Ensuring Proper Air Circulati...

Страница 7: ...ot adjust the control more than one setting at a time Wait 24 hours between adjustments for the temperature to stabilize Cooling On Off Your freezer will not cool when cooling is turned off To turn co...

Страница 8: ...sh rinse and dry removable parts and interior surfaces thoroughly Use a clean sponge or soft cloth and a mild detergent in warm water Do not use abrasive or harsh cleaners such as window sprays scouri...

Страница 9: ...ce pans of hot water in freezer with door open to speed melting Directing air from an electric fan into freezer will also help Do not place fan or any electrical device in freezer 7 Use a plastic scra...

Страница 10: ...ing Care When you are moving your freezer to a new home follow these steps to prepare it for the move 1 Remove all frozen food 2 Unplug the freezer 3 Take out all removable parts wrap them well and ta...

Страница 11: ...ture Get all items out at one time keep food organized and close door as soon as possible Check that the condenser coils are clean Check that the door gasket is sealed all the way around If not contac...

Страница 12: ...le parts i e light bulbs batteries air or water filters preservation solutions etc 5 Conversion of products from natural gas or L P gas 6 Damage from accident misuse abuse fire floods acts of God or u...

Страница 13: ...ur www amana com Au Canada enregistrer le cong lateur sur www amanacanada ca Pour r f rence ult rieure consignez par crit les num ros de mod le et de s rie de votre produit Vous trouverez les num ros...

Страница 14: ...r un c ble de rallonge D brancher la source de courant lectrique avant l entretien Replacer pi ces et panneaux avant de faire la remise en marche Utiliser un produit de nettoyage ininflammable Garder...

Страница 15: ...ations lectriques Avant de d placer le cong lateur son emplacement final il est important de vous assurer d avoir le raccordement lectrique appropri M thode recommand e de mise la terre Une source de...

Страница 16: ...bride de charni re 3 Retirer les illets recouvrant les trous du c t oppos de la charni re inf rieure 4 R installer l axe de charni re dans l autre trou de la bride de charni re Voir l illustration 2 5...

Страница 17: ...fixes La grille de la base recouvre les pieds de stabilisation r glables et les roulettes situ es au bas du cong lateur sous la porte du cong lateur Avant de r aliser les ajustements retirer la grill...

Страница 18: ...aire jusqu ce qu ils soient fermement en appui sur le sol V rifier de nouveau Si le r sultat n est pas satisfaisant continuer de r gler les pieds de nivellement en tournant la vis par demi tours jusqu...

Страница 19: ...ansf r e dans l air ambiant ce qui entra ne le r chauffement de l ext rieur du cong lateur R glage de la commande Si le r glage de la temp rature du compartiment de cong lation est souhait appuyer sur...

Страница 20: ...ments congel s dans plusieurs paisseurs de journaux et recouvrir d une couverture Les aliments demeureront congel s pendant plusieurs heures On peut aussi entreposer les aliments congel s dans un cont...

Страница 21: ...UE Inspecter fr quemment le plat d coulement pour viter le d bordement de l eau Garder un deuxi me plat proximit pour une vidange plus facile 6 Placer des plats d eau chaude dans le cong lateur avec l...

Страница 22: ...r risquent d tre affect es Si les aliments semblent de pi tre qualit ou douteux les jeter D m nagement En cas de d m nagement et de d placement du cong lateur dans une nouvelle habitation suivre ces t...

Страница 23: ...en une seule fois ranger les aliments de fa on organis e et refermer la porte le plus vite possible V rifier que les serpentins du condenseur sont propres V rifier que le joint du porte est herm tique...

Страница 24: ...it du gaz naturel ou du gaz de p trole liqu fi 6 Dommages caus s par accident m susage abus incendie inondations catastrophe naturelle ou l utilisation de produits non approuv s par Amana 7 R paration...

Отзывы: