UBC1319AA00
D3.0 Wireless eMTA
Quick Installation Guide
Subscriber
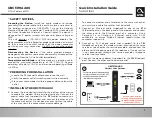
Grounding the Device:
Install the cable modem to include
grounding the coaxial cable to the earth as close as practical to
the building entrance per ANSI/NFPA 70 and the National
Electrical Code (NEC, in particular, Section 820.93, Grounding of
the Outer Conductive Shield of a Coaxial Cable). The device is
designed for IT power systems with phase-to-phase voltage at
120V.
This unit requires a 100-240V, 50/60Hz power adapter. The
power adapter must be keyed for proper polarization, and must
be fully inserted to contact the back of the power connector
port to ensure snug connection. Do NOT use any other power
adapter.
Disconnecting the Device:
If the cable modem becomes
damaged or encounters some other abnormality, disconnect the
power plug from the AC wall outlet immediately.
Temperature and Altitude:
Install the device in a location not to
exceed the maximum temperature of 104°F (40°C). Regular
operating altitude is 2000 m, and maximum operating altitude
is 4500 m.
•
SAFETY NOTICES
•
PREPARING FOR INSTALLATION
✓
Locate the RF (coaxial) cable connector on the wall.
✓
Verify the power outlet is working and is wired correctly.
✓
Place your cable modem within a proper distance from the
outlet.
To connect a modem and a television to the same wall outlet,
you must use a cable line splitter (not included).
2.
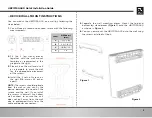
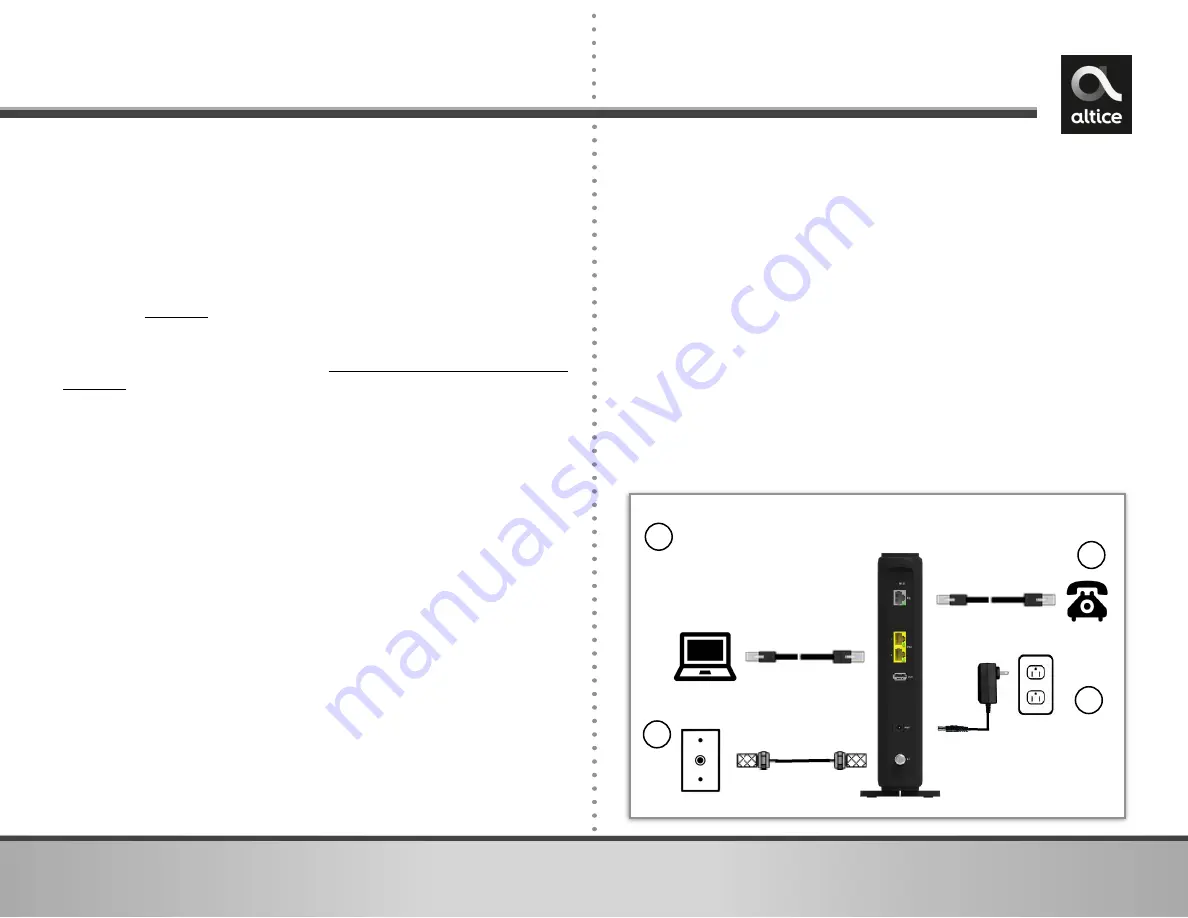
Connect an Ethernet cable (supplied) to one of the
ETH
(Ethernet) port on the back panel of the modem and connect
the other end to the Ethernet port of a computer. Use a
Category 5e or Category 6 Ethernet cable with RJ-45
connectors to ensure Gigabit Ethernet speeds (when the
computer supports it).
3.
Connect an RJ-11 phone cable (not supplied) to the
TEL
(telephone) port on the modem (when provisioned for voice
service as specified by the service provider), and connect the
other end to the phone port of the telephone. If voice service
is not provisioned through the service provider, telephone
service is not available.
4.
Connect the power adapter (supplied) to the
PWR
(power)
port. Connect the other end to a power outlet.
1
UBC1319AA00
Wireless Voice Gateway
RJ-45
Analog Phone
RJ-11
Cable/RF
Device must be installed
vertically using the included
leg stands to obtain optimum
wireless performance.
Connect computers or Ethernet enabled
devices (wireless switch or router). A PC
should be connected for initial device
installation and configuration.
2
1
3
4
1.
Connect the included leg stands to the bottom of the device
to enable the modem to be installed vertically. Connect the
coaxial cable (not supplied) to the
RF
(cable) connector on
the rear panel of the modem and connect the other end to
the cable wall outlet. Do not bend or over tighten the cable,
as this may strain the connector and cause damage.
•
INSTALLING THE UBC1319AA00


