background image

Items Needed

Step 1

Mount the Distribution Module and Power Supply with the battery backup in an appropriate location, install-

ing the cabinet for wall mount units or the stand for desk mount units accordingly. Then remove the knock 

outs (if applicable). The recommended location to mount the Distribution Module and Power Supply is in a 

network closet or machine room. Mount the Command Center according to the owner’s specifications.

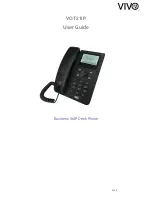
Follow the diagram below for attaching the extender and foot stand to the back of the Command Center 
phone as needed.

Page 

2

N56W24720 N. Corporate Circle    Sussex, WI 53089 

800-451-1460    262-246-4828 (fax)

www.rathmicrotech.com     www.area-of-refuge.com

Installation

Included

• Command Center Phone with phone line cable

• Distribution Module

• System wiring (pigtail cables, power cord, ethernet cable for programming if needed)

• Cabinet (wall mount) or Stand (desk mount)

Not Included

• 22 or 24 AWG twisted, shielded cable

• Multimeter

• Analog phone for troubleshooting

• Recommended: Biscuit jack for each phone (if needed; not applicable for elevator systems)

Step 2

For 12-36 zone systems, remove the screws on the back of the Distribution Module and remove the cover to 

expose the internal ports.

Содержание AlphaRefuge 2400 Series

Страница 1: ...42 Central Drive Farmingdale NY 11735 631 777 5500 800 666 4800 www alphacommunications com AWD266 Rev 07 18 Made in the USA Installation Operations Manual 2400 Series...

Страница 2: ...he diagram below for attaching the extender and foot stand to the back of the Command Center phone as needed Page 2 Installation Included Command Center Phone with phone line cable Distribution Module...

Страница 3: ...nection to Card 1 Extension 2002 Orange and White Orange Stripe Two Wire Connection to Card 1 Extension 2001 Blue and White Blue Stripe N56W24720 N Corporate Circle Sussex WI 53089 800 451 1460 www ra...

Страница 4: ...ication wire pair should be connected to the red and green screw terminals on the biscuit jack This will prevent loose connections that can cause the system to malfunction Option 1 12 36 Zone System O...

Страница 5: ...Port 1 01 04 Connection for 4 Emergency Phones Port 2 05 06 Connection for 2 Emergency Phones Port 3 07 08 Conneciton for 2 Emergency Phones Note The numbering pattern continues on cards 3 through 5...

Страница 6: ...r all additional cards The system uses T568 A for pin out wiring The first card installed will always be Port 1 S01 S04 Connection for 4 Emergency Phones Port 2 S05 S08 Connection for 4 Emergency Phon...

Страница 7: ...ones Port 6 19 20 Conneciton for 2 Emergency Phones Note The numbering pattern continues on cards 3 through 5 Card 6 will always be used for the Voicemail Card and will have no connections S01 S04 S05...

Страница 8: ...ial 1002 followed by the appropriate time zone code Eastern Time Zone 111 Central Time Zone 112 Mountain Time Zone 113 Pacific Time Zone 114 b Touch the GREEN button in the middle of the phone when fi...

Страница 9: ...w the directions below to program the Command Center Phone to dial the external number a Press the speaker phone button b Dial 1 3 4 c Dial 9 then the external number d To exit Program Mode dial 00 fo...

Страница 10: ...1 Select the desired flashing blue LED and press the buttons 2 Each call must be disconnected individually Note If you hang up the handset before disconnecting each call the LED s will remain illumin...

Страница 11: ...uired to dial out of your building Phone will make internal calls but not external calls Check the phone line is connected to the correct port on the Distribution Module Verify the phone line by makin...

Отзывы: