background image

ANO 


Analog Gateway User Manual                                                                                           


2 &y 

www.allo.com

                                                          Version 2.0                                                                        

52


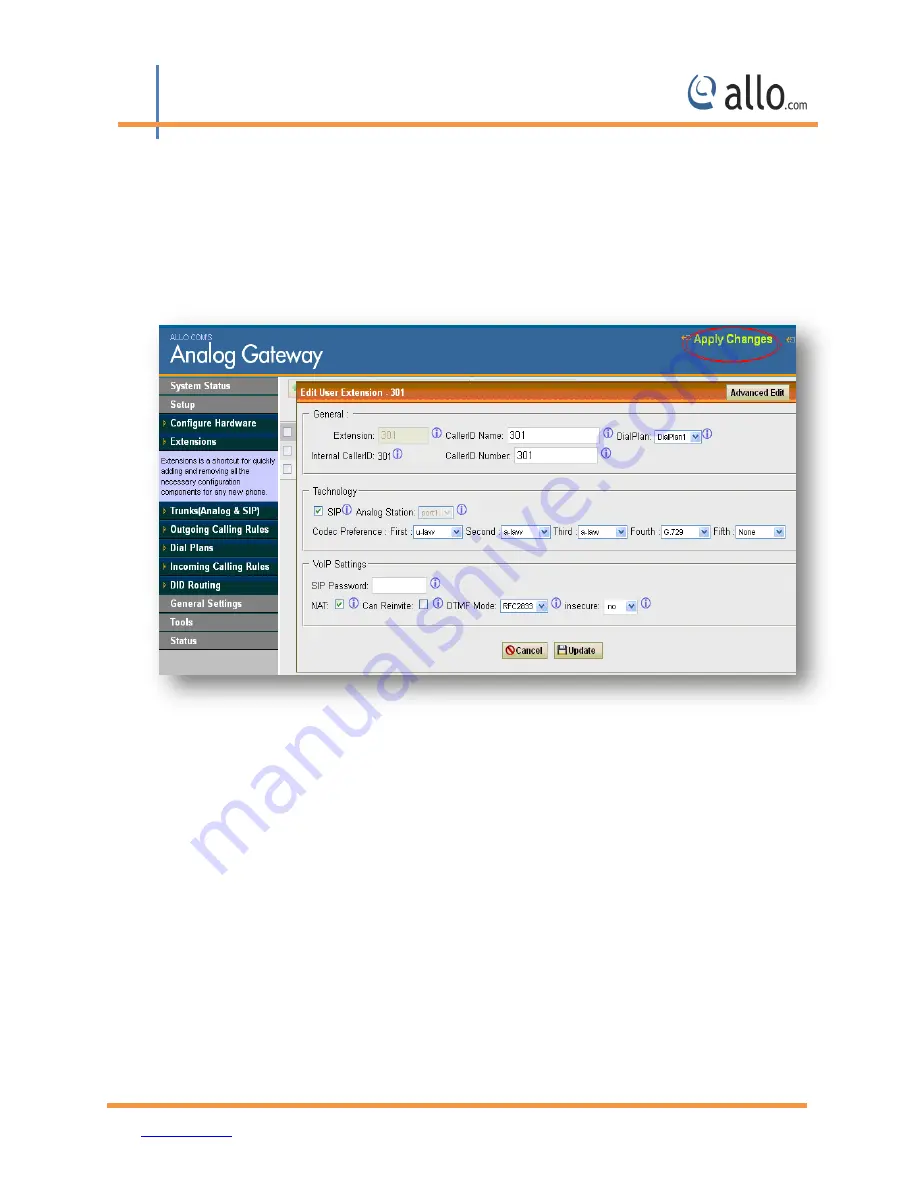
8. APPLY Changes 

Navigation: 

APPLY CHANGES (On the right top of the web GUI)


This  is  the  button  which  you  must  press  after  adding  /  editing  /  deleting  such  things  as 
Extensions , modifying settings such as General Settings, VOIP Accounts, Network Settings, DID 
Routing, Firmware Upgrades, and other System Settings. 


Figure 46: Apply changes


Содержание Analog Gateway

Страница 1: ...ANO Analog Gateway User Manual 2 y www allo com Version 2 0 1 ...

Страница 2: ... information in this document is Confidential to Allo com and is legally privileged The information and this document are intended solely for the addressee Use of this document by anyone else for any other purpose is unauthorized If you are not the intended recipient any disclosure copying or distribution of this information is prohibited and unlawful Disclaimer Information in this document is sub...

Страница 3: ...egies to draw User attention to certain pieces of information In order of how critical the information is to your system these items are marked as a note tip important caution or warning Icon Purpose Note Tip Best Practice Important Caution Warning Bold indicates the name of the menu items options dialog boxes windows and functions The color blue with underline is used to indicate cross references...

Страница 4: ...ing the Web GUI 11 3 System Status 13 4 Set up 15 4 1 Configure hardware 15 4 2 Extensions 15 4 2 1 Create New User 16 4 2 2 Modify Delete selected users 19 4 3 Trunks 19 4 3 1 Analog Trunks 19 4 3 2 VOIP Trunks 20 4 3 3Adding a New VOIP Account Details 20 4 3 4 Editing Deleting an Existing VOIP Account 21 4 4 Trunk Groups 22 4 5 Outgoing Calling Rule 23 4 5 1 New Calling Rules 23 4 5 2 Restore De...

Страница 5: ... Settings 34 5 2 3 Reboot 35 5 3 SIP Settings 35 5 3 1 General 35 5 3 2 TOS 36 5 3 3 NAT 37 5 3 4 Misc 39 5 3 5 Codecs 40 6 Tools 42 6 1 Back Up 42 6 2 Firmware Upgrade 45 6 3 File Editor 46 6 4 Asterisk CLI 46 6 5 Diagnostics 47 7 Status 48 7 1 Call Detail Records 48 7 2 Active Channels 49 7 3 System Info 49 8 APPLY Changes 52 9 Frequently Asked Questions FAQ 53 10 APPENDIX A 60 ...

Страница 6: ...t up to 4 analog ports FXO or FXS modules to VOIP Setting up and configuring the Gateway is a breeze with the user friendly GUI and this document will show you just how easy it is The Model No s are as follows 4 Port FXS Analog Gateway aGA40 4 Port FXO Analog Gateway aGA04 2 Port FXS 2 Port FXO Analog Gateway aGA22 A typical network diagram shows the function of Gateway as below Figure 1 overview ...

Страница 7: ...w Figure 2 Front View Interface Description ON OFF Switch Gateway Power ON OFF switch Power Power LED is Green if the unit is boot up FXS FXO LED Ports FXO port blinks GREEN FXS port blinks RED Notification LEDs On the Front Panel Below table shows the Notification LED for 2 port FXS 2 port FXO Gateway ...

Страница 8: ...1 2 2 Rear view Figure 3 Rear View Interface Description WAN Standard 10 100 BASE TX Ethernet Interface for WAN FXS FXO ports FXS is used to connect analog phones and FXO is used to connect PSTN lines Console Console cable provided along the box for the trouble shooting DC 12 V Supply This is power rating specified for the gateway Reset Reset button for factory default ...

Страница 9: ...and Generation SIP User Agent IETF RFC3261 compliant WARRANTY Hardware Warranty 1 year If the PRI Gateway was purchased from a Distributor reseller please contact the company where the device was purchased for replacement repair or refund If the device was purchased directly from Allo com contact our Technical Support Team for a RMA Return Materials Authorization number before the product is retur...

Страница 10: ...d with the Gateway Hardware Installation 1 Unpack the items from the box 2 Plug one end of the RJ45 Ethernet cable into the WAN port of the FXO FXS Gateway other end into the PC Use Cross over Ethernet cable to connect between the WAN port of the unit PC 3 Insert the Power Adaptor output connector into the Power port of the FXO FXS Getting Started ...

Страница 11: ...sk as 255 255 255 0 and gateway DNS as 192 168 113 1 3 Launch the web browser and enter the URL Access the GUI using http 192 168 113 252 8088which is the default IP address of the WAN of the FXO FXS Gateway 4 Login using the default username password Default Username admin Password admin Successful login takes you to the Dashboard page Figure 5 Login Page 5 To change the password please refer to ...

Страница 12: ...88 at the end of your IP address when logged in For an Example 192 168 0 42 8088 e IP address can be obtained by dialing from the Analog phone which is connected to the Gateway f The FXO FXS VOIP gateway comes with default credentials admin You have to change these as soon as possible to avoid getting hacked Allo com cannot be held responsible for unauthorized access to the FXO FXS VOIP Gateway Pl...

Страница 13: ...red then it is successfully configured and connected 2 Under Extensions you will see all the users and the extensions connected to the Gateway 3 Under System status System Info General you will have a summary of your General information such as Hostname Server Date time zone Uptime 4 Under System status System Info Memory Status you will see total memory resources including RAM usage 5 Under Syste...

Страница 14: ...ANO Analog Gateway User Manual 2 y www allo com Version 2 0 14 Figure 6 System Status ...

Страница 15: ...y aGA22 Figure 7 Analog Hardware 4 2 Extensions Extensions are a shortcut for quickly adding and removing all the necessary configuration components for any new phone Extensions are the core of the FXO FXS VOIP An extension is a number mapped to a person So basically every employee that is connected to the Gateway should have their own unique extension number so that he she can be reached and be a...

Страница 16: ...m which can be connected to an available FXS port of the Analog VOIP Gateway 4 2 1 Create New User You have to create at least one Dial plan using Dial plan option before trying to create Analog IP Extensions Navigation Users Create New user This is where you setup your Analog IP extensions Figure 8 Create new user Technology SIP Select SIP if the user is using SIP or a SIP device Analog Station S...

Страница 17: ...ith the user Caller ID Name Configure the Caller ID Name associated with the user Dial Plan Select one from the dropdown box appears only if dial plans are created using Dial plans By Default Dialplan1 Caller ID Number Configure the Caller ID Number that would be applied for outbound calls from this user The ability to manipulate your outbound Caller ID may be limited by your VOIP provider Figure ...

Страница 18: ...ehind NAT e g broadband router If there is one way audio issue usually it s related to NAT configuration or Firewall s support of SIP and RTP ports Can Re invite By default the Gateway will route the media steam from SIP endpoints through itself If enabled the Gateway will attempt to negotiate with the endpoints to route the media stream directly It is not always possible for the Gateway to negoti...

Страница 19: ...unt Extension Once you click on the Edit button of an Extension then it will display the information about that particular extension Here you can change the required details and then click on the Update Extension button to save the changes made You can delete an extension by clicking on the delete button on the extension from the list of extensions displayed You can delete many existing extensions...

Страница 20: ...In this page fill in the Provider Name Host name Host Port Username Password and Proxy information given to you by your VOIP provider known as SIP Credentials Apply any Codec Settings required You can prioritize your active codec s by using the drop down buttons After you have entered the details click the Save button at the bottom In Create new sip trunk dropdown option context naming Based on pr...

Страница 21: ...e trunk from the provider Qualify If you enable Qualify asterisk will send the SIP Options command regularly to check that the device is still online DID Routing DID Routing Routes calls to a single specific extension Outbound Proxy Configure Outbound proxy to send Outbound signaling to that proxy 4 3 4 Editing Deleting an Existing VOIP Account On the right side of the page you can see the list of...

Страница 22: ...com Version 2 0 22 Make sure to click the APPLY CHANGES tab in the top navigation bar after adding any new VOIP trunk or editing deleting 4 4 Trunk Groups Navigate through Setup Trunk Groups Figure 13 New Trunk Group Figure 14 Manage Trunk Group ...

Страница 23: ... Rules Outgoing Calling Rules represent the prefix sequence used to dial when making an outgoing call either through the PSTN Analog or VOIP There are two ways to make outgoing calls for the registered extension users VOIP SIP trunk via ITSP gateway LINE PSTN trunk via FXO port Figure 15 New Calling Rule Calling Rule Name Configure the name of the calling rule e g local long distance and etc Lette...

Страница 24: ... to route the call i e Failover Trunk an alternative trunk to route calls Send this call through trunk Use Trunk Select the trunk for this outbound rule FXO VOIP Trunk Strip Allows the user to specify the number of digits that will be stripped from the beginning of the dialed string before the call is placed via the selected trunk Prepend Specify the digits to be prepended before the call is place...

Страница 25: ...offer cheaper rates for the region where number starts from 44 users can make use of this rule In the same way user can create a prefix and select a LINE PSTN FXO trunk to make an outgoing call Use failover trunk Failover trunks Check this option to use Failover trunks where a call goes through an alternate route when the primary trunk is busy or down Trunks List Gives the list of trunks configure...

Страница 26: ...cal outgoing calling rule Another user may be permitted to dial long distance numbers and so would have a Dial Plan that includes both the local and long distance outgoing calling rules You have to create the Dial plan first before you create any user accounts to make your call successful The Dial plan details are as follows Dial plan Name The name of the user wish to see in that field of Dial pla...

Страница 27: ...Incoming Calling rule This is where you can create edit delete incoming calling rules Figure 18 New Incoming Rule An Incoming Calling Rule is a rule which routes the incoming call to a phone number The Incoming Calling Rule is a feature that enables incoming calls to be routed directly to selected stations without attendant assistance ...

Страница 28: ...the time interval from the list specify the time for the trunk to use the inbound rule Pattern All patterns are prefixed with the _ X Any Digit from 0 9 Z Any Digit from 1 9 N Any Digit from 2 9 Wildcard Match one or more characters Wildcard Match zero or more characters immediately Destination Select the default destination for the inbound call Extension Trunk Local Extension by DID ...

Страница 29: ...igured phone line from the telephone company allows for dialing inside a company directly without having to go through an attendant A DID line cannot be used for out dial operation since there is no dial tone offered However it can be configured so an outside caller can reach an inside extension with a 7 digit number throughthe phone company s central office Figure 20 New DID ...

Страница 30: ...rsion 2 0 30 DID Configuration parameters DID Number Enter the DID numbers provided by the VOIP Service provider Destinations Select the DID destination Only the selected category can be reached by DID User Extension Trunk Figure 21 DID Calling Results ...

Страница 31: ...1 Network Settings Navigation Network Settings This is where you setup your Networking Configuration Figure 22 WAN Configuration Figure 23 Modifying the confirmation 5 1 1 WAN Configuration Please refer to the following tables for basic network configuration parameters General Settings ...

Страница 32: ...static IP settings DNS Primary Enter the DNS server 1 address for static IP settings DNS Secondary Enter the DNS server 2 address for static IP settings 5 1 2 Host Configuration Host Configuration is used to manage your FXO FXS VOIP Gateway Host Name Host Name Used to name the device to identify inside the LAN network This field is optional but may be required by some Internet Service Providers or...

Страница 33: ...he CallerID Name set to this name If not the extension s CallerID Name will be used Ring Timeout Configure the number of seconds to ring an extension The default setting is 20 VOIP Phone Digit Map This option allows the administrator to define a global digit mapping string compatible with RFC 3435 There is no default setting and this option does not sync with the dial plan assigned to an individua...

Страница 34: ...each entry is separated by the character For more information please refer to RFC 3435 VOIP Phone Digit Timeout The timeout variable is the number of seconds the phone will wait for each segment of a digit map expressed as an integer 5 2 2 Gateway Settings Navigation Admin Settings General settings GATEWAY Settings This is where you can configure the General Settings of the Gateway Change Admin Pa...

Страница 35: ...the Gateway The administrator of the FXO FXS VOIP Gateway can remotely reboot the FXO FXS VOIP Gateway by pressing the Reboot button at the bottom of the System management Once done the following screen will be displayed to confirm reboot Figure 25 Reboot FXO FXS VOIP Gateway will take about 40 seconds to reboot To reboot the FXO FXS VOIP Gateway results in termination of active calls 5 3 SIP Sett...

Страница 36: ...default setting is 5060 Bind IP Address Configure the IP address to bind to The default setting is 0 0 0 0 which means binding to all addresses Enable DNS SRV lookups Select to enables DNS SRV lookups on outbound calls from the Gateway 5 3 2 TOS Navigation General Settings SIP Settings TOS This is where you can configure the TOS sip settings Figure 27 TOS ...

Страница 37: ...ng Never Whenever ringing occurs the FXO FXS VOIP Gateway will send 180 Ringing as long as 200OK has not been set yet In band ringing will not be generated even the end point device is not working properly Server User Agent Allows you to configure the user agent string for the FXO FXS VOIP Gateway DTMF Mode Select DTMF mode to send DTMF The default setting is RFC2833 If Info is selected SIP INFO m...

Страница 38: ...nterval Extern Refresh Configure the refresh interval for the external host if used The default setting is 10 Local Network Address Specify a list of network addresses that are considered inside of the NAT network Multiple entries are allowed If not configured the external IP address will not be set correctly A sample configuration could be as follows 192 168 0 0 255 255 255 0 NAT Mode This is a g...

Страница 39: ... No NAT Allow media path redirection Reinvite but only when the peer is not being behind NAT The RTP core can detect if the peer is behind NAT or not based on the IP address where the media comes from Update Use UPDATE for media path redirection instead of INVITE Some devices do not support this especially if one of them is behind NAT 5 3 4 Misc Navigation General Settings SIP settings Misc This i...

Страница 40: ... proxy provider Register Time Out Configure the register retry timeout in seconds The default setting is 20 Register Attempts Configure the number of registration attempts before the Gateway gives up The default setting is 0 which means the Gateway will keep trying until the server side accepts the registration request 5 3 5 Codecs Navigation SIP settings Codec s The following Audio Video codec s ...

Страница 41: ...ANO Analog Gateway User Manual 2 y www allo com Version 2 0 41 Select the codec s from the list by enabling it Figure 31 Create new config file ...

Страница 42: ... y www allo com Version 2 0 42 6 Tools 6 1 Back Up The Gateway configuration can be backed up locally or via network The backup file will be used to restore the configuration on Gateway when necessary Figure 32 General Settings Tools ...

Страница 43: ...NO Analog Gateway User Manual 2 y www allo com Version 2 0 43 Figure 33 PBX settings Users could backup the Gateway configurations for restore purpose by clicking on Create New Backup under Tools Back Up ...

Страница 44: ...r the external device Besides local backup users could back up the configuration a remote server via TFTP HTTP protocol under Web GUI Tools Back Up RESTORE CONFIGURATION FROM BACKUP FILE To restore the configuration on the Gateway from a backup file users could go to Web GUI Tools Backup A list of previous configuration backups is displayed on the web page Users could click on Restore Previous con...

Страница 45: ...ick Upload Figure 36 Delete Backup configuration 6 2 Firmware Upgrade The Firmware Upgrade page allows you to update the Gateway with the latest release available which can contain key updates added functionalities and bug fixes When a new firmware release is available download it and save to your local PC Then browse for the file and click the Upload button Please contact ALLO support team for th...

Страница 46: ...t the configuration files or verify whether the configuration files are updated In the File Editor filed mention the configuration file you want to view It displays the contents of the file Here you can view modify the contents of the file If the user wishes to create a new configuration file it can be done using the new file 6 4 Asterisk CLI Navigation Tools Asterisk CLI This page gives an easy a...

Страница 47: ... could capture traces ping remote host and trace route remote host for troubleshooting purpose under Web GUI Tools Diagnostic Ping Enter the target host in a host name or IP address Then press Start button The output result will dynamically display in the window below Figure 39 Diagnostic Ping Result ...

Страница 48: ...tail Report To create a new Report select the inbound calls outbound calls internal calls and External calls A list with call details will display in the Call Reports section By clicking on the delete button at the bottom Entire call details records CDR of the Gateway are cleared CDR can also be filtered by selecting inbound calls outbound calls internal calls and External calls Status ...

Страница 49: ... to display the top of the GUI page Whereby right Click on the Download File link and download the CDR using the Save Link As 7 2 Active Channels It displays the current Active Channels on the Gateway with the options to Hang up When calls are in progress since there is always refreshing Active Channels in 10 seconds the Current Active Channels on the Gateway are displayed Figure 41 Active Calls 7...

Страница 50: ...ANO Analog Gateway User Manual 2 y www allo com Version 2 0 50 Figure 42 General System Information Figure 43 Network Information ...

Страница 51: ...one and Hostname Network Network Status you will have a summary of your Network information such as Hostname WAN IP Address Subnet Mask WAN MAC Address and Default Gateway you may refer to Settings Network Settings for more info Disk Usage Disk you will have a summary of Disk usage and Disk free space available on the file system Memory Usage Memory Status you will see total memory resources inclu...

Страница 52: ...PLY CHANGES On the right top of the web GUI This is the button which you must press after adding editing deleting such things as Extensions modifying settings such as General Settings VOIP Accounts Network Settings DID Routing Firmware Upgrades and other System Settings Figure 46 Apply changes ...

Страница 53: ...able from FXO FXS card to your PC Keep your PC network configuration in manual mode and set 192 168 113 xxx Open Mozilla Browser and enter http 192 168 113 252 8088 Username admin Password admin 1 Open the GUI of the FXO FXS card 2 Go to network settings 3 If your network has enabled DHCP server then set DHCP yes 4 If DHCP server is not running in your network then set DHCP no and assign a static ...

Страница 54: ...ount ID provided by your service provider or IPPBX 8 Password It authenticates the user account provided by VoIP service provider or IPPBX 9 DID routing Enable DID Routing if you are accepting DID numbers through this SIP trunk Once you enable this DID Routing all calls will route to DID Routing table 10 Once check the Registration box to send the registration request to a VoIP service provider or...

Страница 55: ... in Use Trunk Place 5 Use Trunk Select the appropriate trunk for which this rule should work 6 Strip The above example clearly explained how many numbers should be stripped from the called number 7 Prepend Digits what are the digits should be prefixed for the called number You can leave rest of the fields as default Click save Go to Dial Plans and add this new outgoing rule to the existed dial pla...

Страница 56: ...igure 49 Create New SIP Trunk 2 Select SIP type and enter all the details as shown below Figure 50 Create New SIP Trunk If you want DID routing you can check the Box All the calls are coming inside the analog card through this 3CX trunk will go to DID routing table ...

Страница 57: ...incoming calling rule Open the GUI and go to Incoming Calling Rules Create New Incoming Rule Figure 51 New Incoming Rule 2 Select the Appropriate trunk either FXO trunk or VoIP trunk from the Trunk dropdown box 3 Select the default time interval 4 Pattern _X will accept the calls 5 Destination Select the destination for the incoming call Click Update and Apply Changes 7 How to create the FXO trunk...

Страница 58: ...ension numbers for FXS ports 3 Create an outbound rule for the SIP trunk and add it to dial plan 4 Set up the incoming calling rule for that SIP trunk and route the call to one of the FXS ports 10 Explain Trunks Bridging Sending call from one Trunk to another Trunk Trunks bridging means if the call is coming from one trunk then we can send the call directly to another trunk Scenario No 1 Call is c...

Страница 59: ... SIP trunk A and SIP trunk B 1 Create an incoming calling rule for SIP trunk A Pattern as _X 2 You can set the default option for a time interval 3 Destination will be the SIP trunk B 4 Strip Digits Number of the digits will be trimmed from the dialed number 5 Prepend Number Prefix to add the dialed number ...

Страница 60: ... a Foreign Exchange Office or FXO is a telephone signaling interface that receives POTS or plain old telephone service FXS Foreign Exchange Station is the interface on a VOIP device for connecting directly to phones faxes and CO ports on Gateways or key telephone systems GATEWAY A network point that acts as an entrance to another network IP ADDRESS Every machine that is on a network a local networ...

Страница 61: ...stablish sessions for features such as audio videoconferencing interactive gaming and call forwarding to be deployed over IP networks thus enabling service providers to integrate basic IP telephony services with Web e mail and chat services In addition to user authentication redirect and registration services SIP Server supports traditional telephony features such as personal mobility time of day ...

Страница 62: ...ANO Analog Gateway User Manual 2 y www allo com Version 2 0 62 ...

Отзывы: