


Chapter 2: Installing the AT-MWS2533AP Access Point
34
Installing the Access Point on a Celling or Wall
The AT-MWS2533AP access point can be mounted on a celling or wall.
Guidelines for
Installing the
Device on a
Celling or Wall
Review the following guidelines before installing the access point on a
ceiling or wall:
You must provide the four self-tapping screws that secure the
mounting base plate to the ceiling or wall.
The ceiling or wall mounting surface must be of proper material to
accommodate the self-tapping screws, strong enough to support
the weight of the equipment and cables.
Connect the Ethernet cable to the access point before installing the
access point on the ceiling or wall if connecting the Ethernet cable
will be difficult after the access point is installed.
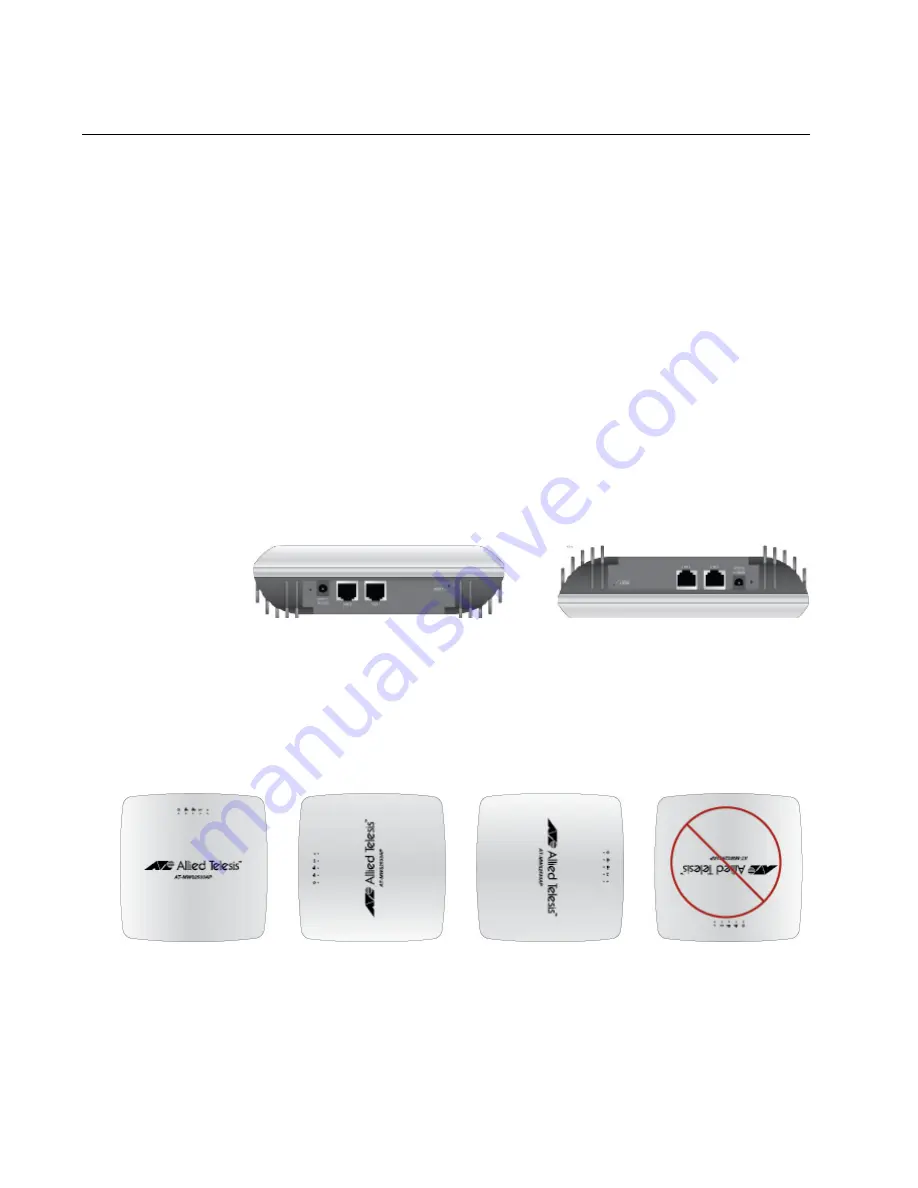
The AT-MWS2533AP access point can be installed on a ceiling or
tabletop. See Figure 7.
Figure 7. Correct Ceiling or Tabletop Installation
The AT-MWS2533AP access point can be mounted on the wall;
however, installing the access point with the LAN ports facing up is
not
allowed. See Figure 8 for correct and incorrect wall installation
orientations.
Figure 8. Correct and Incorrect Wall Installation
Correct Tabletop Installation
Correct Ceiling Installation
Correct
Correct
Correct
Incorrect
Содержание AT-MWS1750AP
Страница 12: ...Preface 12...
Страница 26: ...Chapter 1 Product Description 26...
Страница 42: ...Chapter 2 Installing the AT MWS2533AP Access Point 42...


