Installation Guide for AT-AR3050S, AT-AR4050S Routers
23
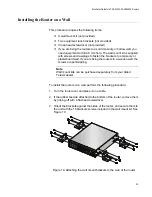
4. Use the four handle screws to screw the handles to the wider side of
each bracket, as show in Figure 7.
Figure 7. Attaching handles to the brackets
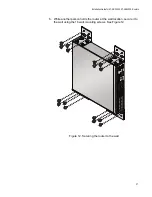
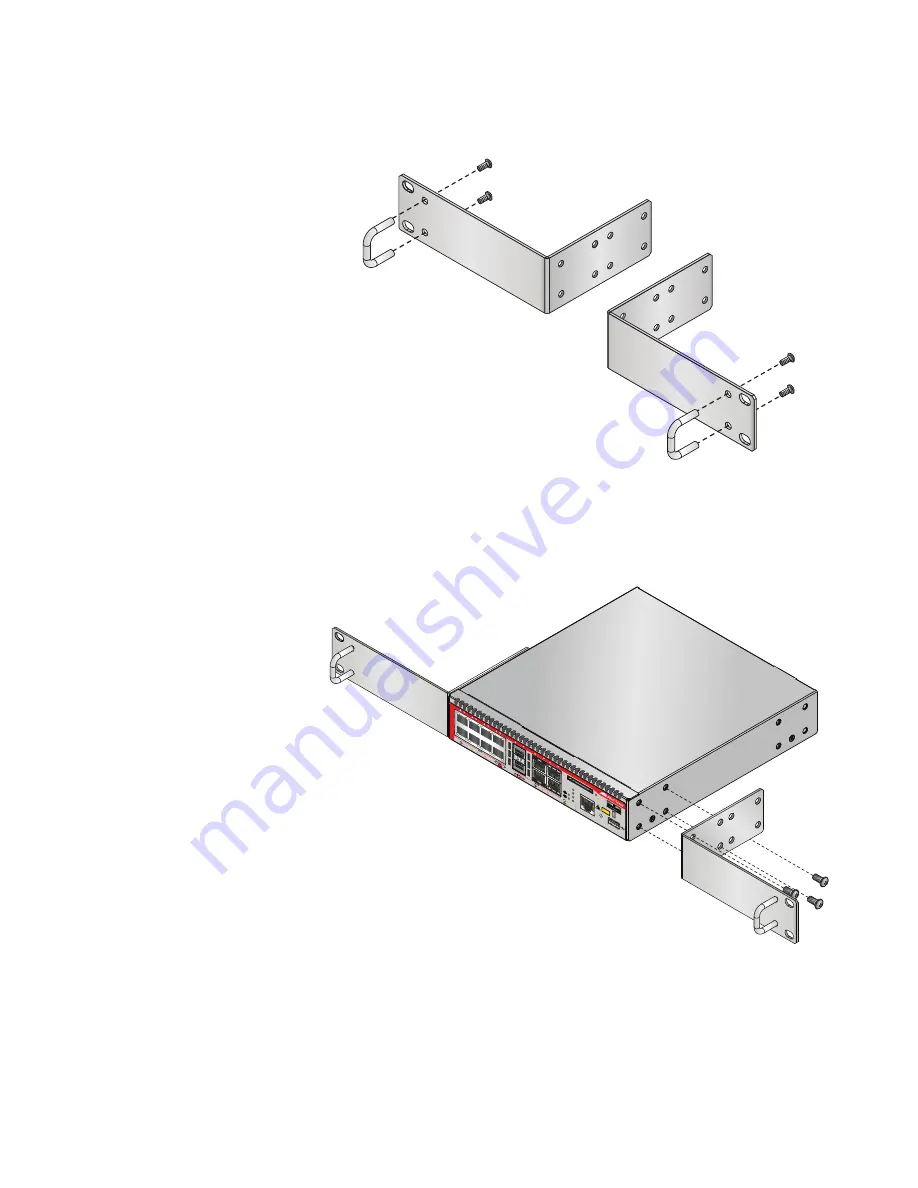
5. Use the eight bracket screws to screw the two rack mount brackets to
the sides of the router, as shown in Figure 8.
Figure 8. Attaching the equipment rack brackets
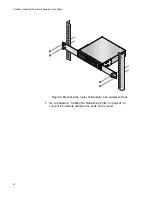
6. While another person holds the router in the equipment rack, secure it
using standard equipment rack screws, as shown in Figure 9.
CLAS
S 1
LAS
ER P
ROD
UC
T
CON
SOL
E
SD
SD
FAU
LT
PWR
FN
C1
FNC
2
RE
SE
T
1
2
3
4
5
6
7
8
1
2
BY
PA
SS
1
2
1
2
USB
HA
FDX
HD
X
CO
L
RE
ADY
FAU
LT
RE
AD
Y
FAU
LT
MAS
TER
STA
NDBY
ETH
ETH
A
R3050S
1000 L
IN
K
AC
T
10
0 LIN
K
AC
T
A
R3050S
Содержание AT-AR3050S
Страница 8: ...Figures 8 ...
Страница 10: ...Tables 10 ...
Страница 14: ...Preface 12 ...
Страница 50: ...Chapter 2 Beginning the Installation 16 ...
Страница 76: ...Chapter 5 Troubleshooting 40 ...


