Repairs
4 - 36
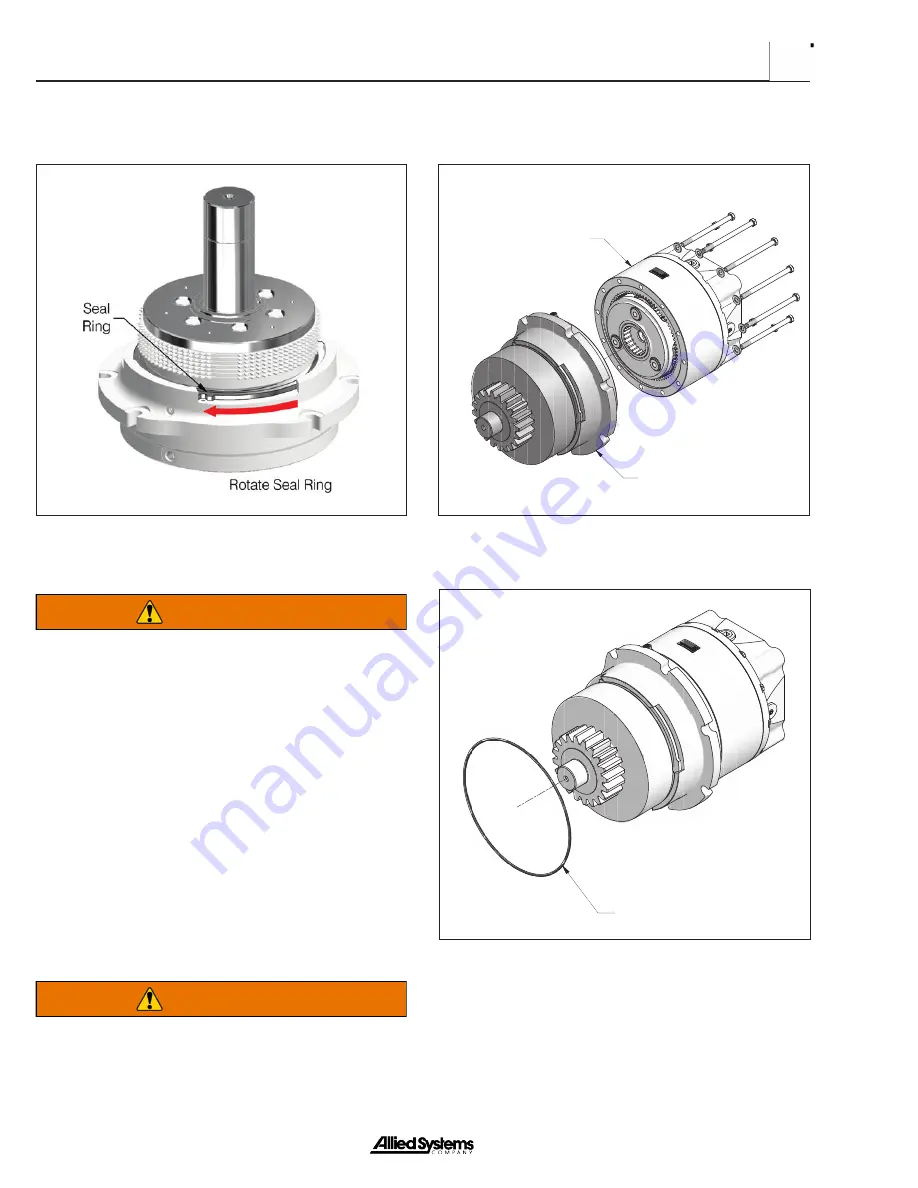
6. Rotate seal ring clockwise with brass drift and
hammer until lock bolt notch aligns with bolt hole.
7.
Testing clutch
WARNING
Wear safety glasses whenever working
around pressurized hydraulics.
7.1 Apply hydraulic pressure to port on clutch housing;
7.2 Steadily increase pressure. Gear should begin to
rotate by hand at about 360 psi;
7.3 Increase pressure further, clutch should reach full
release at 420 psi;
7.4 Increase pressure to 700 psi MAX and check for
leaks.
8. While clutch is released, friction disks can be aligned
by carefully assembling spider gear and aligning
splines.
WARNING
Use caution to prevent pinching fingers
during spider installation - splines are sharp
and can cut.
9.
Install clutch housing assembly into reducer.
PLANETARY REDUCER (REF)
CLUTCH HOUSING
10. Install new O-ring on clutch housing.
O-RING
- Motor Shaft Assembly & Installation
Содержание H6H
Страница 3: ......
Страница 9: ...vi Notes...
Страница 49: ...General 1 40 Notes...
Страница 65: ...General 1 56 Notes Notes...
Страница 71: ...Troubleshooting 2 6 Notes...
Страница 78: ...Section 3 3 7 Notes...
Страница 79: ...Service 3 8 Notes...
Страница 84: ...Section 4 4 5 Intentionally Blank...
Страница 92: ...Section 4 4 13 7 Remove the counterbalance relief manifold...
Страница 96: ...Section 4 4 17 Intentionally Blank...
Страница 98: ...Section 4 4 19 7 Separate the clutch hub and the pressure plate CLUTCH HUB PRESSURE PLATE...
Страница 102: ...Section 4 4 23 Intentionally Blank...
Страница 112: ...Section 4 4 33 Intentionally Blank...
Страница 120: ...Section 4 4 41 FREESPOOL HOSES BRAKE HOSE BRAKE OFF HOSE 6 Install freespool brake and brake off hoses...
Страница 126: ...Section 4 4 47 Intentionally Blank...
Страница 132: ...Section 4 4 53 Notes...


