ASSEMBLY INSTRUCTIONS
7
8.
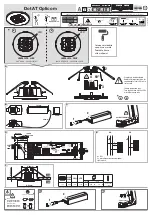
Attach fixture (A) to mounting plate (B) using
the mounting plate screws (C) previously
removed (Step 3, Page 5).
NOTE:
Before tightening mounting plate
screws (C) completely, use level (not included)
to check fixture (A) -- adjust if necessary.
Restore power and test fixture (A).
If lights do not function, please refer to
TROUBLESHOOTING.
9.
If you wish to use your fixture with the side
plates (F) provided, remove the decorative
nuts (D). Use the wrench (EE) to remove the
nuts (E), then firmly press the screw on the
side of fixture (A) to remove the metal cover
from fixture (A).
Attach side plates (F) using nuts (E) and
decorative nuts (D) previously removed.
10
A
D
E
F
EE
9
A
C
8
B
A
C
C
10.


