3-16
Installing A ControlNet Cable System
Publication 1786-6.2.1 - April 1998
5.
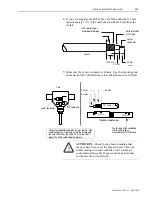
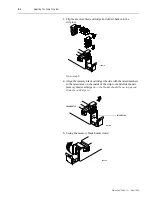
Move the connector in a circular motion (without any inward
pressure) to work the connector base underneath the three outer
shields. Once a gap has opened up between the inner shield tape
and the three outer shields, start applying inward pressure to seat
the connector base under the three outer shields (braid/tape/braid).
6.
Slide the crimp ferrule over the three outer shields and connector
base until it meets the shoulder on the connector.
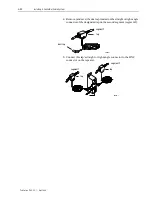
7.
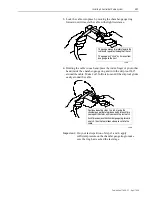
Using the crimp tool, crimp the ferrule. Position the crimp tool on
the ferrule as close as possible to the connector base and ferrule
meeting line. Press the tool tightly around the ferrule until the crimp
tool allows release.
Important:
Many network problems are due to improperly
installed connectors. You should have tight-fitting
connectors on the ends of all your cables. Pull the
connector to verify that it is attached. If it is loose or
comes off, snip off the connector and install a new
one.
20077d
The wire is pliable and
may fray slightly.
20077e
crimp ferrule
The larger hexagonal crimping
notch is for crimping the ferrule
which holds the connector to
the cable

