


5
www.observint.com
© 2019 Observint Technologies. All rights reserved.
a.
Click on the message to install the plugin.
b.
In the message bar at the bottom of the screen, click
Run
. Follow the on-screen instructions
to install
WebComponents
. When the following screen opens, click
Finish
.
c.
In the message bar at the bottom of the screen, click
Run
. Follow the on-screen instructions
to install
WebComponents
. When the following screen opens, click
Finish
.
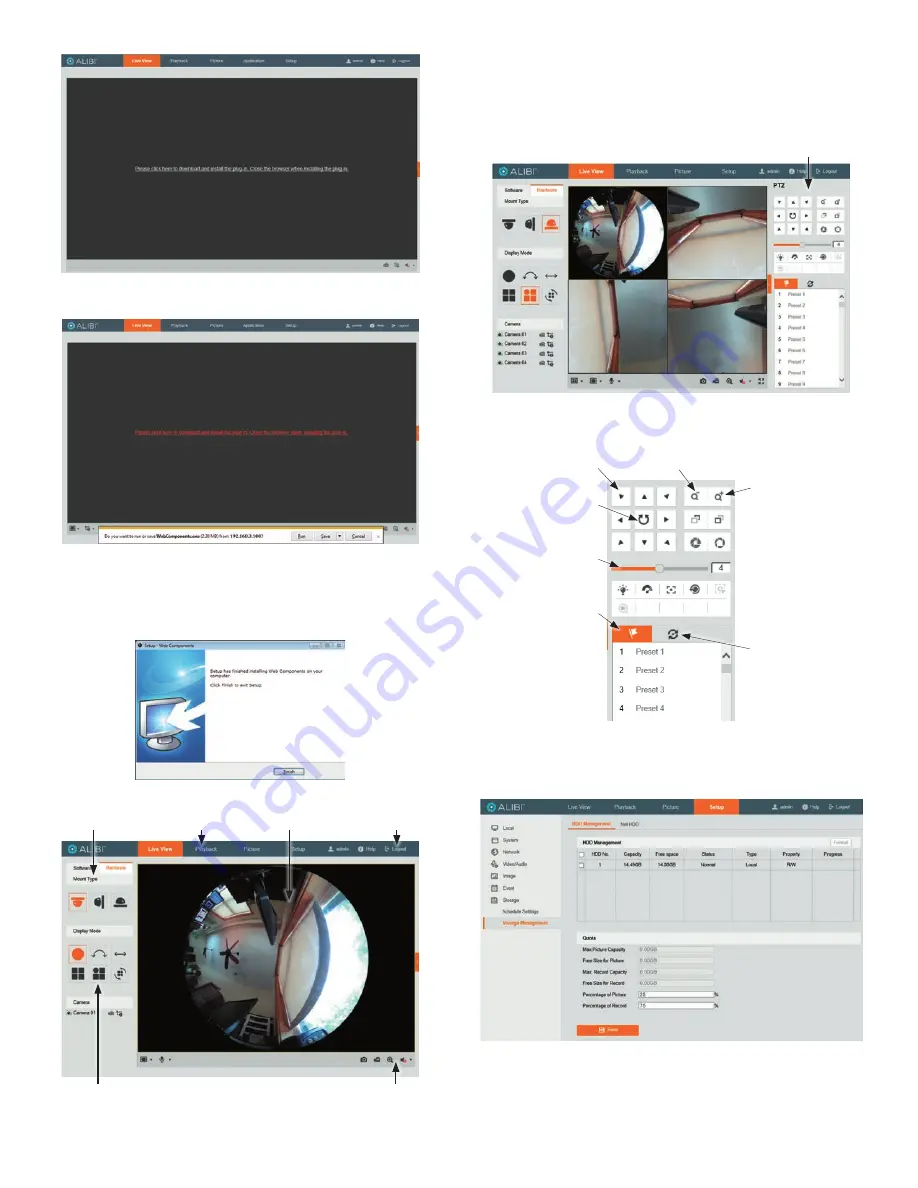
The Live View screen with the camera video image should appear.
Capture, Record, Zoom icons
Display Mode
Screen select tabs
Mounting Type
Logout button
Live View image
5.
In the
Live View
screen, click the
Mounting Type
icon representing how the camera is mounted
(ceiling, wall or table). The icon selected will be orange, and a
Save Succeeded
message will
appear in the lower right corner of the screen.
6.
You can hover the mouse cursor over a Display Mode icon to show its definition. Click on the icon for
the
Display Mode
you want to view, and then click the link to reboot the camera.
PTZ panel
In the example above, the
Mount Type
was changed to
Table
, and the display mode was changed
to
F 3 PTZ
. Here, you can click on one of the PTZ frames and then use the direction icons in
the PTZ panel to change the view of the camera.
Zoom out
Zoom in
Direction buttons
Continuous
pan
Camera
PTZ speed
Show
Preset
list
Patrol
setup
7.
If you installed a microSD card in the camera, open the Storage Management menu to prepare the
card for use:
a.
Go to:
Setup
(tab)
| Storage | Storage Management | HDD Management
b.
Find your microSD card in the list.
c.
Check the card Status. If the card status is anything other than
Normal
, or data is written
to the card that you want to erase, check the select box for the card, then click the
Format
button.


