4
www.Observint.com
© 2014 Observint Technologies. All rights reserved.
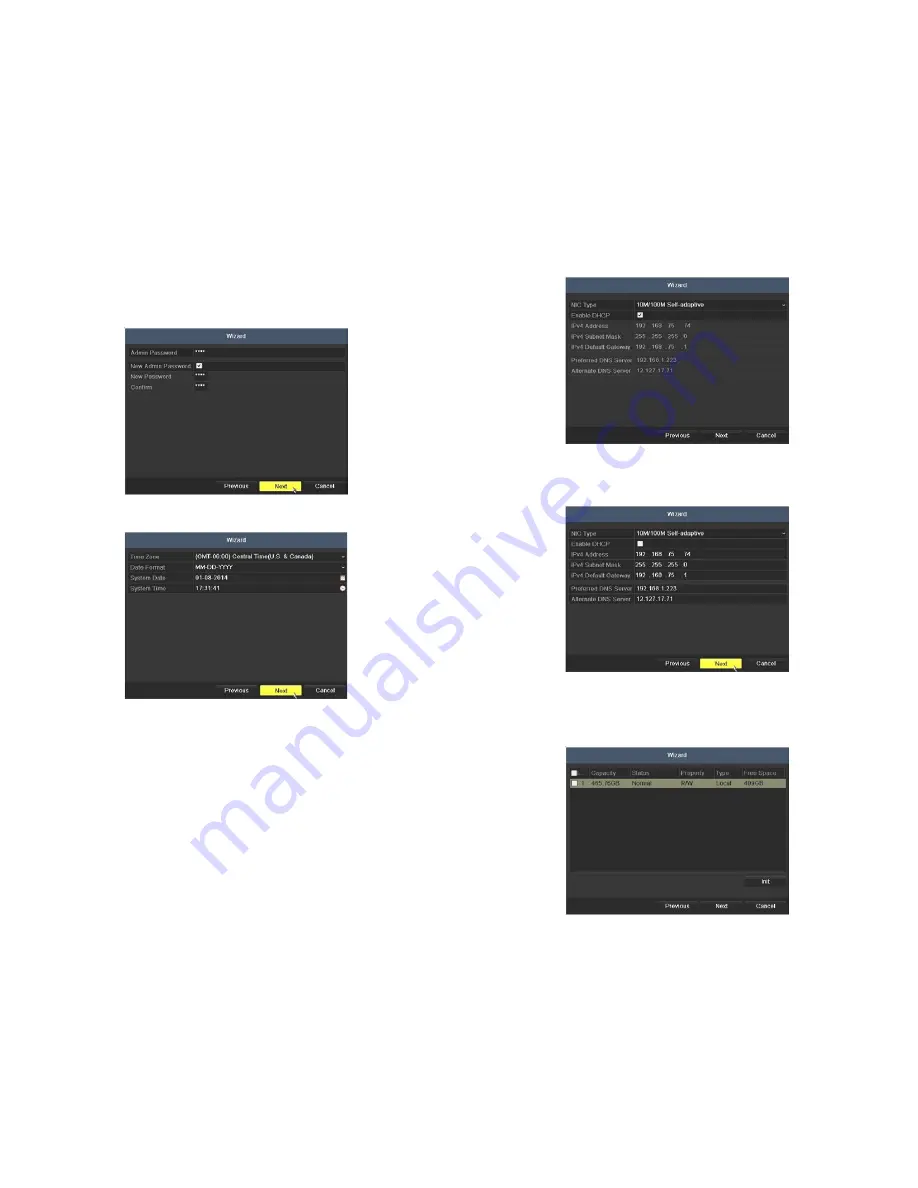
Generally, it is preferable to setup the DVR with a fixed network settings, if possible, to assure the DVR has an unchanging IP address
for remote logins. To enable fixed network settings, uncheck the
Enable DHCP
box, then edit the appropriate fields to change the
settings. Consult with your network administrator to determine the best network settings for your DVR. When finished, click
Next
.
8.
Click
Next
after you configured the network parameters. The HDD management Wizard window will open. If a new DVR is shipped
with a pre-configured HDD, nothing needs to be done in this window. If you installed an HDD or replaced the HDD, select (check the
box for) the HDD, then click
Init
to setup the disk for the DVR.
NOTE
:
Init
will erase all data from the disk. When the initialization is
complete, click
Next
to continue.
Observint strongly recommends that you change the default admin user password to improve the security of your surveillance system.
To change the admin password, check the
New Admin Password
box, then enter the new password in the
New Password
and
Confirm
fields. Record your new password and save it in a secure place for reference later.
5.
Click the
Next
button to open the date and time settings window.
6.
In the date and time setup window, click the field you want to change, then use the drop-down list or setup aid to select the
appropriate values. Click
Next
to confirm your settings or
Cancel
to discard them and open the network setup Wizard window.
7.
In the
Network
setup Wizard window, click the field value you want to change, then use the pop-up aid to enter a new value. By
default, the DVR uses DHCP (Dynamic Host Configuration Processor) to acquire compatible (dynamic, changeable) network settings
from a network DHCP server.


