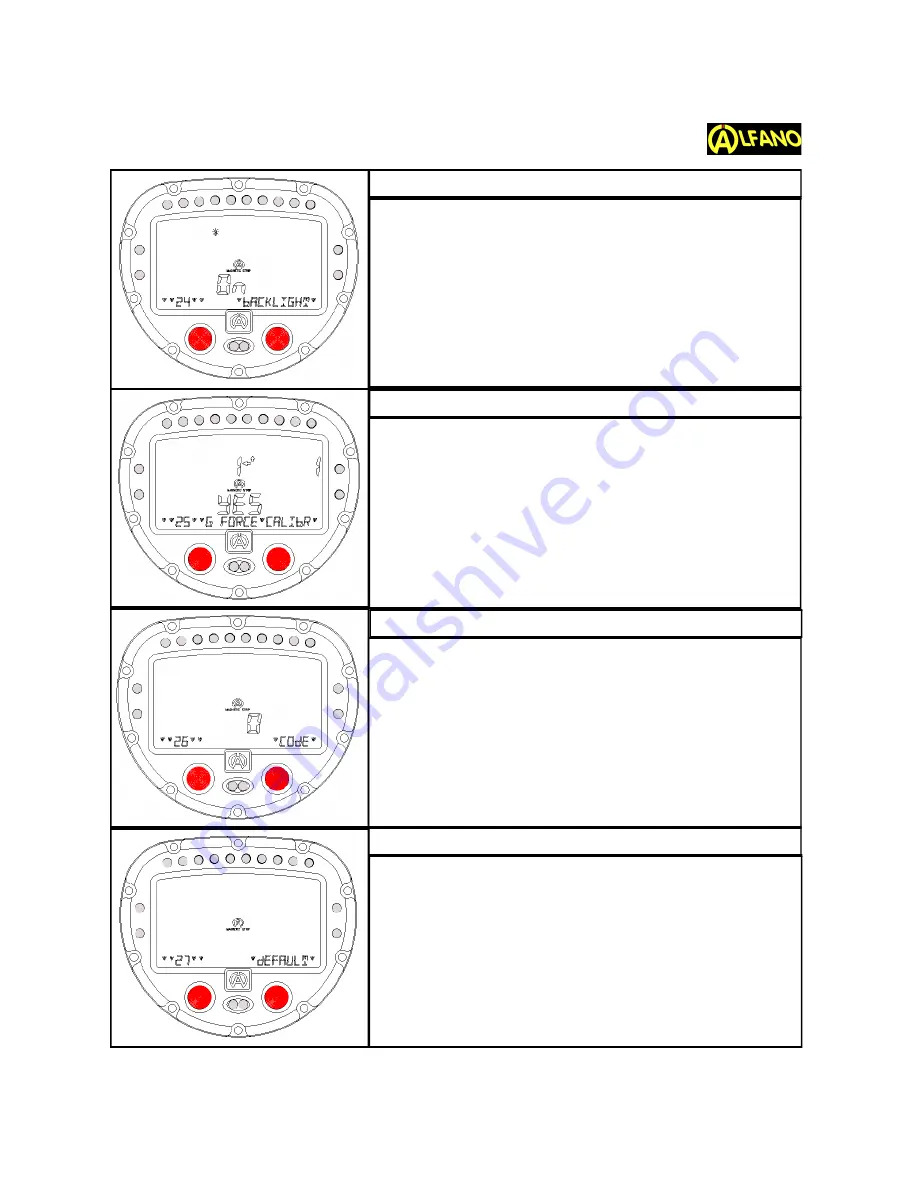
Alfano AStrO Скачать руководство пользователя страница 13

Press the 

right button

to choose wether to make the

backlight menu active or not.
When on active ("ON" mode), as soon as you start the unit
the backlight menu will pop up for a few seconds asking if
you will need to have the backlight 

on

or 

off

.

If you have not activated the back light, it will not appear
when you start the unit.
Press the 

left button

to set and  pass to the next menu.

Hold the sensor upward until you reach a maximum value,
then press the 

right button

.

Repeat same, holding sensor downwards, then left, then
right.  Install sensor flat on your Vehicle.
You should see a 

"YES"

on your screen, meaning your G-

Force calibration is OK.
In case you see

"NO"

you will need to start the process

over.
Press the 

left button

to set and  pass to the next menu.

With the 

right button

, you can enter a 2 digit password,

using the 

arrows up

and 

down

.  

Then press the

left button

to set  once the code has been

chosen.  
Press the 

left button

to set and  pass to the next menu.

Tip: If password is improperly entered, after 5 attempts,
your display will go to start Mode and the data in 
memory will be lost (the configuration settings will remain).

Left button

passes to next menu

Press the 

right button

to bring you to the default factory

settings.
Press the 

left button

to set and  pass to the next menu.

www.Alfano-usa.com

Toll Free:1 (877) 462-7296

13

BACKLIGHT ON/OFF

G-FORCE SENSOR

DATA SECURITY PASSWORD

FACTORY DEFAULT SETTINGS

Содержание AStrO

Страница 1: ...1 QUICK START GUIDE AStrO Ver 10 309 Toll Free 1 877 462 7296 Visit www Alfano usa com...

Страница 2: ...the manual as user friendly as possible making it easy for you to input data As we are always striving for excellence in our products we welcome your feedback and comments on this product guide or an...

Страница 3: ...ith speed sensor Temperature 1 Temperature 2 Temperature Alarm LED 2 RPM Display Graphic RPM 1 or Temperature 2 Display Display A G Force sensor for track mapping B Temperatures 1 inputs NTC type ther...

Страница 4: ...shing LEDS Temperature is Above the Pre Set High Range Simple push of button gives access to menu 1 from 1 to 7 Holding for 2 seconds gives access to menu 2 CONFIG SYSTEM from 10 to 28 Number of sessi...

Страница 5: ...er Fahrenheit C or F D Dynamic mode over Peak Delay D or P 1 2 Number of strips or beacons at that track Km h Choice that was made between Metric or Imperial mph C on the right bottom of screen tells...

Страница 6: ...u to the previ ous lap Pressing right button right arrow will bring you to the next lap in this case you cannot choose as you are already at the last lap On a chosen lap wait a few seconds for VIEW pr...

Страница 7: ...ired Counters 4 5 6 RPM Time Accumulate your engine s running time Counters 7 8 Miles Accumulate distance traveled in motion Pressing the right button will bring you to the 1st counter Pressing the le...

Страница 8: ...UTTON 3 sec Tip Prior to this configuration go to Menu 22 and choose between Celcius or Fahrenheit Press the right button to choose your low temperature tar get for Temp 1 wait for arrows up or down p...

Страница 9: ...to pass to the next menu By pressing the right button this feature allows the driver a delay giving him time while driving to watch the RPM peak He can choose between 0 4 and 4 4 With increments of 0...

Страница 10: ...ocket using right button and with arrows up and down set again with left button Finally using the right button set the gear size of the rear axle number of teeth and left button sets passes to next me...

Страница 11: ...or drive your vehicle Press the right button to choose the number of gears on your engine and to set that number press left button Now you are in the configuration of your 1st gear As soon as you reac...

Страница 12: ...in memory for further use but will not be displayed while driving Tip This must be set up prior to configuration of Menu 13 Low High Temp alarm Press the right button to choose between Celcius or Fah...

Страница 13: ...g your G Force calibration is OK In case you see NO you will need to start the process over Press the left button to set and pass to the next menu With the right button you can enter a 2 digit passwor...

Отзывы: