background image


90 


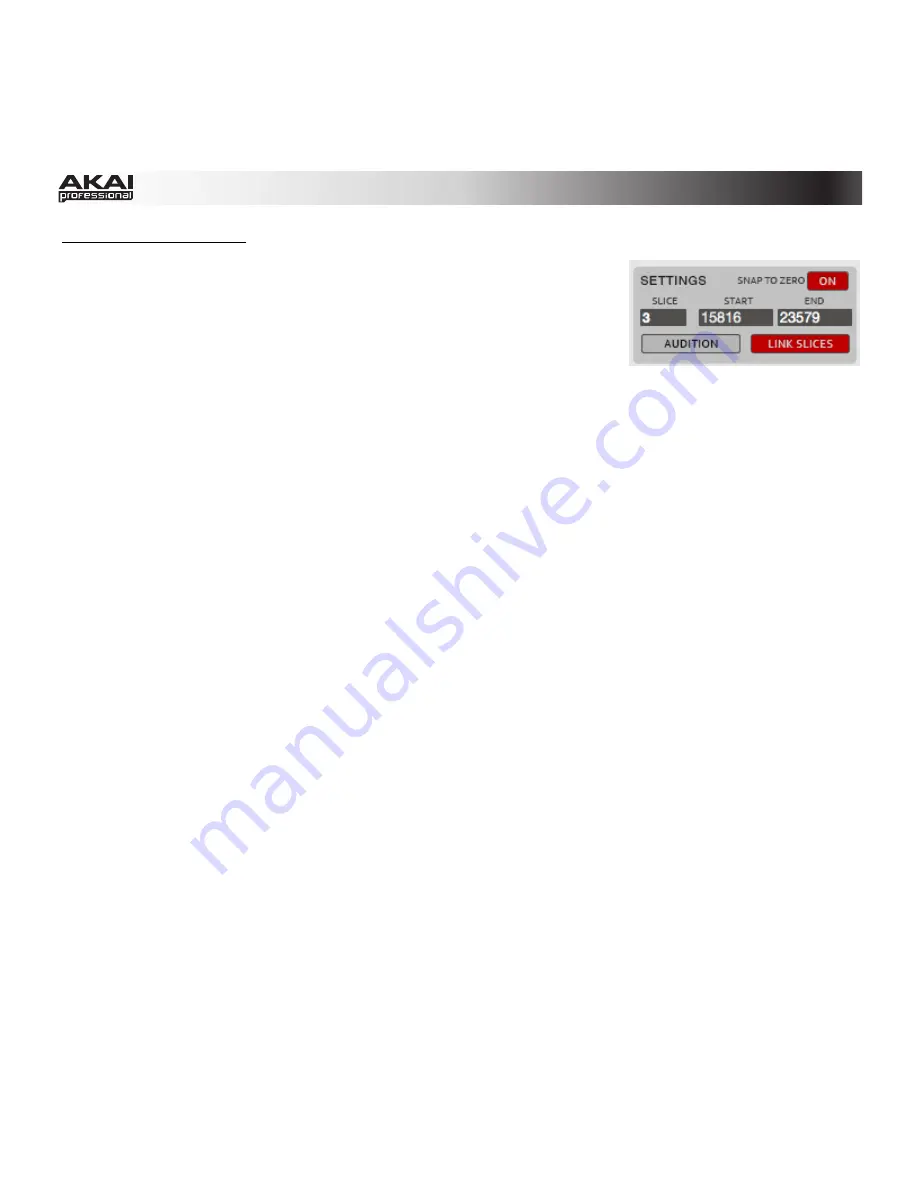
Settings in Chop Mode 

 
In the software, this section lets you edit various parameters affecting 
the start point and end point of your sample's slices: 


Slice

 is the number of the currently selected slice. Click a 

slice in the Waveform Display to select it. (Remember that you 
have to create slices before one can be selected.) 


Start

 defines the start point of the current slice. Click and drag the slice marker in the 

Waveform Display left or right to change it. Alternatively, double-click somewhere in the 
Waveform Display to create a start point there. Remember that the start point of a slice is also 
the end point of the previous slice. 


End

 defines the end point of the current slice. Click and drag the slice marker in the Waveform 

Display left or right to change it. Alternatively, double-click somewhere in the Waveform Display 
to create an end point there. Remember that the end point of a slice is also the start point of the 
next slice. 


Snap to Zero

 activates the snap-to-zero function. For easier sample editing, the software will 

"force" you to place a start point or end point only at "zero-crossings." This can help to avoid 
clicks and glitches when playing a sample. 


When 

Audition

 is activated, you can use the pads can to play the different slices. Each slice is 

assigned to a pad automatically, starting from 

Pad A01

 with 

Slice 1

 and ascending from there. If 

your sample contains more than 16 slices, use the 

Bank

 buttons to switch through the pad 

banks to view all playable slices. Playing a slice will also select it. 


With 

Link Slices

 activated, changing the start point of a slice will also change the end points of 

the previous slice. Similarly, changing the end point of a slice will also change the start point of 
the next slice. Turn 

Link Slices

 off if you are trying to create slices that use non-contiguous 

parts of the sample. 


Содержание MPC Essentials

Страница 1: ...User Guide English Manual Version 1 0 ...

Страница 2: ...Recording a Drum Sequence 12 Organizing Samples and Editing Note Events 14 Recording a Bass Sequence 15 Creating a Song 17 Exporting the Song 17 Operation Software 18 General Features 19 Adjusting the Controls 19 Program Types 21 File Browser 26 Mode Tab Section 28 Transport Section 30 The Grid 32 Software Menus 38 Main Mode 50 Q Link Section 50 Pad Bank Section 52 Sequence Section 53 Project Info...

Страница 3: ... Drum Programs Only 67 Velocity Sensitivity Section 68 LFO Section 68 Controller Mod Section Keygroup Program Only 69 Pad Insert Effects Section 69 Program Edit Mode for MIDI Programs and Plugin Programs 70 Program Mixer Mode 71 Levels 72 Panning 72 Mute 72 Insert Effects 72 Next Sequence Mode 73 Sequence Playlist 74 Pad Bank Section 74 Next Sequence Section 75 Project Information Section 75 Sampl...

Страница 4: ...ection 96 Edit Step Section 97 Step Section 97 Project Information Section 97 Pad Mute Mode 98 Pad Mute 98 Pad Group 99 Project Information Section 99 Step Sequence Mode 100 Pad Section 101 MIDI Control Mode 102 Effects 105 Operation Plugin 106 Differences Between the MPC Essentials Plugin and Standalone Application 106 Appendix 108 Keyboard Shortcuts 108 Effects and Parameters 110 Glossary 142 Tr...

Страница 5: ...ntial sounds of modern music production and you can easily import your own sound samples MPC Essentials can operate standalone and can also work seamlessly with your current DAW as a plugin MPC Element comes with everything you need to make music right away and because it operates via standard MIDI you can also use MPC Element to control MIDI music software you already have An 1 8 inch MIDI input ...

Страница 6: ... your MPC hardware s controls Note that these paragraphs are not the only parts of the manual that mention the MPC hardware All buttons controls and parameters are highlighted in bold characters throughout the manual Examples Press the Prog Edit button Turn the Level dial Specific settings or values are indicated in italic characters Examples The Velocity ranges from 0 to 127 Set your Sample Play ...

Страница 7: ... zip file is located 2 Double click the file to extract it 3 Double click the MPC Essentials installer icon This launches a special installation program 4 Follow the on screen instructions Important After installing the MPC software you need to unlock the program on your computer Please refer to Unlocking MPC Essentials Mac OS X 1 Open the folder where the downloaded zip file is located 2 Double c...

Страница 8: ...nternet follow these additional steps 8 Click Use Web Form 9 The window that appears will have your name serial number and software ID number Click Save Details to save this information as a txt file or copy the information from each field into another file of your choosing 10 On a computer connected to the Internet go to authorizations akaipro com MPC enter the copied information and click Unlock...

Страница 9: ...9 MPC Hardware Overview This chapter explains the features and functions of your MPC Element MPC Element Top Panel 1 2 3 4 5 6 7 8 9 10 11 12 13 14 15 16 17 18 18 19 20 ...

Страница 10: ...o start recording Recording in this way rather than using Overdub erases the events of the current Sequence After the Sequence plays through once while recording Overdub will be enabled 9 Overdub Press this button and simultaneously press Play or Play Start to enable Overdub This allows you to record note events in a Sequence without overwriting any previously recorded note events You can enable O...

Страница 11: ...ase both 15 Note Repeat Hold this button down and press a pad to retrigger that pad s sample at a rate based on the current Tempo and Time Correct settings Vary the pressure on the pad to increase or decrease the velocity of the notes being played 16 Tap Tempo Press this button in time with the desired tempo to enter a new tempo in BPM in the software 17 Pad Bank Press and hold down this button an...

Страница 12: ...t click the new Program Program 001 and enter a name e g Drums Now let s load some drum sounds 1 Click the File Browser s drop down menu for an overview of your hard disk structure and select a location Double click any displayed folder in the File Browser to open it 2 Locate and select a drum sample Click the Preview button to preview any selected audio sample Let s load a bass drum first 3 Click...

Страница 13: ... keeps looping allowing you to record further notes Don t stop the recording 4 Play the snare drum part then a hi hat part 5 When you re done recording click Stop 6 To repeat the recording keep in mind that the pads you play in your new recording will automatically replace existing notes played with the same pads To prevent this you can start again from Step 1 but click Overdub instead of Rec Over...

Страница 14: ...you can see your recorded note events Click and drag a note to move it to a different position By default you can position notes only by quantization values defined by the Time Correct value You can change the value by clicking the Time Correct drop down menu We recommend working with 8 or 16 values Hold down your keyboard s Shift key and use the arrow keys to nudge events without restricting snap...

Страница 15: ...k structure and select a location Double click any displayed folder in the File Browser to open it 2 Locate and select a bass sample Click the Preview button to preview any selected audio sample 3 Double click a sample to add it to the Project Keep in mind that the sample is not yet assigned to a pad Let s continue to set up the Keygroup Program 1 Click the Program Edit tab to enter Program Edit M...

Страница 16: ...ad both samples will sound at once Maybe this new sound is interesting as it is but let s make some quick edits to get as close as we can to a real life bass sound 4 Set Layer 1 s Velocity slider to cover the velocity range from 0 to 80 and set Layer 2 s Velocity slider to cover the range from 81 to 127 Now when you hit a pad the lower velocities will trigger the Layer 1 sample only while higher v...

Страница 17: ...d determined by the value in the Repeats Rpts column a Rpt value of 1 means the Sequence will play through only once Each Step can be set to play its Sequence at an independent tempo determined by the value in the BPM column The Bars column indicates the total number of bars or measure that will elapse when playing that Step Click any drop down menu in the Sequence column to select a new Sequence ...

Страница 18: ...w it s described in this chapter but with some notable differences discussed in the Operation Plugin chapter Remember In this manual whenever the MPC Element can be used to control a parameter or a function this is explained separately in a light red box labeled Hardware We strongly recommend using the MPC Element to control the MPC Essentials software its intuitive and fast operation will greatly...

Страница 19: ...s you can increase the resolution The MPC software uses the following types of control elements Knobs To set a value click the knob hold the mouse button and drag the knob up and down Alternatively you can edit values by using your mouse scroll wheel Parameter Values To set a value click and hold the mouse button on the field and drag the mouse up and down Drop Down Menus Click the downward arrow ...

Страница 20: ... parameter Pencil and Select Box Icons Clicking this icon will switch between Draw Mode the Pencil Tool and Select Mode the Select Box tool When the grid is active i e when you have clicked somewhere in it you can press your computer keyboard s 1 key to enter Draw Mode or 2 key to enter Select Mode Draw Mode Click once on an empty square in the grid to place a note event in that square Double clic...

Страница 21: ...hem chromatically with a MIDI keyboard or the MPC hardware pads Two other kinds of Programs use MIDI data only Plugin Programs and MIDI Programs This section covers how to create each Program type To learn about editing your Programs to your preference see the Program Edit Mode chapter Drum Program To create a Drum Program in the software 1 Click the Main Mode tab to enter Main Mode 2 In the Seque...

Страница 22: ...sample per pad In the software click the Program Edit tab With the Sample drop down menus of Layer 2 to Layer 4 you can assign additional samples to the selected pad You can assign up to four samples per pad one for each Layer Remember A Drum Program holds 128 pads 16 pads across eight banks Keygroup Program To create a Keygroup Program in the software 1 Click the Main Mode tab to enter Main Mode ...

Страница 23: ...eyboard In the software click the Program Edit tab With the Sample drop down menus for Layer 2 to Layer 4 you can assign up to four samples loaded into the Project Information beforehand to create velocity layers or make other layer dependent adjustments To create complex Keygroup Programs you can add more Keygroups up to 128 This is useful when working with multi samples e g when programming a re...

Страница 24: ... enter an appropriate Program name Unlike Drum Programs and Keygroup Programs which use samples imported into the software your MIDI Program will send MIDI messages to an external sound module a connected drum machine synth etc You will need to set up the MIDI Program to do this properly See the Sequence Section of the Main Mode chapter for more information on how to properly configure your MIDI P...

Страница 25: ...n menu select the desired plugin from the list and click Select to select it or Close to cancel in the window that appears you can click checkboxes to re order your list of plugins Sort by type or Sort by manufacturer Click the e button to open the user interface of the loaded plugin Remember You have to specify where your plugins are located This can be done in the software s Preferences See the ...

Страница 26: ...ur hard disk s to give you quick access to your files Note The File Browser does not display irrelevant files e g text documents spreadsheets pictures etc To set the file path 1 Click the File Browser s drop down menu You ll see an overview of your hard disk structure which looks quite similar to the Explorer Windows or the Finder Mac OS X 2 Navigate to the desired location The folder s content wi...

Страница 27: ...ile press and hold your keyboard s Control key Windows or Command key Mac OS X and then click any additional file s you want to select Release the Control key or Command key when you have finished selecting the files Tip You can also click and drag files from your computer s Explorer Windows or Finder Mac OS X instead of from the File Browser With the Parent Directory arrow button in the software ...

Страница 28: ... on the selected mode tab on the left This section is always visible The different modes are described in detail in the following sections of this chapter To select a mode within the software click the corresponding tab Main Mode Sample Record Mode Step Sequence Mode Program Edit Mode Sample Edit Mode MIDI Control Mode Program Mixer Mode Song Mode Next Sequence Mode Pad Mute Mode ...

Страница 29: ...n the currently loaded Project A Project can hold up to 32 Songs The Song drop down menu is only available when the Song tab is selected See the Song Mode chapter for more information about Songs Click the Screen Scroll button to switch between Scroll Mode and Page Mode Depending on the zoom setting Scroll Mode will make the screen scroll along in the background keeping the position marker centere...

Страница 30: ...volume of your metronome click In the software next to the Metronome dial click On to activate or deactivate the metronome It will light up red when active Read more about the metronome in the Click Metro Menu section of the Software Menus chapter The bar and tempo display shows the actual position in bars beats and ticks You can change the Sequence s tempo by double clicking the BPM value and ent...

Страница 31: ...top to abort and clear the loaded files Play will start playback from the current time position Play Start will start playback from the beginning of the Song or Sequence or from the First Bar setting Hardware The Undo button can be used differently during recording Normally pressing Undo will undo the last event only the button will be lit solid when there is an action that can be undone While rec...

Страница 32: ...Programs MIDI Programs and Plugin Programs appear another way Grid for Drum Programs When a Drum Progam is selected the grid looks like this The left column shows you all available pads A01 to H16 in a vertical view with their corresponding data Use the vertical window scroll bar right of the grid windows to move up and down Under the scroll bar is a slider that can adjust the vertical zoom Below ...

Страница 33: ... Command D Mac OS X The selected note events will be automatically copied and pasted starting from the step just after the last selected note event When Hitting Pads Select Events is selected you can hit a pad on your MPC hardware to select all events on that pad in the currently shown Sequence Click Undo the red arrow to undo your last action Click Redo the green arrow to redo the last action you...

Страница 34: ...op between the beginning of the first bar and the end of the last bar When creating a new Sequence the first bar will default to Bar 1 You can change the start point and end point of a Sequence by adjusting the First Bar and Last Bar parameters in the Sequence section below the grid The red arrows in the measure bar will be placed accordingly For more information on this please see the Sequence Se...

Страница 35: ...am is selected the grid looks like this The only difference from the Drum Program view is the vertical miniature keyboard piano roll in the left grid window section Click a key to select all note events for that note You will also hear the note assigned to that key Everything else works exactly as in a Drum Program ...

Страница 36: ...te or delete note events with the Pencil Tool in Draw Mode or with the Select Box Tool in Select Mode In Draw Mode Click once on an empty square in the grid to place a note event in that square Double click a note event to erase it In Select Mode Click and drag the box over note events on the grid to highlight them Double click an empty square in the grid to add a note event Double click a note ev...

Страница 37: ...ily copied to all 16 pads The pads will now output the same note number as the initial pad but a selectable parameter will be fixed at values that increase as the pad numbers increase e g Pad 1 is the minimum Pad 16 is the maximum regardless of how hard you hit them In the software in the window that appears click the Type menu to select the parameter Velocity Tune Filter Layer Attack or Decay You...

Страница 38: ...an anchor point to delete it Use the Select Box Tool Select Mode to select several adjacent anchor points for simultaneous editing You can add multiple automation parameters using this procedure Software Menus Some of the software s menu items let you access features that cannot be accessed with the MPC hardware Important The software menu organization differs between Windows and Mac OS X operatin...

Страница 39: ...r Sequence data in various formats MPC formats a standard MIDI file a single Project Archive file or as an audio mixdown file Select the desired option from the sub menu MPC formats o As MPC1000 MPC2500 Seq exports the current Sequence so it can be read by an MPC1000 or MPC2500 o As MPC1000 MPC2500 Prg exports the current Program so it can be read by an MPC1000 or MPC2500 o As MPC5000 Seq Prg expo...

Страница 40: ...tput you render You can select by clicking the drop down menu under the checkbox o File format lets you select wav or aiff as the exported file format You can select a Bit depth of 8 bit 16 bit 24 bit or 32 bit floating point o Sample rate lets you select from 44 1 kHz 48 kHz 88 2 kHz or 96 kHz In most cases we recommend selecting 44 1 kHz o Click Export to open a window where you can enter a file...

Страница 41: ... or insert them at another location in the same or another Sequence Paste lets you to paste the contents of the clipboard at the position marker s current location Clear deletes the contents of the clipboard Delete Unused Samples deletes any samples not assigned to a pad from the Project Important The samples will be deleted immediately from the project The software will not ask for confirmation o...

Страница 42: ... system beforehand o Sample Rate Click this to drop down menu to select the desired sample rate for your Project This should depend on your audio interface s available sample rates i e select 96000 Hz only if your interface allows a 96 kHz sample rate o Audio Buffer Size Click this drop down meny to set the latency of your audio system Lower values result in a more immediate playing response but a...

Страница 43: ...n select for your Midi Out Port is your host software DAW Preferences Plugins Tab Here you can select up to four locations on your hard disk where the software will look for installed VST or AU plugins These plugins can be used as insert or send effects within your MPC software Click the button to the right of the field to select a desired location After selecting a new location we recommend using...

Страница 44: ... useful when you want to have the track muted immediately The loop will continue to play but at zero volume allowing the loop to continue playing when the track is unmuted o Record Mute Events If this option is enabled mute events are recorded when you are in Pad Mute Mode Timing Correct settings will affect the recorded position of Pad Mute events o Play Mute Events If this option is enabled mute...

Страница 45: ... how your playing is translated into velocity values starting from value A a soft touch is enough to create a big velocity value up to D you have to hit the pad really hard for a high velocity value o Pad Response View the Velocity and Aftertouch meters when pressing the pads to help gauge the force and pressure you are applying to them These meters are useful when adjusting the Pad Threshold and ...

Страница 46: ...DI interface Make sure to check the port s over which you want to send this information You can select two MIDI devices connected to your computer to send MIDI Clock or MTC data to Select your device in each To drop down menu below it o MTC Frame Rate Check one of these boxes to set the frame rate for MIDI Time Code MTC synchronization in FPS frames per second In most cases you should select 25 Th...

Страница 47: ...e recording for instance o Program Change Click this drop down menu to select what an incoming MIDI Program Change message will change a Program or Sequence o Sampling Bit Depth Click this drop down menu to set the bit depth of the audio recorded from a sample Click Metro Menu This menu contains all settings regarding the Metronome Count In enables or disables the metronome pre count before record...

Страница 48: ... OS X on your computer keyboard to apply quantization Settings Click this to open the Time Correct window with the following functions Time Division Click a box to select the note value to quantize to Default is 1 16 You can select from different quantizations including triplet T values Swing Click and drag this field up or down to set the amount of swing from 50 to 75 Swing lets you shuffle your ...

Страница 49: ...e display as well as the pads or keys that will be quantized Click Do It to apply the settings you made Click Close to cancel without making any changes Help Menu About MPC shows information about the software version Check for Updates checks online if a newer version of the software is available You need an active Internet connection to use this function Set Up MMC Control opens a PDF with instru...

Страница 50: ...ctionality of the Q Link Knobs The Q Link section can work in two modes Program Mode Pgm and FX Mode Program Mode The 16 Q Link Knobs control specific Program parameters of the selected Program FX Mode The 16 Q Link Knobs can be assigned to the parameters of used effects By switching between these two modes you are able to define two parameters for each knob This offers maximum flexibility when co...

Страница 51: ...n assigned sample with distinct non overlapping velocities See the Edit Layers Section of the Program Edit Mode section to learn how to set sample layer velocities o Tuning controls the sample s pitch o Filter Cutoff controls the cutoff frequency of the filter Select a pad s filter type in Program Edit Mode o Filter Resonance controls the resonance value of the filter o Filter Env Amount controls ...

Страница 52: ...u hold down the Q Link Trigger button on your MPC hardware and touch the top of one the Q Link Knobs the corresponding parameters will jump to either its minimum Min or maximum Max value 3 Click the Effect drop down menu and select one of the effects which have previously been loaded Note You have to load an effect before its parameters can be assigned to the Q Link Knobs All effects loaded to the...

Страница 53: ...alue Click the Time Sig field to change the time signature for your Sequence Click the BPM field to set the desired tempo in beats per minute Click the Swing field to change the groove of your Sequence Values range from 50 to 75 and let you shuffle your beats from subtle to extreme An icon will indicate whether the Sequence is using a Drum Program Keygroup Program MIDI Program or Plugin Program Cl...

Страница 54: ... port This is where the Sequence data will be sent The drop down menu shows you the available MIDI ports as set in the MIDI tab of the Preferences window For more information see the Preferences MIDI Tab section of this guide Click the MIDI Ch drop down menu to select the MIDI channel from 1 to 16 you want to send MIDI messages over Click the Prog Ch drop down menu to select a MIDI Program Change ...

Страница 55: ... add a new plugin to the Project click the icon next to the Program drop down menu A new Program name Plugin will appear in the Program drop down menu you can click it to enter a new name for it Then click the Plugin drop down menu select the desired plugin from the list and click Select to select it or Close to cancel Click the e button to open the user interface of the loaded plugin Click the MI...

Страница 56: ...list an icon will indicate whether it is a Drum Program Keygroup Program MIDI Program or Plugin Program for Plugin Programs the plugin name is in gray on the right side of the column Right click a Program to open a menu with the following options Duplicate makes a copy of the selected Program and adds a 1 to the Program name Delete deletes the selected Program To avoid accidental deletion a window...

Страница 57: ...ere you can select a save location Rename opens a window where you can rename the selected sample This doesn t affect the original file s name Edit opens Sample Edit Mode for the selected sample For more information on that please refer to the Sample Edit Mode section Click the trash can icon in the upper right corner of the Project Information Section to delete samples from the Project In the win...

Страница 58: ...or MIDI Programs or Plugin Programs skip to the Program Edit Mode for MIDI Programs and Plugin Programs section for more information For more general information on the differences between these four kinds of Programs please see the Program Types section In the software click the Program Edit tab in the Mode Tab Section Drum Programs To select a Drum Program for editing select the desired pad firs...

Страница 59: ...y Mode several pads can be triggered at the same time limited only by the total number of voices available Semi lets you transpose the selected Program up to 12 semitones up or down Fine provides fine tuning of the Program by fractions of a semitone up or down Trans only available for Keygroup Programs transposes incoming notes it does not change the pitch of a sample Simultaneous Play Section Dru...

Страница 60: ...odes Section for Drum Programs in this chapter Keygroup Play Modes Section Keygroup Programs Only Here you can set the behavior for each pad s samples in a Keygroup Program Mute Groups let you assign the selected pad to one of the 32 available groups When pads assigned to the same Mute Group receive MIDI notes the last pad played will silence all other pads in that Mute Group Layer Play determines...

Страница 61: ...m from note number 0 to 127 allowing you to easily play a melody with a single sample over a wide range KG Select Keygroup Select lets you select a specific Keygroup for editing This parameter works in conjunction with the No KG Numbers of Keygroups parameter in the Edit Layers section which lets you create up to 128 Keygroups within one Keygroup Program A default Keygroup Program contains only on...

Страница 62: ...s for the sample while Edit Layer parameters control the settings for each layer up to 4 Edit Layers Section Each pad can trigger up to four samples which are assigned in four individual layers Each layer has separate parameters for Sample Semi Fine Level Pan and Velocity Keygroup Programs also have a Root Note parameter Note For easier recognition Drum Program controls are colored in blue while K...

Страница 63: ...d while for example a range from 100 to 127 lets the layer respond only to higher velocity levels By assigning several samples of one instrument you can create a realistic sounding multi sample by adjusting the velocity ranges of each layer accordingly For example you may have three samples of a drum hit with low force medium force and high force You can set each sample to a layer and set the Velo...

Страница 64: ...y you can select All Keygroups for simultaneous editing Edit Zones only available in Drum Programs displays an overview of any selected pad s Click one of the checkboxes on the right to select how the selected pads will be edited In the software you can select pads directly in Program Edit Mode by clicking with your computer mouse On your MPC hardware you can select pads by striking them Current O...

Страница 65: ...k and Decay values as well as a medium low Sust value of the Filter Envelope This will start a sound with the filter opened and close it shortly afterward giving it a bright start followed by a darker sustain String sounds on the other hand can sound much more alive with low Env settings and a high Atk value resulting in a slight fade in of the higher frequencies The Modulation Sources set the amo...

Страница 66: ...ecked or AHDS unchecked For Keygroup Programs the software offers only AHDS envelopes With AHDS envelopes the following happens when you trigger a sample 1 Within the period of time you have defined with the Attack Atk parameter the sample volume rises to its maximum value 2 The sample s maximum volume will be maintained during the Hold phase 3 During the Decay phase the sample s volume will gradu...

Страница 67: ...The pad will switch between layers depending on how hard you hit a pad Random Ran Each time the pad is played it will play one its layer s samples at random Sample Play determines how much of the sample is played Note On only as long as the note is held One Shot The entire sample will play from start to end Use this when you want to play short sounds Note On The sample will play only as long as th...

Страница 68: ...ed for smooth modulations Sine best suited for smooth modulations Square interesting results with hard panning modulations Saw can generate interesting filter or volume changes Saw Down can generate interesting filter or volume changes Noise generates random values and glides S H samples a random value and holds it until the next value is generated Rate determines the LFO frequency when Sync is on...

Страница 69: ...effects for each pad You can use various effects included in your MPC software as well as other VST and AU plugins installed on your computer Tip A list of all available MPC software effects and their parameters is in the Effects and Parameters chapter of the Appendix In the software load a pad insert effect by following these steps 1 Click the button in the upper right of the panel of the panel s...

Страница 70: ...ary knob for editing We recommend editing a virtual instrument by using its own graphical user interface though To assign a parameter to one of the controls click the drop down menu above the corresponding controller and select it from the drop down menu In this way you can easily set up arrangements of 16 knobs to be controlled by your MPC hardware You can use Program Edit Mode to directly edit a...

Страница 71: ...ams this mode shows a channel strip for one channel only For more general information on how these Programs differ please see the Program Types section In the software click the Program Mixer tab in the Mode Tab Section Program Mixer Mode works like a regular audio mixer and offers various settings for each channel All channels functionality is identical If a sample has been assigned to a pad its ...

Страница 72: ...nnel s Mute button M to mute it To view more mixer channels use the scroll bar under the channel faders at the bottom of the window Insert Effects Tip See the Effects chapter to learn more about how insert and send effects work in the software To load and edit pad insert effects 1 In the software click the Program Mixer tab in the Mode Tab Section 2 Click the desired pad s channel s Inserts button...

Страница 73: ...e In the software click the Next Seq tab in the Mode Tab Section Triggering Sequences During playback select a Sequence to play next simply by hitting the corresponding pad The number and name of the selected Sequence will be displayed in the timeline in the upper half of the window Use the controls in the Pad Bank Section and Next Sequence Section to change or repeat Sequences in real time ...

Страница 74: ...pad will be green During playback change the next Sequence by clicking and holding the corresponding pad until the current Sequence ends If no other Sequence is selected the software will repeat the current Sequence indefinitely Hardware Every pad is assigned to a Sequence starting from Pad A01 with Sequence 1 and ascending from there Used Sequences are shown with their names unused Sequences are ...

Страница 75: ...elete the selected Sequence from the Sequence Playlist Click Hold to repeat playback of the current Sequence until you click it again This is useful for live performances to prolong the playing of a Sequence for example to respond to the audience When playback is stopped this section gives you the following options Copy to Song opens a drop down menu to select a Song the Sequence playlist is copie...

Страница 76: ... two main parts the Waveform Display which shows the waveform of a sample after the recording process the Record Control section which includes the controls Important To record audio you need to connect an audio source to your computer s audio interface In the software click the Sample Record tab in the Mode Tab Section ...

Страница 77: ...e entire waveform of your recorded sample with a timeline at the top While this is just for reference during in Sample Record Mode it s the focus of Sample Edit Mode Please see the Sample Edit Mode section to learn about editing your recorded samples ...

Страница 78: ... Set this parameter to an appropriate level using the level meter Use Q Link Knobs Q3 and Q4 to define the maximum sampling time You can record up to 20 minutes and 59 seconds We recommend setting these to values that roughly match your estimated recording duration Click the Reset Peak button to reset the peak hold which shows the highest level of your input signal as a red bar within the level me...

Страница 79: ...ut monitoring is on the audio you hear in your headphones will be taken before it reaches the software ensuring zero latency When input monitoring is off the audio you hear in your headphones will be taken after it is processed in the software so there may be some latency but you will hear the audio source as it sounds in the recording Click the Input Monitor button to control the incoming audio s...

Страница 80: ...d field to select a pad to assign the sample to Click and drag the Root Note field to set where the sample s original pitch will be on the keyboard To save the sample click Keep To delete the recording and try again click Retry To listen to the sample before deciding click Play Tip We recommend editing your recorded sample in Sample Edit Mode Project Information Section This section is identical t...

Страница 81: ...aveform Display You can also right click a sample in the Project Information section and select Edit You can select a sample this way in any mode that shows the Project Information section When selecting a sample for editing the mode will change automatically to Sample Edit Mode The upper half of the window is the Waveform Display The lower half contains the editing controls Sample Edit Mode can w...

Страница 82: ...r Command Mac OS X and double click the shaded rectangle in the overview Alternatively you can use the slider in the lower right corner of the Waveform Display In the main Waveform Display a start point and end point are marked by green lines These two points define the portion of the sample data which will be played Click and drag either of these lines to move it The most recently moved line will...

Страница 83: ... number the more precise the adjustment of the start point To adjust the end point of the sample use Q Link Knobs Q14 Q10 Q6 or Q2 The smaller the Q Link Knob number the more precise the adjustment of the end point To adjust the loop point of the sample use Q Link Knobs Q15 Q11 Q7 or Q3 The smaller the Q Link Knob number the more precise the adjustment of the loop point Alternatively you can adjus...

Страница 84: ...t point is set to 0 nothing will be played Play From Start Pad 11 plays the sample from the start point to the end of the sample regardless of the end point If the start point is identical to the end point nothing will be played Play To Loop Start Pad 06 plays the sample portion before the loop point Play From Loop Start Pad 07 plays the sample from the loop start point to the end of the sample re...

Страница 85: ...Zero activates the snap to zero function For easier sample editing the software will force you to place a start point or end point only at zero crossings This can help to avoid clicks and glitches when playing a sample Tune lets you transpose the sample based on its original pitch The value range is two octaves up or down in semitone steps Root Note lets you select a root note for the sample The r...

Страница 86: ...een the start point and end point and closes the gap between them Silence replaces the part of the sample between the start point and end point with silence Extract deletes parts of the sample before the start point and after the end point and saves it as a new sample with a name you enter in your current Project Tip This is useful if you recorded a drum loop and wanted to remove just a snare drum...

Страница 87: ...ent pitches You can enter the original tempo of the sample and the desired tempo after processing Tip To change the sample length in percent set the original tempo to 100 and then set the new tempo to the desired percentage e g to lengthen the sample by 20 set the original tempo to 100 and set the new tempo to 80 Gain Change raises or lowers the volume of the sample You can adjust it up to 18dB hi...

Страница 88: ...them into Programs first Chop Mode This section describes several functions unique to Chop Mode in contrast to Trim Mode In Chop Mode the sample will be divided into multiple regions called slices There are three different ways to use this function Region divides a sample into several regions of equal length BPM divides a sample into several regions based on the tempo beats per minute Threshold us...

Страница 89: ...er of beats in BPM Mode This Q Link Knob has no function in Threshold Mode or Region Mode Use Q Link Knob Q4 to set the time signature in BPM Mode This Q Link Knob has no function in Threshold Mode or Region Mode Note Depending on the Chop Mode Threshold Regions or BPM the Q Link Knob section offers different parameters for editing for the Q Link Knobs Q12 Q8 and Q4 Pad Section in Chop Mode In Cho...

Страница 90: ...eform Display to create an end point there Remember that the end point of a slice is also the start point of the next slice Snap to Zero activates the snap to zero function For easier sample editing the software will force you to place a start point or end point only at zero crossings This can help to avoid clicks and glitches when playing a sample When Audition is activated you can use the pads c...

Страница 91: ...re loop BPM divides a sample into several regions of equal length based on its length and the current tempo beats per minute Click and drag the Bars field up or down to set how many bars are in the sample Click and drag the Beat field up or down to set how many beats are in each bar Click and drag the Time Div field up or down to set a note division the slice markers will be placed according to th...

Страница 92: ...s from the slices of the current sample If Crop Samples is activated each slice results in a new sample If Create New Program is activated you will create a new Program in which each slice results in a sample and is automatically assigned to a pad If Create New Program is selected you also get the option to Create Events If Create Events is activated available only when Create New Program is activ...

Страница 93: ... is also extracted as a new sample Click Program to specify a Program to which you want to add the assigned slice The sample will be named with pp attached to its original name Sequence with events after using the Sliced Sample Create Events function Project Information in Chop Mode This section is identical to the Project Information in Trim Mode ...

Страница 94: ...can edit the structure of a Song during playback for easy on the fly composing A Project can contain up to 32 Songs each consisting of up to 999 steps each of which can have an assigned Sequence as well as the number of times that Sequence will repeat In the software click the Song tab in the Mode Tab Section ...

Страница 95: ...n replace Sequences by dragging a Sequence directly over another The Step column indicates which step of the Song it is Each Song can contain up to 999 steps The Sequence column shows the name of the Song s Sequences Click a Sequence to open a drop down menu where you can exchange the Sequence with another one The Repeats Rpts column lets you define how often a Sequence is going to be repeated Nor...

Страница 96: ...he window if you prefer working in a horizontal arrangement You can insert Sequences between existing Sequences or you can replace Sequences by dragging a Sequence directly over another Song Section This section lets you name or select a Song or execute other operations that affect the Song Click the Song drop down menu to name the Song You can also click the downward arrow T to the right of the S...

Страница 97: ... where in the Song the step ends before moving onto the next step Total Bars indicates how many bars the step occupies in the Song this accounts for how many times the step s Sequence repeats Repeats indicates how many times the step s Sequence plays Time Sig indicates the Sequence s time signature BPM indicates the Sequence s tempo in beats per minute Tip To learn more about creating Songs please...

Страница 98: ...te button in the Mute Section to activate it 2 Click the desired bank A H in the Bank section or Pad Bank section 3 Click a pad in the Pad Bank section to mute or unmute its assigned sound Muted pads are lit red unmuted pads are lit yellow Alternatively you can click the the miniature pads in Bank section This section gives you an overview of all 128 pads at the same time Unused pads are grayed ou...

Страница 99: ...e pads in Bank section This section gives you an overview of all 128 pads at the same time Unused pads are grayed out 4 Click and drag the Pad __ field in the Mute Section up or down to select the desired Mute Group number When a pad in a Mute Group is selected the other pads in that same Mute Group will blink yellow Time Correct lets you quantize Pad Mutes This is useful when you want your mutes ...

Страница 100: ...f the current Sequence The lower half of the window has various controls that are also available in other modes like Main Mode Please see the Main Mode section for more information about the Q Link Knob Section the Sequence Section or the Project Information Section The only difference is the Pad Section which you use to enter note events as you would with a traditional step sequencer This can be ...

Страница 101: ...s to select the bar whose steps you want to edit You can also click the Current Bar field and enter the number using your computer keyboard 3 Each pad represents a step in the bar Keep in mind that the number of steps depends on the Time Correct setting which you can set in the Sequence Section For time divisions larger than 16 e g 32 the bar s steps will be represented by multiple pad banks Use t...

Страница 102: ...ou make in MIDI Control Mode will be retained with the current MPC Essentials Project If you want to use the same control map for all of your Projects we recommend saving your control map in your template file See the Preferences Auto Load Save Tab part of the General Features chapter for more information about template files In your software click the MIDI Control tab in the Mode Tab Section The ...

Страница 103: ...ED will always be off o When set to MIDI Input the LED will light up when the software receives a MIDI message that matches that control o When set to Local the LED will light up when you press the pad or button and or MIDI input is received MIDI Channel all controls This deteremines over which MIDI channel from 1 to 16 the pad or button will send MIDI messages to the software CC Number buttons on...

Страница 104: ...s multiple pads the aftertouch message each pads sends will be independent from the others 3 When you have set all of the parameters as desired you can select another control or enter another mode Remember The edits you make in MIDI Control Mode will be retained with the current MPC Essentials Project If you want to use the same control map for all of your Projects we recommend saving your control...

Страница 105: ...ion of each and their editable parameters Pad Effects In a Program each pad can have up to four insert effects applied to it This is done in Program Mixer Mode where each channel represents a pad To load and edit pad insert effects 1 In the software click the Program Mixer tab in the Mode Tab Section 2 Click the desired pad s channel s Route button 3 Click the button next to Inserts so it says On ...

Страница 106: ...s in the same folder Software Menus The MPC plugin doesn t offer a top menu like in the standalone application The menu button is located to the left of the Main Mode tab Audio Input and Output Your audio input and output are set in your host application rather than in MPC Essentials MPC Essentials s Preferences will not have the Audio tab MIDI Ports All MIDI Out ports will be assigned to your dig...

Страница 107: ...xt or previous instance of the MPC Essentials plugin Unselected MPC Essentials plugin windows will be grayed out A Seq Sync button will appear at the bottom of the software window with three settings o When the active instance of MPC Essentials is set to Master if you switch to another Sequence when in Next Sequence Mode all other instances will change Sequences as well The inactive instances Seq ...

Страница 108: ... events Click background to switch to Eraser Tool Click and drag selected events without snapping to grid Click events to add to current selection Click events to send to back Real time Automation Pencil Tool Fine edit value of selected events Click background to switch to Eraser Tool Click and drag selected events with no time constraints Click and drag selected events without snapping to grid NT...

Страница 109: ... Preferences Control Command Edit Menu Function Control Windows Command Mac OS X Undo Control Z Command Z Redo Control Y Shift Z Cut Control X Command X Copy Control C Command C Paste Control V Command V Duplicate Control D Command D Miscellaneous Function Control Windows Command Mac OS X Select All Control A Command A Play Space Shift Space Shift Play from Start Space Space ...

Страница 110: ...es will be affected by the current tempo In the graphic user interface for these effects a next to the time division indicates a triplet based rate Reverbs Reverb Small This is a spatial effect designed to emulate a small room Parameter Value Range Default Value Q Link Knob Number Dry Wet 0 dry 100 wet 50 Q13 Pre Delay 1 100 50 Q9 Early Reflection 0 100 50 Q5 Density 0 100 50 Q1 Diffuse 0 100 50 Q...

Страница 111: ...Density 0 100 50 Q1 Diffuse 0 100 50 Q14 Decay 0 100 50 Q10 Lo Cut 0 100 15 Q6 Hi Cut 0 100 10 Q2 Reverb Large This is a spatial effect designed to emulate the sound of a large hall Parameter Value Range Default Value Q Link Knob Number Dry Wet 0 dry 100 wet 50 Q13 Pre Delay 1 100 50 Q9 Early Reflection 0 100 50 Q5 Density 0 100 50 Q1 Diffuse 0 100 50 Q14 Decay 0 100 75 Q10 Lo Cut 0 100 10 Q6 Hi C...

Страница 112: ...ulating the sound of a large hall Parameter Value Range Default Value Q Link Knob Number Dry Wet 0 dry 100 wet 50 Q13 Pre Delay 1 100 50 Q9 Early Reflection 0 100 50 Q5 Density 0 100 50 Q1 Diffuse 0 100 50 Q14 Decay 0 100 75 Q10 Lo Cut 0 100 10 Q6 Hi Cut 0 100 10 Q2 ...

Страница 113: ...nput drops below the level set in the Gate In parameter Parameter Value Range Default Value Q Link Knob Number Dry Wet 0 dry 100 wet 50 Q13 Pre Delay 1 100 50 Q9 Early Reflection 0 100 50 Q5 Density 0 100 50 Q1 Diffuse 0 100 50 Q14 Decay 0 100 75 Q10 Lo Cut 0 100 15 Q6 Hi Cut 0 100 10 Q2 Gate In 0 100 0 Q15 ...

Страница 114: ...output drops below the level set in the Gate Out parameter Parameter Value Range Default Value Q Link Knob Number Dry Wet 0 dry 100 wet 50 Q13 Pre Delay 1 100 50 Q9 Early Reflection 0 100 50 Q5 Density 0 100 50 Q1 Diffuse 0 100 50 Q14 Decay 0 100 75 Q10 Lo Cut 0 100 10 Q6 Hi Cut 0 100 10 Q2 Gate Out 0 100 0 Q15 ...

Страница 115: ... Mono Parameter Value Range Default Value Q Link Knob Number Dry Wet 0 dry 100 wet 50 Q13 Time 2 2000 ms 100 Q9 Feedback 0 100 25 Q5 Damping 0 100 100 Q1 Delay Mono Sync Parameter Value Range Default Value Q Link Knob Number Dry Wet 0 dry 100 wet 50 Q13 Time 1 bar 1 16 triplets 1 4 Q9 Feedback 0 100 25 Q5 Damping 0 100 100 Q1 ...

Страница 116: ...er Dry Wet 0 dry 100 wet 50 Q13 Time 2 2000 ms 100 Q9 Feedback 0 100 25 Q5 Damping 0 100 100 Q1 Delay Sync Stereo Stereo Delay operates similarly to Mono Delay but in true stereo Parameter Value Range Default Value Q Link Knob Number Dry Wet 0 dry 100 wet 50 Q13 Time 1 bar 1 16 triplets 1 4 Q9 Feedback 0 100 25 Q5 Damping 0 100 100 Q1 ...

Страница 117: ...ry 100 wet 50 Q13 Time 2 2000 ms 500 Q9 Feedback 0 100 50 Q5 Cutoff 0 100 50 Q1 Resonance 0 100 20 Q14 Delay HP HP Delay is identical to the Mono Delay but it uses a resonant high pass filter in the delay line Parameter Value Range Default Value Q Link Knob Number Dry Wet 0 dry 100 wet 50 Q13 Time 2 2000 ms 100 Q9 Feedback 0 100 50 Q5 Cutoff 0 100 33 Q1 Resonance 0 100 33 Q14 ...

Страница 118: ...nk Knob Number Dry Wet 0 dry 100 wet 50 Q13 Time 2 2000 ms 100 Q9 Feedback 0 100 25 Q5 Delay Analog Sync Analog Delay is similar to Mono Delay except that it s designed to sound like an analog Bucket Brigade style delay This delay has a unique character to it that gives a warmer sound by adding subtle inaccuracies in phase and timing Parameter Value Range Default Value Q Link Knob Number Dry Wet 0...

Страница 119: ...t 50 Q13 Time 1 bar 1 16 triplets 1 4 Q9 Feedback 0 100 50 Q5 Ramp 0 100 50 Q1 Head 1 0 100 100 Q14 Head 2 0 100 0 Q10 Head 3 0 100 0 Q6 Head 4 0 100 0 Q2 Tone 0 100 50 Q15 Spread 0 100 50 Q11 Wow Flutter 0 100 50 Q7 Delay Ping Pong This stereo delay allows you to set different delay times for its left and right repeats Parameter Value Range Default Value Q Link Knob Number Dry Wet 0 dry 100 wet 5...

Страница 120: ...stereo position Parameter Value Range Default Value Q Link Knob Number Dry Wet 0 dry 100 wet 50 Q13 Time 1 2 2000 ms 100 Q9 Time 2 2 2000 ms 100 Q5 Time 3 2 2000 ms 100 Q1 Feedback 0 100 25 Q14 Pan 1 0 100 50 Q10 Pan 2 0 100 50 Q6 Pan 3 0 100 50 Q2 Damping 0 100 100 Q15 Gain 1 0 100 25 Q11 Gain 2 0 100 25 Q7 Gain 3 0 100 25 Q3 ...

Страница 121: ...sound while faster rates result in more of a warble Flanger Parameter Value Range Default Value Q Link Knob Number Dry Wet 0 dry 100 wet 100 Q13 Rate 0 100 10 Q9 Feedback 100 100 0 Q5 Delay 0 100 20 Q1 Width 0 100 80 Q14 Flanger Sync Parameter Value Range Default Value Q Link Knob Number Dry Wet 0 dry 100 wet 100 Q13 Rate 8 bars 1 16 triplets 1 4 Q9 Feedback 100 100 0 Q5 Delay 0 100 20 Q1 Width 0 ...

Страница 122: ...h for more pronounced shimmering and watery sounds Chorus 2 Voice Parameter Value Range Default Value Q Link Knob Number Dry Wet 0 dry 100 wet 100 Q13 Delay 0 100 20 Q9 Amount 0 100 80 Q5 Width 0 100 80 Q1 Feedback 0 100 50 Q14 Rate 0 100 10 Q10 Chorus 4 Voice Parameter Value Range Default Value Q Link Knob Number Dry Wet 0 dry 100 wet 100 Q13 Delay 0 100 20 Q9 Amount 0 100 80 Q5 Width 0 100 80 Q1...

Страница 123: ...across the stereo field creating a rotary effect Autopan Parameter Value Range Default Value Q Link Knob Number Dry Wet 0 dry 100 wet 100 Q13 Rate 0 100 10 Q9 Autopan Sync Parameter Value Range Default Value Q Link Knob Number Dry Wet 0 dry 100 wet 100 Q13 Rate 8 bars 1 32 1 4 Q9 ...

Страница 124: ...ve or a stuttering on off effect square wave Tremolo Parameter Value Range Default Value Q Link Knob Number Dry Wet 0 dry 100 wet 100 Q13 Rate 0 100 10 Q9 Sine to Square 0 sine 100 square 0 Q5 Tremolo Sync Parameter Value Range Default Value Q Link Knob Number Dry Wet 0 dry 100 wet 100 Q13 Rate 1 bar 1 16 triplets 1 4 Q9 Sine to Square 0 sine 100 square 0 Q5 ...

Страница 125: ...ly modulated by an LFO to create a sweeping sound Phaser 1 Parameter Value Range Default Value Q Link Knob Number Dry Wet 0 dry 100 wet 100 Q13 Rate 0 100 10 Q9 Phaser 2 Parameter Value Range Default Value Q Link Knob Number Dry Wet 0 dry 100 wet 100 Q13 Rate 0 100 10 Q9 Phaser Sync Parameter Value Range Default Value Q Link Knob Number Dry Wet 0 dry 100 wet 100 Q13 Rate 1 bar 1 16 triplets 1 4 Q9...

Страница 126: ...er Frequency 10 19999 Hz 1500 Q13 Resonance 0 100 0 Q9 HP Filter Sweep This effect is a high pass filter with its cutoff frequency modulated by an LFO Parameter Value Range Default Value Q Link Knob Number Dry Wet 0 dry 100 wet 80 Q13 Low Frequency 0 100 50 Q9 High Frequency 0 100 100 Q5 Resonance 0 100 33 Q1 Rate 0 100 10 Q14 ...

Страница 127: ...et 100 Q13 Low Frequency 0 100 0 Q9 High Frequency 0 100 100 Q5 Resonance 0 100 50 Q1 Rate 8 bars 1 32 1 4 Q14 HP Shelving Filter This filter differs from the standard filter type as it attenuates all frequencies after the cutoff point equally Parameter Value Range Default Value Q Link Knob Number Frequency 10 19999 Hz 1500 Q13 Resonance 0 100 0 Q9 Gain 18 0 18 0 dB 0 0 Q5 ...

Страница 128: ...ber Frequency 10 19999 Hz 1500 Q13 Resonance 0 100 0 Q9 LP Filter Sweep This effect is a low pass filter with its cutoff frequency modulated by an LFO Parameter Value Range Default Value Q Link Knob Number Dry Wet 0 dry 100 wet 80 Q13 Low Frequency 0 100 0 Q9 High Frequency 0 100 100 Q5 Resonance 0 100 33 Q1 Rate 0 100 10 Q14 ...

Страница 129: ...t 100 Q13 Low Frequency 0 100 0 Q9 High Frequency 0 100 100 Q5 Resonance 0 100 50 Q1 Rate 8 bars 1 32 1 4 Q14 LP Shelving Filter This filter differs from the standard filter type as it attenuates all frequencies after the cutoff point equally Parameter Value Range Default Value Q Link Knob Number Frequency 10 19999 Hz 1500 Q13 Resonance 0 100 0 Q9 Gain 18 0 18 0 dB 0 0 Q5 ...

Страница 130: ...Parameter Value Range Default Value Q Link Knob Number Low Frequency 22 1000 Hz 220 Q13 Frequency 1 82 3900 Hz 820 Q9 Frequency 2 220 10000 Hz 2200 Q5 High Frequency 560 19999 Hz 5600 Q1 Q1 0 100 0 Q14 Q2 0 100 0 Q10 Low Gain 18 0 18 0 dB 0 0 Q15 Gain 1 18 0 18 0 dB 0 0 Q11 Gain 2 18 0 18 0 dB 0 0 Q7 High Gain 18 0 18 0 dB 0 0 Q3 ...

Страница 131: ...fault Value Q Link Knob Number Low Frequency 22 1000 Hz 220 Q13 Frequency 1 82 3900 Hz 820 Q9 Frequency 2 220 10000 Hz 2200 Q5 High Frequency 560 19999 Hz 5600 Q1 Q1 0 100 5 Q14 Q2 0 100 5 Q10 Q3 0 100 5 Q6 Q4 0 100 5 Q2 Gain 1 18 0 18 0 dB 0 0 Q15 Gain 1 18 0 18 0 dB 0 0 Q11 Gain 2 18 0 18 0 dB 0 0 Q7 Gain 4 18 0 18 0 dB 0 0 Q3 ...

Страница 132: ...0 100 50 Q5 Dynamics 0 100 50 Q1 Output 0 100 50 Q14 Distortion Fuzz This popular effect uses hard clipping of the audio signal which at extreme settings can turn a standard waveform into a square wave producing a razor effect Parameter Value Range Default Value Q Link Knob Number Dry Wet 0 dry 100 wet 100 Q13 Drive 0 100 50 Q9 Output 0 100 50 Q5 Low 0 100 50 Q14 Low Mid 0 100 50 Q10 High Mid 0 10...

Страница 133: ... 100 50 Q9 Grime 0 100 50 Q5 Center 0 100 50 Q1 Width 0 100 50 Q14 Resonance 0 100 50 Q10 Output 0 100 50 Q6 Distortion Overdrive This distortion is designed to sound like a mildly distorting amplifier at medium volumes It is the smoothest distortion type available Parameter Value Range Default Value Q Link Knob Number Dry Wet 0 dry 100 wet 100 Q13 Drive 0 100 50 Q9 Tone 0 100 50 Q5 Output 0 100 5...

Страница 134: ...nge of useable sounds Parameter Value Range Default Value Q Link Knob Number Dry Wet 0 dry 100 wet 100 Q13 Drive 0 100 50 Q9 Soft 5 75 2 Q14 Clip 5 50 25 Q10 Soft 5 75 2 Q6 Clip 5 50 25 Q2 Low 18 0 18 0 dB 0 0 Q15 Mid 18 0 18 0 dB 0 0 Q11 High 18 0 18 0 dB 0 0 Q7 Output 18 0 18 0 dB 50 Q3 ...

Страница 135: ...ressor Master This is the most transparent compressor able to perform substantial volume adjustments without artifacts Parameter Value Range Default Value Q Link Knob Number Dry Wet 0 dry 100 wet 100 Q13 Attack 0 100 50 Q9 Release 0 100 50 Q5 Threshold 50 0 dB 0 Q1 Ratio 1 20 1 Q14 Oldskool Off On Off Q10 Output 6 24 dB 0 Q6 ...

Страница 136: ...of the input signal These compressors are usually associated with soft and unobtrusive attack and release characteristics Parameter Value Range Default Value Q Link Knob Number Dry Wet 0 dry 100 wet 100 Q13 Input 6 18 dB 0 Q9 Attack 0 100 50 Q5 Release 0 100 50 Q1 Threshold 50 0 dB 0 Q14 Ratio 1 20 1 Q10 Knee 1 100 1 Q6 Output 6 24 dB 0 Q2 ...

Страница 137: ...A Compressor tends to have quicker attack and release times than an Opto Compressor Parameter Value Range Default Value Q Link Knob Number Dry Wet 0 dry 100 wet 100 Q13 Input 6 18 dB 0 Q9 Attack 0 100 50 Q5 Release 0 100 50 Q1 Threshold 50 0 dB 0 Q14 Ratio 1 20 1 Q10 Knee 1 100 1 Q6 Output 6 24 dB 0 Q2 ...

Страница 138: ...with their gentle yet pumping response and a dash of tube saturation Parameter Value Range Default Value Q Link Knob Number Dry Wet 0 dry 100 wet 100 Q13 Input 6 18 dB 0 Q9 Attack 0 100 50 Q5 Release 0 100 50 Q1 Threshold 50 0 dB 0 Q14 Ratio 1 20 1 Q10 Knee 1 100 1 Q6 Output 6 24 dB 0 Q2 ...

Страница 139: ... Knob Number Dry Wet 0 dry 100 wet 100 Q13 Decimate 0 100 0 Q9 Bit Reducer 4 32 32 Q5 Resampler Resampler is similar to Decimator in that it removes bits from an incoming signal The difference is that Resampler applies a complex suite of filters and anti aliasing to attempt to retain the original sound quality This is a method used by popular vintage samplers and sampling drum machines from the 19...

Страница 140: ...nd The envelope is triggered by the incoming signal s amplitude The amount of the envelope on the cutoff frequency is user definable Parameter Value Range Default Value Q Link Knob Number Dry Wet 0 dry 100 wet 100 Q13 Resonance 0 100 75 Q9 Attack 0 100 30 Q5 Release 0 100 30 Q1 Center 0 100 50 Q14 Sensitivity 0 100 50 Q10 ...

Страница 141: ...Range Default Value Q Link Knob Number Dry Wet 0 dry 100 wet 100 Q13 Frequency 1000 1000 0 Q9 Asynchrony 0 1000 0 Q5 A Pan 0 100 0 Q14 B Pan 0 100 100 Q10 A Gain 0 100 75 Q6 B Gain 0 100 75 Q2 Transient Shaper A transient shaper can be used to enhance or soften the Attack and Release phases of audio material Parameter Value Range Default Value Q Link Knob Number Dry Wet 0 dry 100 wet 100 Q13 Attac...

Страница 142: ...ameter This term describes the ascent rate of a time relevant process e g an envelope from its starting point to the point where it reaches its highest value The Attack phase is initiated immediately after a trigger signal is received e g after you play a note on a trigger pad or a keyboard Bit Rate Bit rate also known as Word Length is the number of bits used to store the level information of eac...

Страница 143: ...classic ADSR envelope consists of four individually variable phases Attack Decay Sustain and Release Attack Decay and Release are time or slope values while Sustain is an adjustable level Once an incoming trigger is received the envelope runs through the Attack and Decay phases until it reaches the programmed Sustain level This level remains constant until the trigger is terminated The envelope th...

Страница 144: ...ieve this a MIDI channel message is sent with each MIDI event MIDI Channel This is a very important element of most messages A receiver can only respond to incoming messages if its receive channel is set to the same channel as the one the sender is using to transmit data Subsequently the sender can address specific receivers individually MIDI Channels 1 through 16 are available for this purpose MI...

Страница 145: ...mple or more and spread it across two or more keys and play the sample chromatically over a keyboard That way there is no need to sample every key of for instance a piano Program Change These are MIDI messages that select sound Programs Program numbers 1 through 128 can be changed via program change messages Release An envelope parameter This term describes the descent rate of an envelope to its m...

Страница 146: ...you can compose on the software MIDI information from your MPC hardware s pads buttons and Q Link Knobs or an external keyboard are recorded to a Sequence The software can hold up to 128 separate Sequences at the same time The length of a Sequence can be set from 1 to 999 bars which would be enough to create an entire Song using only one Sequence However the software has a dedicated Song Mode that...

Страница 147: ... and VST are trademarks of Steinberg Media Technologies GmbH Mac and OS X are trademarks of Apple Inc registered in the U S and other countries Windows is a registered trademark of Microsoft Corporation in the United States and other countries All other product or company names are trademarks or registered trademarks of their respective owners ...

Страница 148: ...akaiprompc com ...

Отзывы: