background image

3

WARNING

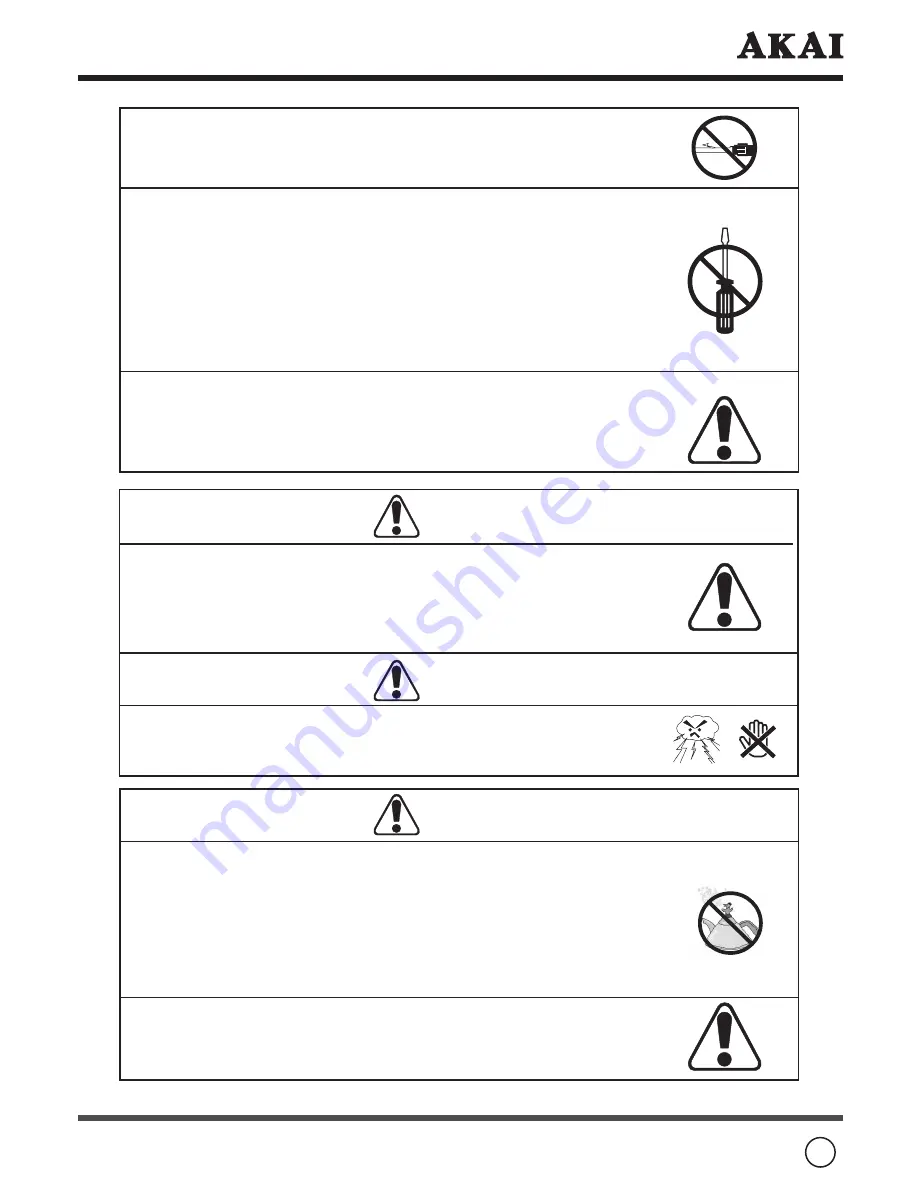
Avoid using dropped or damaged appliances:

If the product is dropped and the housing is damaged, the internal 

components may function abnormally. Unplug the connector 

immediately and contact the manufacturer for repair. Continuous use 

of the product may cause fire or electric shock.

WARNING

While it is thundering, do not touch the connecting cables or 

apparatus.

Never  block  or  cover  the  slots  or  openings  in  the TV  cabinet  back, 

bottom, and sides. Never place the TV:

-  on a bed, sofa, rug, or similar surface;

-  too close to drapes, curtains, or walls; or

-  in a confined space such as bookcase, built-in cabinet, or any    

  other place with poor ventilation.

The slots and openings are provided to protect the TV from 

overheating and to help maintain reliable operation of the TV.

Do not use the product if any abnormality occurs:

If any smoke or odor becomes apparent, unplug the connector 

and contact the manufacturer immediately. Do not try to repair 

the product by yourself.

Never use a damaged power cord:

Heavy objects, heat or tensile force may damage the power cord and 

cause fire or electric shock.

Do not install the product close to smoke or moisture:

Fire  or  electric  shock  may  be  caused  when  the  product  is  installed 

close to smoke or moisture.

Do not installed the product in an area with heavy dust or high 

humidity:

Fire or electric shock may be caused when the product is installed in 

a place with heavy dust or high humidity.

ATTENTION

Instructions for moving the product:

Ensure that the power connector and any other leads are unplugged 

before moving the product.

Содержание LCT2715

Страница 1: ......

Страница 2: ...e will not occur in a particular installation If this equipment does cause by turning the equipment off and on the user is encouraged to try to correct the interference by one or more of the following...

Страница 3: ...injury to the user Prohibition Warning Attention symbol indicating Electric Shock Never place TV on an unstable cart stand or table The TV may fall causing serious personal injury death or serious da...

Страница 4: ...d to protect the TV from overheating and to help maintain reliable operation of the TV Do not use the product if any abnormality occurs If any smoke or odor becomes apparent unplug the connector and c...

Страница 5: ...connector IMPORTANT SAFEGUARDS The power cable should be kept away from heat sources The heat produced by any heat source may melt the covering of the power cable Always make sure the antenna system...

Страница 6: ...dition In particular it may affect electronic equipment beyond the residential until where a LCD TV is used 3 The screen on this TV is manufactured from glass To prevent damage never strike the glass...

Страница 7: ...being walked on or pinched particularly at plugs convenience receptacles and the point where they exit from the apparatus 11 Only use attachments accessories speci ed by the manufacturer 12 Use only w...

Страница 8: ...4 2 Rear View 11 4 3 Remote Control 12 5 Connect Accessory Devices 15 6 Basic Operation 17 6 1 Power ON OFF 17 6 2 Selection of Input Mode 17 6 3 Other Function 17 6 4 Using the POP double window fea...

Страница 9: ...t is in good condition and that all standard accessories and items are included Whenever possible use the handles on the back of the Display for transport 1 2 Installation A speci ed technician from t...

Страница 10: ...P 1080i The Video module also provides one set of Stereo Audio output The TUNER Module The RF input terminal is for ANTENNA and CABLE TV channels 2 Power Management Function The machine provides an au...

Страница 11: ...ress and hold down either channels MENU Press to display the menu Press again to exit the menu SOURCE Press to cycle display TV AV S Video Component 1 Component 2 and VGA source menu When display the...

Страница 12: ...nent video outputs YPbPr YCbCr to the Y Pb Cb and Pr Cr jacks of the TV COMP1 COMPONENT1 YPbPr YCbCr AUDIO INPUT Connect the audio cable to device s audio L and R jacks and to the L and R audio jacks...

Страница 13: ...els press and hold down either channels MTS Press repeatedly to cycle through the Multi channel TV sound MTS options Mono Stereo and SAP Second Audio Program ENTER Press to move the on screen cursor T...

Страница 14: ...your viewing requirements Normal Full Wide1 Wide2 Wide3 4 3 No scale Panoramic and Normal When in POP mode it can select picture size is Full 4 3 and Normal P MODE Press repeatedly to cycle through t...

Страница 15: ...ONTROL CARE FOR REMOTE CONTROL Care For Remote Control Avoiding being spoiling by liquids Avoiding being dropped to the oor Always store the remote control at dry and normal room temperature place Rep...

Страница 16: ...Out to the TV Component L R jacks 3 Press POWER to turn on the TV Turn on external equipment also 4 Press SOURCE to select COMPONENT 1 or COMPONENT 2 signal source DVD or Set top box Red White Red Bl...

Страница 17: ...in channels 4 Press POWER to turn on the TV Turn on external equipment also 5 Press SOURCE to select AV or S VIDEO signal source Connecting AUDIO OUT jacks to a stereo ampli er Switch off TV and exter...

Страница 18: ...y turn itself off after approximately 15 minutes if no signal input When no signal is inputed for about 14 minutes A No signal and going to power down wording will appear You can press or button to PO...

Страница 19: ...nd press again to cancel and return to normal viewing ZOOM Press it repeatedly the size of image will change cycling in following sequence 2 times 4 times 8 times 16 times 32 times 1 32 times 1 16 tim...

Страница 20: ...2 To change the next programmed channels press number buttons 0 9 or CH CH Note a If the V CHIP feature is active and you try to watch a TV program that exceeds your set rating limits the program wil...

Страница 21: ...g Right Down Left Down Left Up Right Up Right Down Left Up Left Down Right Down Right Up OSD OPTION ADJUSTMENT To change Main or Sub sound When the red frame is displaying in main window the sound goe...

Страница 22: ...00 Darken Brighten Back Light Bright Middle Dark Adjust the balance of back light Saturation 0 100 Decrease Increase of color Hue 30 30 Decrease Increase Sharpness 0 7 Soften Sharpen Phase 0 31 Decrea...

Страница 23: ...e bright Press ENTER to con rm the adjustment and return Continued on next page Press MENU and then press or until the Video menu appears Press or to highlight the item Press ENTER to con rm and displ...

Страница 24: ...Press ENTER to con rm the adjustment Press to return Continued on next page Press MENU and then press or until the Video menu appears Press or to highlight the item Press ENTER to con rm and display a...

Страница 25: ...make image more red Press ENTER to con rm the adjustment and return Continued on next page Press MENU and then press or until the Video menu appears Press or to highlight the item Press ENTER to con r...

Страница 26: ...m the adjustment and return Note This is a feature just used for YPbPr input source Continued on next page Press MENU and then press or until the Video menu appears Press or to highlight the item Pres...

Страница 27: ...em Status Description DNR Off Low Middle Strong Selecting to control the sharpness and noise reduction White Peak Limitator On Off Select On to limit the white peak CTI Low Middle Strong Off Select dy...

Страница 28: ...o Menu Continued on next page Press MENU and then press or until the Audio menu appears Press or to highlight the item Press ENTER to con rm and display a status bar as below Press to decrease the Bas...

Страница 29: ...press or until the Audio menu appears Press or to highlight the item Press ENTER to confirm Press or to select On or Off Press ENTER to con rm your selection Press to return OSD FUNCTIONS AUDIO MENU...

Страница 30: ...eous Menu Continued on next page Option Press Description Language English Fran ais Espa ol Select the OSD language Closed Caption C1 C2 C3 C4 T1 T2 T3 T4 Off To select Captions or Text V Chip Enter t...

Страница 31: ...k 53 12 Sunny London 51 11 Cloudy HongKong 80 25 Clear Note If text is not available in your area a black rectangle may appear on screen If this happens turn off the Closed Caption feature Hot keys Yo...

Страница 32: ...ss ENTER to confirm The V Chip menu includes the V Chip Control Block MPAA Rating and Block TV Rating functions You can use these functions after entering the correct PIN code Entering the PIN code Bl...

Страница 33: ...menu again then entering the PIN code or press or move cursor to Cancel and press ENTER button to close up this menu Continued on next page OSD FUNCTIONS MISCELLANEOUS MENU Using the V Chip Control i...

Страница 34: ...d Under 17 requires accompanying parent or adult guardian NC 17 Not intended for anyone 17 and under X X rated For adults only Press MENU button to exit the sub menu The movie block you can lock are d...

Страница 35: ...ropriate for all children TV Y7 Directed to Older Children This program is designed for children age 7 and above Note Programs in which fantasy violence may be more intense or more combative than othe...

Страница 36: ...o con rm The Parental menu includes the Channel Lock Video Lock Change Password and Block TV Rating functions You can use these functions after entering the correct PIN code Entering the PIN code Bloc...

Страница 37: ...mponent 1 Component 2 VGA Use Input Source and ENTER buttons to select the Video you desired to lock Change Password Enter a new 4 digit code by using the number keys on the remote and then con rm the...

Страница 38: ...your selection Press to return Selection of Blue Mute Press MENU and then press or until the Misc menu appears Press or to highlight the item Press ENTER to confirm it will reset to restore factory d...

Страница 39: ...he channel name Note TV menu is only for TV input source mode thus it is not available in other input source mode The locked channel will be skipped during the searching Continued on next page Using t...

Страница 40: ...there is a the channel Press ENTER to toggle the channel will be skipped or not Press to return Using the Channel Skip Press MENU and then press or until the TV menu appears Press or to highlight the...

Страница 41: ...o this menu It is not available in other input source mode Contrast Brightness can be adjusted only if picture mode is in USER mode When smart picture mode is pre set the value of the above settings w...

Страница 42: ...ht Middle or Dark for the balance of back light Press ENTER to con rm the adjustment Press to return Using Auto Setting Press MENU and then press or until the Geometric menu appears Press or to highli...

Страница 43: ...u appears Press or to highlight the item Press ENTER to con rm and display a status bar as below Press to decrease and press to increase it Press ENTER to con rm and return Continued on next page OSD...

Страница 44: ...ssing excluding the skipped channels Press number buttons 0 9 to select the corresponding channel content If the channel number is bigger than 9 just press the two number buttons successively If the c...

Страница 45: ...lors R G B each 256 scales Gray Scale 256 R G B each 8 bit Brightness Peak Value 550cd m2 Typical Contrast Dark Room 1000 1 Typical TV System NTSC M Sound Mono Stereo SAP BTSC Sound Effect Spatial Eff...

Страница 46: ...08 28 32 6 800 x 600 35 16 56 25 36 00 7 800 x 600 37 90 60 32 40 00 8 800 x 600 46 90 75 00 49 50 9 800 x 600 48 08 72 19 50 00 10 832 x 624 49 00 75 00 57 27 11 1024 x 768 48 40 60 00 65 00 12 1024...

Страница 47: ...ry cloth after cleaning 3 Cleaning of Screen Use a soft cotton cloth to clean the screen gently The screen glass is very fragile so do not scrape it with any sharp object Do not press or tap the scree...

Страница 48: ...appear on the screen Check that there is no emitter sources Car HV cable or Neon lamp or other possible interference sources Image color or quality deteriorates Check that all the video settings are a...

Страница 49: ......

Отзывы: