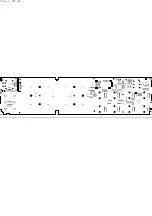
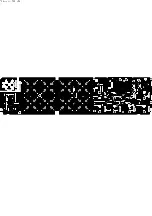
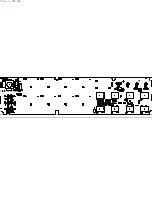
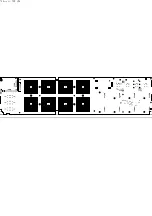
background image

2

PLAD2001

POLY FOAM(L)

1

2

PLAD2002

POLY FOAM(R)

1

1

PT15106258

Stick(Black)

1

3

1

PT1510631404

Button(6)(Laser etched)

1

6

2

PT15106314

Knob

1

3

PMPA758

0.013

1

PT1510631504

Button(4)(Laser etched)

1

15

2

PT15106315

Knob

1

3

PMPA758

0.011

1

PT15106333

KNOB

8

14

1

PT153008301

TOP Housing(PPAINTING)

1

4

2

PT1530083

TOP Housing(White)

1

3

PMTN6097B

Powder(ABS 707)

0.141

4

PM-PA-707

ABS(PA-707)

0.141

1

PT1530371

Bottom Housing(Black)

1

11

2

PM-757GJ08

Black Resin

0.238

1

RU1504408

Rubber(Black)

1

1

1

RU1510678

RUBBER PAD(CO-MOLD)

1

16

1

SC2310FBBI

Screw M2.3*10 PFB Tapping

1

2

1

SC2608PBBI

Screw

33

8

1

TWPC19A00801

Main PCB overall assembly

1

2

OTEO012832DWPP

OLED 30*11.5*1.4mm 128*32 Dots white (No

1

(J1)

 Distinguish)

2

PT15044129

OLED Holder

1

(J1)

2

TWPC19A00801T

Main PCB SMT/AI overall assembly

1

-

3

PC19A008

Main PCB 2-Layer FR-4 306x75.2mm 1.6t

1

-

 ENIG

3

TWPC19A008A01T

Main PCB SMT/AI assembly

1

-

4

AA822748X

Diode BAV99

1

D2

4

AL2-51-4401

Transistor 2N4401 NPN SOT-23 (Transistor

1

Q4

 MMBT4401LT1 NPN SOT-23)

4

AL2-51-4403

Transistor 2N4403 PNP SOT-23

1

Q2

4

CS101J5003NPO

CCAP SMD 100pF/50V 5% 0603 NPO

40

C55~C58,C60~C64,C66~C68,C71~C98

4

CS102K5003X7R

CCAP SMD 1nF/50V 10% 0603 X7R

3

C13,C14,C15

4

CS103K5003X7R

CCAP SMD 0.01uF/50V 10% 0603 X7R

3

C11,C12,C35

4

CS104K5003X7R

CCAP SMD 0.1uF/50V 10% 0603 X7R

18

C2,C4~C10,C24,C29~C33,C37,C44~C46

4

CS105K1603X5R

CCAP SMD 1uF/16V 10% 0603 X5R

5

C3,C18,C21,C22,C23

4

CS180J5003NPO

CCAP SMD 18pF/50V 5% 0603 NPO

2

C26,C28

4

CS225K1603X5R

CCAP SMD 2.2uF/16V 10% 0603 X5R

2

C25,C27

4

CS471J5003NPO

CCAP SMD 470pF/50V 5% 0603 NPO

3

C34,C50,C52

4

DIEN1N4148WSM

HF Diode 1N4148 SOD123 SMD

11

D4~D14

4

DITVSNUP2201SM

Transient Voltage Suppressol Diode

1

D1

1MR6 TSOP-6

4

ECS22616B

Capacitor Electrolytic 22uF/16V B type

1

EC2

MD

4

ECS47606B

ECAP 47uF/6.3V 4*5.3mm SMD

1

EC1

4

FCN1T0501502

FCN Down Touch ZIF SMD Pitch:0.5mm 15P

1

J1

4

FCN2T1001601

FCN Dual Touch 180° SMD Pitch:1.0mm 16P

1

FCN1

4

ICCD74HC4051PWR

IC CD74HC4051PWR TSSOP-16

3

IC4,IC5,IC6

4

ICLMV321IDCKR

IC LMV321IDCKR Operational Amplifiers

1

IC3

 SOT-23-5

4

ICTLV75733PDBVR

IC LDO TLV75733PDBVR SOT-23-5

1

IC1

4

ICU74HC595AGS16

IC U74HC595AG-S16-R SOP-16

3

IC7,IC8,IC9

4

ICYH108M07

IC(ICSTM32FProgram) LQFP

1

IC2

5

ICSTM32F070RBT6

IC STM32F070RBT6 LQFP-64

1

(IC2)

4

LDB1911USD-20D

Liquid-emitting Diode Red SMD 0603 angle

17

LD1~LD14,LD17~LD19

 120°

Содержание AD20W

Страница 1: ...nt you are hereby notified that any review dissemination distribution or duplication of this document is strictly prohibited If you are not authorized please contact Akai Professional and destroy all...

Страница 2: ...o the Manual shall be solely your responsibility and Akai Professional shall have no liability for any such repairs or service work All such service or repairs are performed at the sole risk of the pe...

Страница 3: ...E WITH ANY AKAI PROFESSIONAL DISTRIBUTOR OR AUTHORIZED REPAIR SERVICE CENTER IN THE PROVISION OF REPAIR SERVICES OR TO BE OR MAKE REPAIRS AS AN AUTHORIZED SERVICE CENTER ALL REPAIRS DONE BY ANY ENTITY...

Страница 4: ...stoves heat registers radiators or other heat producing equipment 7 Ventilation When installing the product make sure that the product has adequate ventilation Improperly ventilating the product may c...

Страница 5: ...ntroller Y Controller 1 configurable thumbstick with 3 modes Inputs Outputs Inputs Outputs Inputs Outputs Inputs Outputs 1 USB port 1 1 4 6 35mm TS input for sustain pedal Power Power Power Power USB...

Страница 6: ...DISASSEMBLY PROCEDURES 1 DISASSEMBLE THE BOTTOM PANEL A REMOVE 20 PCS SCREW FROM THE BOTTOM PANEL Fig1 2 DISASSEMBLE THE KEYBOARD A REMOVE 2 PCS SCREW FROM THE KEYBOARD Fig2...

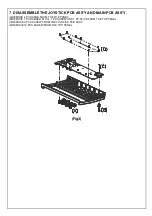
Страница 7: ...ASS Y AND MAIN PCB ASS Y A REMOVE 6 PCS KNOB FROM THE TOP PANEL B REMOVE 1 PC RUBBER PLUG 1 PC SCREW AND 1 PC STICK FROM THE TOP PANEL C REMOVE 2 PCS SCREW FROM THE JOYSTICK PCB ASS Y D REMOVE 12 PCS...

Страница 8: ...WIRING DIAGRAM US...

Страница 9: ...PACKING DIAGRAM US...

Страница 10: ...EXPLODE DIAGRAM US EQUENCIAL NO EXPLODE DIAGRAM WILL BE MARKED ON REF COLUMM OF BOM LIST...

Страница 11: ...RU1510677 Rubber Switch Button 1 2 RU1510687 Rubber Switch Button 1 2 SC2608PBBI Screw 6 2 SP1504309 keyboard Spring 25 2 TWPC19A01201 AD20 25 key PCB overall Assembly 1 3 TWPC19A01201M AD20 25 key PC...

Страница 12: ...P SMD 100pF 50V 5 0603 NPO 40 C55 C58 C60 C64 C66 C68 C71 C98 4 CS102K5003X7R CCAP SMD 1nF 50V 10 0603 X7R 3 C13 C14 C15 4 CS103K5003X7R CCAP SMD 0 01uF 50V 10 0603 X7R 3 C11 C12 C35 4 CS104K5003X7R C...

Страница 13: ...LHA15 Switch Tact Stem Height 1 5mm Operating 10 SW1 SW10 force 160gf Horizontal SMD 4 TRDMP3099L MOSFET DMP3099L P CHAN 30V 3 8A SOT 23 2 Q1 Q3 4 UH160808T 600Y BEAD 60 100MHz 3A 25 0603 1 L1 4 UHACM...

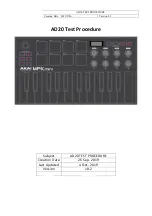
Страница 14: ...AD20 TEST PROCEDURE Creation Date 2019 9 26 Version 0 2 AD20 Test Procedure Subject AD20 TEST PROCEDURE Creation Date 26 Sep 2019 Last Updated 4 Oct 2019 Version v0 2...

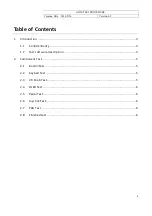
Страница 15: ...2 2 Table of Contents 1 Introduction 3 1 1 Confidentiality 3 1 2 Test software description 3 2 Component Test 5 2 1 Button Test 5 2 2 Keybed Test 5 2 3 VR Knob Test 5 2 4 OLED Test 6 2 5 Pedal Test 6...

Страница 16: ...n the understanding that its contents will not be transmitted to any third party without prior written consent from 1 2 Test software description During the test the red graphic control element indica...

Страница 17: ...ANK PROG SELECT and plug in USB cable to enter test mode 1 2 2 Connection status and version confirmation If the Connect Status is green the connection to the AD20 device is successful and the version...

Страница 18: ...K clicks bright green then clicks bright red OP needs to visually check whether all LEDs are lighting normally 2 2 Keybed Test When pressed it will light green Pass When released it will light blue in...

Страница 19: ...reen and then released to show blue indicating that the test is completed 2 6 Joystick Test Turn the Joystick once it will show blue if tested in both directions 2 7 PAD Test When the pressing pressur...

Страница 20: ...AD20 TEST PROCEDURE Creation Date 2019 9 26 Version 0 2 7...

Страница 21: ...CAMtasticDXP TM...

Страница 22: ...CAMtasticDXP TM...

Страница 23: ...CAMtasticDXP TM...

Страница 24: ...CAMtasticDXP TM...

Страница 25: ...CAMtasticDXP TM...

Страница 26: ...CAMtasticDXP TM...

Страница 27: ...CAMtasticDXP TM...

Страница 28: ...CAMtasticDXP TM...

Страница 29: ...CAMtasticDXP TM...

Страница 30: ...CAMtasticDXP TM...

Страница 31: ...CAMtasticDXP TM...

Страница 32: ...CAMtasticDXP TM...

Страница 33: ...CAMtasticDXP TM...

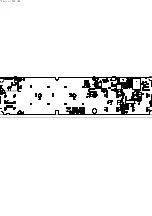
Страница 34: ...2 COC23 PIC2401 PIC2402 COC24 PIC2501 PIC2502 COC25 PIC2601 PIC2602 COC26 PIC2701 PIC2702 COC27 PIC2801 PIC2802 COC28 PIC2901 PIC2902COC29 PIC3001 PIC3002 COC30 PIC3101 PIC3102 COC31 PIC3201 PIC3202 C...

Страница 35: ...8302 COC83 PIC8401 PIC8402 COC84 PIC8501 PIC8502 COC85 PIC8601 PIC8602 COC86 PIC8701 PIC8702 COC87 PIC8801 PIC8802 COC88 PIC8901 PIC8902 COC89 PIC9001 PIC9002 COC90 PIC9101 PIC9102 COC91 PIC9201 PIC92...

Страница 36: ...2 PISW1302a COSW13 PISW1401 PISW1401a PISW1402 PISW1402a COSW14 PISW1501 PISW1501a PISW1502 PISW1502a COSW15 PISW1601 PISW1601a PISW1602 PISW1602a COSW16 PISW1701 PISW1701a PISW1702 PISW1702a COSW17 P...

Отзывы: