ENGLISH
17
PREP
ARA
TIONS
En
S-VIDEO
OUT
DIGITAL
OUT
AUDIO
OUT1
DIGITAL OUT
VIDEO OUT
S-VIDEO
COMPONENT/
PROGRESSIVE SCAN
COAXIAL
OPTICAL
L
R
AUDIO
OUT2
L
R
Y
COMPONENT
VIDEO OUT/
PROGRESSIVE
SCAN
VIDEO
OUT
P
R
/C
R
P
B
/C
B
A
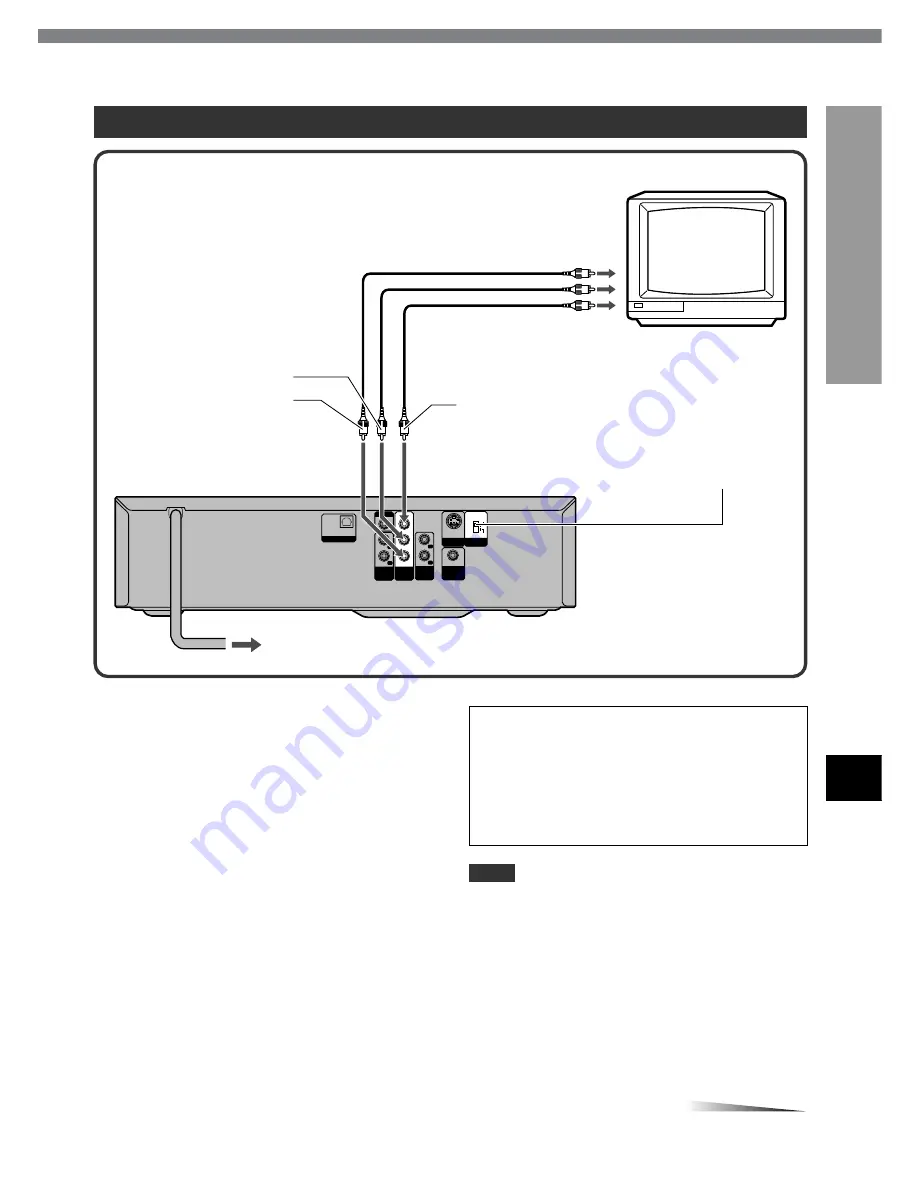
-3 Connecting to a TV or monitor with component video input connectors
Set the VIDEO OUTPUT switch before
connecting
Set the VIDEO OUTPUT switch to "COMPONENT/
PROGRESSIVE SCAN" before connecting to a TV with
component input connectors.
Set the setup menu correctly after
connecting
Set the "TV Aspect" and "Progressive Scan" in the setup
menu according to the TV connected to the unit as follows:
(See "Changing Setup Values" on page 46 for details.)
TV Aspect
When the TV has a conventional 4:3 screen:
4:3 Letterbox or 4:3 Panscan
When the TV has a wide 16:9 screen:
16:9 Wide
Progressive Scan
When the TV is compatible with progressive scan signals:
On
When the TV is not compatible with progressive scan
signals:
Off
TV or monitor
to the video input jacks
(Y: green, P
R
/C
R
: red,
P
B
/C
B
: blue)
Set the VIDEO OUT switch to
COMPONENT/PROGRESSIVE SCAN
to COMPONENT VIDEO
OUT/PROGRESSIVE SCAN
(Y, P
R
/C
R,
P
B
/C
B
) jacks
Rear of the unit
to an AC outlet
Video cables (not supplied)
CAUTION
DO NOT set the "Progressive Scan" in the setup menu
to "On" when connecting to a TV that is not compatible
with progressive scan signals. If you set "Progressive
Scan" to "On" in error, the picture will appear scrambled.
In this case, reset the unit by holding down
s
for more
than 5 seconds in stop mode. The original video output
will be restored and the picture will become visible again.
NOTE
Composite video signals are not output from the VIDEO
OUT jack on the unit if "Progressive Scan" is set to "On".
red
blue
green
CONTINUE


