– 34 –
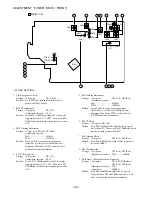
1. Tape Speed Adjustment (DECK 2)
Settings : • Test tape :
TTA-100 (3kHz)
• Test point :
TP10 (Lch), TP11 (Rch)
• Adjustment location : SFR1
Method : Play back the test tape and adjust SFR1 so that
the frequency counter reads 3000Hz
±
5Hz (FWD) and
±
45Hz (REV) with respect to forward speed.
2. Head Azimuth Adjustment (DECK 1, DECK 2)
Settings : • Test tape :
TTA-300 (315/10kHz)
• Test point :
TP10 (Lch), TP11 (Rch)
• Adjustment location : Head azimuth
adjustment screw
Method : Play back the 10kHz signal of the test tape
and adjust screw so that the output becomes
maximum. Next, perform on each FWD PLAY
and REV PLAY mode.
3. PB Frequency Response Check (DECK 1, DECK 2)
Settings : • Test tape :
TTA-300 (315/10kHz)
• Test point :
TP10 (Lch), TP11 (Rch)
Method : Play back the 315Hz and 10kHz signals of the
test tape and check that the output ratio of the
10kHz signal with respect to that of the 315Hz
signal is within 0
±
3dB.
4. PB Sensitivity Check (DECK1, DECK2)
Settings : • Test tape :
TTA-200
• Test point :
TP10 (Lch), TP11 (Rch)
Method : Play back the test tape and check that the output level of
the test piont is 250mV
±
3dB.
5. REC/PB Frequency Response Adjustment (DECK 2)
Settings : • Test tape :
TTA-602 (Normal)
• Test point :
TP10 (Lch), TP11 (Rch)
• Input signal : 1kHz/10kHz (LINE IN)
• Adjustment location : SFR351 (Lch)
SFR352 (Rch)
Method : Apply a 1kHz signal and REC mode. Then adjust OSC
attenuator so that the output level at the test points
becomes 9.0mV. Record and play back the 1kHz and
10kHz signals and adjust SFRs so that the output level
of the 10kHz signals becomes 0dB
±
1.0dB with respect
to that of the 1kHz signal.
6. REC/PB Frequency Response Check (DECK 2)
Settings : • Test tape :
TTA-615 (CrO
2
)
• Test point :
TP10 (Lch), TP11 (Rch)
• Input signal : 1kHz/10kHz (LINE IN)
Method : Apply a 1kHz signal and REC mode. Then
Adjust OSC attenuator so that the output level
at the test points becomes 9.0mV. Record and
play back the 1kHz and 10kHz signals and
check that the output is 0dB
±
2dB.
7. REC/PB Sensitivity Check (DECK 2)
Settings : • Test tape :
TTA-615 (CrO
2
),
TTA-602 (Normal)
• Test point :
TP10 (Lch), TP11 (Rch)
• Input signal : 1kHz (LINE IN)
Method : Apply a 1kHz signal and REC mode. Then adjust OSC
attenuator so that the output level at the test points
becomes 90mV. Record and play back the 1kHz signal
and check that the output is -1dB
±
3dB.
<FRONT SECTION>
8.
µ
-CON OSC Adjustment
Settings : • Test point :
TP5 (K-SCAN) and TP6 (GND)
• Adjustment location : L101
Method : Insert AC plug with pressing of POWER and TUNER
function key. Adjust L101 so that the frequency across
the test point is 208.8Hz
±
0.2Hz.
< DECK SECTION >
Содержание NSX-VC78
Страница 13: ... 13 SCHEMATIC DIAGRAM 1 MAIN 1 3 AMP VM ...
Страница 14: ... 14 SCHEMATIC DIAGRAM 2 MAIN 2 3 DECK HEAD 1 HEAD 2 ...
Страница 15: ... 15 SCHEMATIC DIAGRAM 3 MAIN 3 3 TUNER ...
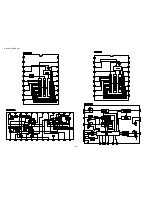
Страница 17: ... 17 SCHEMATIC DIAGRAM 4 FRONT DECK ...
Страница 19: ... 19 SCHEMATIC DIAGRAM 5 AMP ...
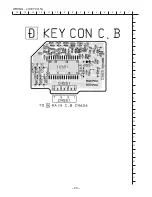
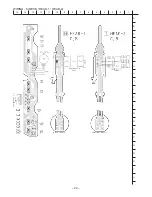
Страница 20: ...WIRING 4 KEY CON 20 1 2 3 4 5 6 7 8 9 10 11 12 13 14 15 A B C D E F G H I J K L M N O P Q R S T U ...
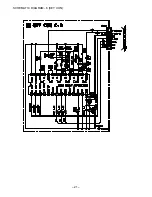
Страница 21: ... 21 SCHEMATIC DIAGRAM 6 KEY CON ...
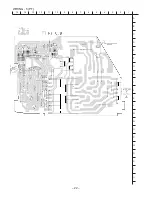
Страница 22: ...WIRING 5 PT 22 1 2 3 4 5 6 7 8 9 10 11 12 13 14 15 A B C D E F G H I J K L M N O P Q R S T U ...
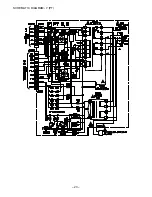
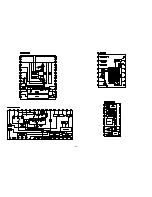
Страница 23: ... 23 SCHEMATIC DIAGRAM 7 PT ...
Страница 24: ...WIRING 6 DECK HEAD 1 HEAD 2 24 1 2 3 4 5 6 7 8 9 10 11 12 13 14 15 A B C D E F G H I J K L M N O P Q R S T U ...
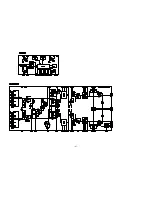
Страница 25: ... 25 IC BLOCK DIAGRAM ...
Страница 26: ... 26 ...
Страница 27: ... 27 ...
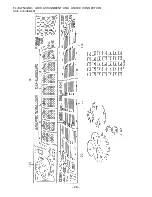
Страница 28: ... 28 FL BJ754GNK GRID ASSIGNMENT AND ANODE CONNECTION GRID ASSIGNMENT ...
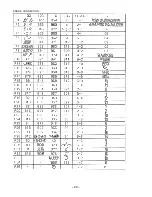
Страница 29: ... 29 ANODE CONNECTION ...
Страница 37: ... 37 TAPE MECHANISM EXPLODED VIEW 1 1 ...
Страница 41: ...2 11 IKENOHATA 1 CHOME TAITO KU TOKYO 110 JAPAN TEL 03 3827 3111 Printed in Singapore 9301978 0251431 ...

