30
29
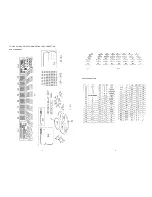
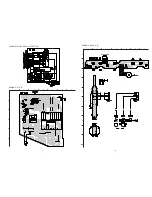
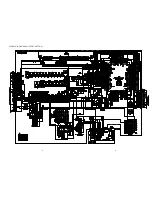
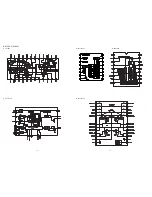
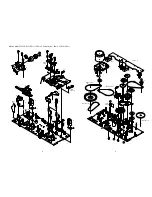
ADJUSTMENT
11
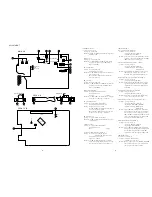
DECK-2 R/P HEAD
FWD
FRONT C.B
IC201
FL401
GND
TP7
16
16
L331
C326
1
R268
+
30
11
REV
FWD
DECK-1 P HEAD
11
10
SFR1
DECK C.B
11
REV
MAIN C.B
L951
SFR451 SFR452
L801
TP2 (CLK)
TP4 (DC BALANCE)
GND
TP8 (RCH)
TP9 (LCH)
10
2
L802
L942
L941
TC942
9
5
TP1 (VT)
(3/3) (1/3)
FFE831
TP3 (DC BALANCE)
8
1
3
4
3
5
6
7
8
9
11
12
13
14
15
9
6
14
IC801
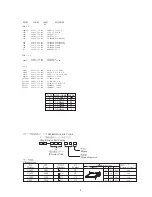
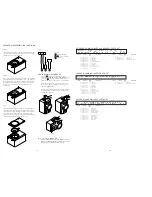
< TUNER SECTION >
1. Clock frequency Check
Settings : • Test point : TP2
Method : Set to AM 1602kHz and check that the test point is
2052kHz
±
45Hz.
2. MW VT Check
Settings : • Test point : TP1 (VT)
Method : Set to MW 1602kHz, 531kHz and check that the
test point is less than 8.0V (1602kHz) and more
than 0.6V (531kHz).
3. LW VT Adjustment
Settings : • Test point : TP1 (VT)
• Adjustment location: L942
Method : Set to LW 144kHz and adjust L942 so that the test
point is 1.3V
±
0.05V.
Then set to LW 290kHz and check that the test
point is less than 8.0V.
4. FM VT Check
Settings : • Test point : TP1 (VT)
Method : Set to FM 87.5MHz, 108.0MHz and check that the
test point is more than 0.5V (87.5MHz) and less
than 8.0V (108.0MHz).
5. MW Tracking Adjustment
Settings : • Test point : TP8(Lch), TP9(Rch)
• Adjustment location :
L951(1/3) ...................................... 999kHz
Method : Set to MW 999kHz and adjust L951(1/3) so that the
level at the test point becomes maximum.
6. LW Tracking Adjustment
Settings : • Test point : TP8(Lch), TP9(Rch)
• Adjustment location : L941, TC942
Method : Set up TC942 to center position.
Set to LW 144kHz and adjust L941 so that the level
at test point becomes maximum.
Then set to LW 290kHz and adjust TC942 so that
the level at test point becomes maximum.
7. FM Tracking Check
Settings : • Test point : TP8(Lch), TP9(Rch)
Method : Set to FM 98.0MHz and check that the test point is
less than 13dB
µ
V.
8. AM IF Adjustment
Settings : • Test point : TP8(Lch), TP9(Rch)
• Adjustment location :
L802 ............................................. 999kHz
9. DC Balance / Mono Distortion Adjustment
Settings : • Test point : TP3, TP4 (DC Balance)
: TP8(Lch), TP9(Rch) (Distortion)
• Adjustment location : L801
• Input level : 60dB
µ
V
Method : Set to FM 98.0MHz and adjust L801 so that the
voltage between TP3 and TP4 becomes 0V
±
0.3V.
Next, check that the distortion is less than 1.3%.
< DECK SECTION >
10. Tape Speed Adjustment (DECK 2)
Settings : • Test tape : TTA–100
• Test point : TP8(Lch), TP9(Rch)
• Adjustment location : SFR1
Method : Play back the test tape and adjust SFR1 so that the
frequency counter reads 3000Hz
±
5Hz and
±
45Hz
(REV) with respect to forward speed.
11. Head Azimuth Adjustment (DECK 1, DECK 2)
Settings : • Test tape : TTA–330
• Test point : TP8(Lch), TP9(Rch)
• Adjustment location : Head azimuth
adjustment screw
Method : Play back (FWD) the 8kHz signal of the test tape
and adjust screw so that the output becomes
maximum. Next, perform on REV PLAY mode.
12. PB Frequency Response Check (DECK 1, DECK 2)
Settings : • Test tape : TTA–300
• Test point :TP8(Lch), TP9(Rch)
Method : Play back the 315Hz and 8kHz signals of the test
tape and check that the output ratio of the 8kHz
signal with respect to that of the 315Hz signal is
within 5dB.
13. PB Sensitivity Check (DECK 1, DECK 2)
Settings : • Test tape : TTA–200
• Test point : TP8(Lch), TP9(Rch)
Method : Play back the test tape and check that the output
level of the test point is 140mV
±
3dB.
14. REC/PB Frequency Response Adjustment (DECK 2)
Settings : • Test tape : TTA–602
• Test point : TP8(Lch), TP9(Rch)
• Input signal : 1kHz / 8kHz (LINE IN)
• Adjustment location : SFR451 (Lch)
SFR452 (Rch)
Method : Apply a 1kHz signal and REC mode. Then adjust
OSC attenuator so that the output level at the TP8,
TP9 becomes -20VU. Record and play back the
1kHz and 8kHz signals and adjust SFRs so that the
output of the 8kHz signals becomes 0dB
±
0.5dB
with respect to that of the 1kHz signal.
15. REC/PB Sensitivity Check (DECK 2)
Settings : • Test tape : TTA–602
• Test point : TP8(Lch), TP9(Rch)
• Input signal : 1kHz (LINE IN)
Method : Apply a 1kHz signal and REC mode. Then adjust
OSC attenuator so that the output level at TP8, TP9
becomes 0VU. Record and play back the 1kHz
signals and check that the output is –2dB
±
3.0dB.
< FRONT SECTION >
16.
µ
-CON OSC Adjustment
Settings : • Test point : TP7 and GND
• Adjustment location : L331
Method : Insert AC plug while pressing POWER and TUNER
function keys. Adjust L331 so that the frequency
atthe test point is 153.84Hz
±
0.15Hz.
Содержание NSX-BL44
Страница 11: ...12 11 FL HNA 11MM30 GRID ASSIGNMENT ANODE CONNECTION GRID ASSIGNMENT ANODE CONNECTION ...
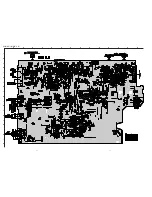
Страница 12: ...1 2 3 4 5 6 7 8 9 10 11 12 13 14 A B C D E F G H I J 14 13 WIRING 1 MAIN C B CN601 R622 NOT USED ...
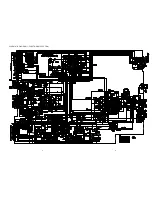
Страница 13: ...16 15 SCHEMATIC DIAGRAM 1 FUNCTION AMP SECTION NOT USED ...
Страница 14: ...18 17 SCHEMATIC DIAGRAM 2 TUNER SECTION NOT USED ...
Страница 16: ...1 2 3 4 5 6 7 8 9 10 11 12 13 14 A B C D E F G H I J 22 21 WIRING 4 FRONT C B NOT USED ...
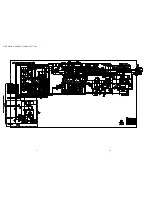
Страница 17: ...24 23 SCHEMATIC DIAGRAM 4 FRONT SECTION TO CD MECHANISM NOT USED ...
Страница 18: ...26 25 IC BLOCK DIAGRAM IC LA1844 IC LC72131D IC M61506FP IC BU2092F IC M61503FP ...
Страница 27: ...2 11 IKENOHATA 1 CHOME TAITO KU TOKYO 110 JAPAN TEL 03 3827 3111 Printed in Singapore 920074 ...

