en
6
7
Carefully remove all the components from the carton and remove all packing materials from the components.
Make sure that nothing is accidentally discarded with the packing materials.
If possible, save the carton and packing materials for the unlikely event that the unit ever needs to
be returned for service. Using the original carton and packing materials is the only proper way to
protect the unit from shipping damage.
Unwind the AC power cord on the back of the main unit and extend it to its full length.
CONNECTIONS
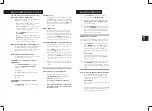
1.
Check if the power voltage, as shown on
the type plate located on the back of the
set, corresponds to your local AC power
supply. If it does not, consult your dealer
or service center.
(fig. 1)
2.
Connect the speakers
“R”
-
“L”
to the unit.
3.
Connect the power cord to the wall outlet.
(fig. 2)
4.
To switch off completely, turn off the
main power on/off button and unplug
the power cord from the wall outlet.
Unplug the power cord from the wall
outlet to protect your set during heavy
thunderstorms.
If electric cable is damaged, it must
be replaced by the manufacturer, or
by qualified persons, in order to avoid
damage.
The main plug is used as a disconnected
device, the disconnected device shall
remain readily operable.
This system includes a stereo headphones socket on the front panel of the main unit. You may
connect a set of headphones (not included), to this socket for private listening without disturbing
others.
The main unit speakers are automatically shut off when headphones are connected to the phone socket.
Make sure that the plug from your headphone is fully inserted into the headphone jack (if the plug
is not fully inserted, the sound may be intermittent, or you may only hear sound from one side of
the headphone.)
IMPORTANT:
To prevent hearing damage always set the volume control to a low level before you connects the
headphone. Then connect the headphone, put them on, and very gradually increase the volume
to a comfortable listening level. Remember that CD’s may contain both very soft and very loud
passages. Adjust the volume to a comfortable level using a louder passage, so that you always
know what the maximum level will be.
PREPARATION FOR USE
FM ANTENNA CONNECTION
HINTS FOR BETTER FM RECEPTION
The FM lead wire antenna on the back panel should be extended to its full length. You may also have to
vary the direction of this antenna until you find the position that provides the best reception.
STEREO HEADPHONES JACK
Notes:
•
This system has USB charging support.
Micro system
Remote control and AAA type batteries
Audio cable
FM cable
User manual
(fig. 2)
(fig. 1)

