background image

Содержание CX-NA31

Страница 1: ...87 NF 7 911 01 970120 AKY U 9 For assistance and information cdl toll free I 8QQ BUY AIWA United States and Puerto Rico ...

Страница 2: ...he unit should be situated with adequate space around it so that proper heat ventilation is assured Allow 10 cm 4 in clearance from the rear and the top of the unit and 5 cm 2 in from each side Do not place the unit on a bed rug or similar surface that may block the ventilation openings Do not install the unit in a bookcase cabinet or airtight rack where ventilation may be impeded Objects and liqu...

Страница 3: ...requirements for grounding terminals themselves MANUAL TUNING m 9 PRESETTING STATIONS 9 TAPE PLAYBACK BASIC OPERATIONS m 10 Antenna Wounding According to the National Electrical Code CD PLAYING BASIC OPERATIONS ll PROGRAMMED PLAY w m 12 R ANTENNA LEAD IN WIRE ANTENNA DISCHARGE UNI1 NEC SECTION 810 201 GROUNDING CONDUCTORS NEC SECTION 810 2i GROUND CLAMPS POWER SERVICE GROUNDING ELECTRODE SYSTEM RE...

Страница 4: ...them when you contact your Aiwa dealer in case of difficulty Model No Serial No Lot No CX NA31 SX FNA51 NSX A31 only SX NA34 NSX A34 only SX R21 O NSX A34 only 3 ENGLISH To position the antennas FM feeder antenna Extend this antenna horizontally in a T shape and fix its ends to the wall AM loop antenna Position for the best reception To stand the AM antenna on a surface Fix the claw to the slot Be...

Страница 5: ...should be connected 4 to the terminal and the black cord to the O terminal Connect the left speaker to the main unit Connect the surround speaker cord to the SURROUND SPEAKERS L terminal and speaker cord to the SPEAKERS L terminals in the same manner as step 1 Connect the supplied antennas Connect the FM antenna to the FM 75 Q terminals and the AM antenna to the AM LOOP terminals AM LOOP antenna C...

Страница 6: ...LOOP antenna r 1 fr ii rwl eUILeIII ICI The speaker cord with the white stripe should be connected to the 0 terminal and the black cord to the O terminal 2 Connect the surround speakers to the main un it rb Connect the right surround speaker cord to the SURROUND SPEAKERS R terminal and left to the SURROUND 759 SPEAKERS L terminal P 4 Connect the AC cord to an AC outlet De 4 fQj 6 f 3 FM antenn AM ...

Страница 7: ...on on the remote control Buttons have two different functions One of these functions is indicated on the button and the other on the plate above the button To use the function on the button simply press the button To use the function on the plate above the button press the button while pressing the SHIFT button To use the FUNCTION button on the remote control The FUNCTION button substitutes for th...

Страница 8: ... the unit off Press the POWER button AUDIO ADJUSTMENTS VOLUME Turn the VOLUME control on the main unit or press the VOLUME buttons on the remote control The volume level is displayed as a number from O to MAX 31 The volume level is automatically set to 16 when the power is turned off with the volume level set to 17 or more SUPER T BASS SYSTEM The T BASS system enhances the realism of low frequency...

Страница 9: ... presence of a concert hall Press the DSP button repeatedly until the desired surround mode is displayed your preference When the music source is monaural Select LIVE to obtain a simulated stereo effect When DISCO or HALL is selected no sound will be heard from the surround speakers To cancel the selected mode Press the DSP button repeatedly so that SUR OFF appears on the display While DSP surroun...

Страница 10: ...en the AM tuning interval is changed all preset stations are cleared The preset stations have to be set again 9 ENGLISH PRESETTING STATIONS 0 9 1 o The unit can store a total of 32 preset stations Each band has a maximum of 20 available preset stations When a station is stored a preset number is assigned to the station Use the preset number to tune in to a preset station directly 7 Press the TUNEF...

Страница 11: ...ose 2 Press the button to start play Only the side facing out from the unit can be played back The selected deck number tape counter To select a playing deck When tapes are loaded in both decks press the TAPE button first lo select a deck The seliscted deck number is displayed To stop play press the button To pause play deck 2 only press the II button To resume play press again To fast forward or ...

Страница 12: ...atedly To remove discs press the A OPEN CLOSE button To start play when the power is off Direct Play Function Press the CD button The power is turned on and play of the loaded disc s begins When the 4 OPEN CLOSE button is pressed the power is also turned on To check the remaining time During play press the EDIT CHECK button on the remote control while pressing the SHIFT botton The amount of time r...

Страница 13: ...en the PRGM button is pressed once in step 1 the unit enters the KARAOKE PROGRAM page 18 Press one of the DISC DIRECT PLAY buttons to s lect a discm The selected disc is indica ed in red on the display Go tc the next step when the tray stops rotating 3 4 5 Press the numbered buttons and the 1 O button to program a track Example To select the 25th track press the 10 10 and 5 buttons To select the 1...

Страница 14: ...ecording will start Note that recording is done only one side of the tape 1 Insert the tape to be recorded on into deck 2 Insert the tape with the side to be recorded on first facing out from the unit 2 Press one of the function buttons and prepare the source to be recorded To record from a CD press the CD button and load the disc s To record from a radio broadcast press the TUNER button and tune ...

Страница 15: ...Playing and recording start simultaneously To stop dubbing Press the button DUBBING THE WHOLE TAPE This function allows you to make exact copies of the original tape m Dubbing does not start from a point halfway in the tape Note that recording will be done on one side of the tape only 7 Press the TAPE button 2 Insert the original tape into deck 1 and the tape to be recorded on into deck 2 Insert e...

Страница 16: ...r entering the recording stop mode go to step 7 Press the EDIT CHECK button while pressing the SHIFT button on the remote control to display the program for the second recording B is displayed Turn over the tape in deck 2 and press the REC REC MUTE button to start recording on the second side To stop recording Press the button Recording and CD play stop simultaneously To clear the edit program Pre...

Страница 17: ...ress the EDIT CHECK button while pressing the SHIFT button on the remote control to select side B and program the tracks for side B After confirming B on the display repeat step 5 Tape side B reverse side Press the EDIT CHECK button while pressing the SHIFT button to select side A and press the O REC REC MUTE button to start recording CD play and recording of edited tracks for the first side start...

Страница 18: ... unit can use discs or tapes as Karaoke sources Use the vocal fader function for ordinary discs or tapes Use the multiplex function for multi audio discs or tapes Press the KARAOKE button repeatedly to select the vocal fader or multiplex function Each time the KARAOKE button is pressed one of these functions is selected cyclically o Vocal Fader The singer s voice becomes softer than the accompanim...

Страница 19: ...tion during play Repeat step 2 To check the reserved tracks Press the EDIT CHECK button repeatedly while pressing the SHIFT button Each time it is pressed the disc number and track number are displayed in the reserved order To stop play Press the button When the F E button is pressed the play starts from the last track again To skip a current track Press the W button The skipped track is cleared f...

Страница 20: ... time cannot be displayed during recording pressing the DOWN or P UP button and To switch to the 24 hour standard press the II SET button Repeat to designate the Press the CLOCK button while ressina the SHIFT button on minute of the timer on time If power is interrupted for more than approximately 24 hours all settings stored in memory after purchase need to be reset 3 Within 4 seconds press the F...

Страница 21: ...timer is set You can use the unit normally after setting the timer Before turning off the power repeat step 5 to prepare the source and adjust the volume and tone Timer playback and timer recording will not begin unless the power is turned off Connected equipment cannot be turned on and off by the built in timer of this unit Use an external timer TIMER RECORDING Timer recording is applicable for T...

Страница 22: ...jack Then connect an optical cable plug to the CD DIGITAL OUT OPTICAL jack When the CD DIGITAL OUT OPTICAL jack is not being used Attach the supplied dust cap SUPER WOOFER d JACK Connect an optional powered sub woofer with a built in amplifier to the jack LISTENING TO EXTERNAL SOURCES To play equipment connected to the VI DEO AUX jacks proceed as follows 1 Press the VIDEO AUX button VIDEO appears ...

Страница 23: ...gnetizer TUNER SECTION There is constant wave like static c Is the antenna connected properly page 4 Is the signal weak Connect an outdoor antenna The reception contains noise interferences or the sound is distorted Is the system picking up external noise or multipath distortion Change the orientation of the antenna Move the unit away from other electrical appliances CASSETTE DECK SECTION The tape...

Страница 24: ...W XH X D 10 4 X 12 4 x 13 8 in Weight of main unit 6 5 kg 14 Ibs 5 OZ Speaker svstem SX FNA51 for NSX A31 Cabinet type 3 way bass reflex with surround Speakers Impedance Output sound pressure level Dimensions W x H x D Weight SDeaker svstem SX NA34 for NSX A34 Cabinet type 3 way bass reflex magnetic shielded type Speakers Woofer 140 mm 55 8 in cone type Tweeter 60 mm 2 in cone type Super tweeter 2...

Страница 25: ......

Страница 26: ...ensation En la Iente del fonocaptor del reproductor de discos compactos tal vez se forme condensation cuando La unidad se pase de un Iugar frio a uno AL caliente El sistema de calefaccion se acabe de encender La unidad se utilice en una habitation muy humeda La unidad se enfr e mediante un acondicionador de aire Esta unidad tal vez funcione mal cuando tenga condensation en su interior En este case...

Страница 27: ...ta a tierra de la antena segtin el Codigo E16ctrico National INDICE PRECAUCIONES 1 PREPARATIVES CONEXIONES 3 CONTROL REMCDTO 6 ANTES DE LA OPERACION 7 SONIDO AJUSTES DE AUDIO m m 7 ECUALIZADOR GRAFICO 8 SISTEMA DE SONIDO AMBIENTAL DSP 8 RECEPCION DE LA RADIO SINTONIZACION MANUAL 9 PREAJUSTE DE EMISORAS 9 REPRODUCTION DE CINTAS OPERAClONES 13 ASICAS 10 3 REPRODUCTION DE DISCOS COMPACTOS CABLE DE BA...

Страница 28: ... mostrada en el panel trasero es de 120 V CA Asegurese de que la tensi6n nominal coincida con la tension ernpleada en su Iocalidad IMPORTANTE Conecte primero Ios altavoces Ias antenas y todos Ios demas equipos opcionales Finalmente conecte el cable de alimentacion de CA Para posicionar Ias antenas Antena de FM Extienda horizontalmente esta antena formando una T y fije sus extremes en la pared Ante...

Страница 29: ... ambiental al terminal SURROUND SPEAKERS L y el cable del altavoz a Ios terminals SPEAKERS L de igual forma que en el paso 1 3 Conecte Ias arttenas suministradas Conecte la antena de FM a Ios terminals FM 75 Q y la antena de AM a Ios terminals AM LOOP Antena de cuadro de AM h Antena de FM 1 4 Conecte el cable de alimentacion de CA a una El cable de altavoz con la franja blanca debera conectarse al...

Страница 30: ...al a la unidad principal Conecte el cable del altavoz de sonido ambiental derecho al terminal SURROUND SPEAKER R y el cable del altavoz de sonido am biental izquierdo al terminal SURROUND SPEAKERS L o 4 Conecte Ias antenas suministradas Conecte la antena de FM a Ios terminals FM 75 Q y la antena de AM a Ios terminals AM LOOP Antena de cuadro de AM h Antena de FM 1 Conecte t l cable de alimentacion...

Страница 31: ...l control remoto Los botones tienen dos funciones diferentes Una de estas funciones se indica en el boton y a otra en la placa situada encima del boton Para utilizar la funcion del boton pulse simplemente el boton Para utilizar la funcion de la placa situada encima del boton pulse el boton mientras pulsa el boton SHIFT Para utilizar e boton FUNCTION del control remoto El boton FUNCTION sustituye a...

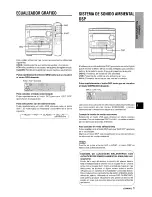
Страница 32: ...ior pulse el boton mientras pulsa el boton CD Para volver a encenderla repita el procedimiento seguido para apagarla Para apagar la unidad Pulse el boton POWER 7 ESPAMOL AJUSTES DE AUDIO CONTROL DE VOLUMEN Gire el control VOLUME de la unidad principal o pulse Ios botones VOLUME del control remoto El nivel de sonido se visualiza mediante un numero del O al 31 MAX El nivel de sonido se ajusta automa...

Страница 33: ...do SURROUND deseado DISCO LIVE HALL Las curvas de ecualizacion se seleccionan automaticamente para que concuerden con Ios modos SURROUND y podran seleccionarse o desactivarse segtin sus preferencias Cuando la fuente de sonido sea mono Seleccione el modo LIVE para obtener un efecto estereo simulado Cuando seleccione DISCO o HALL el sonido no saldra por Ios altavoces de sonido ambiental Para cancela...

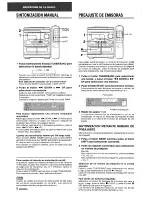
Страница 34: ...iiales scan muy debiles Utilice el control remoto para seleccionar directamente el numero Cuando una radiodifusion estereo tJorFM tenqa ruido de preajuste Pulse el bot6n MONO TUNER mientras pulsa el b on SHIFT del control remoto para que MONO aparezca en el visualizador 1 Pulse el boton BAND mientras pulsa el boton El ruido se reducira pero la recepcion sera mono SHIFT para seleccionar una banda P...

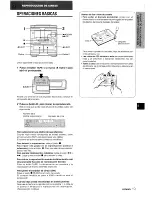
Страница 35: ...ra iniciar la reproduction cuando la alimentacion este desconectada funcion de reproduction directs Pulse el boton TAPE La alimentacion se conectara y la reprmduccionde la cinta insertada empezara Para poner el contador de cinta a 0000 Pulse el bottm CLEAR en el modo de parada El contador tambien se pone a 0000 cuando se abre el portacasete Cuando haya cintas introducidas en ambas platinas Despues...

Страница 36: ...l boton 0 Para quitar Ios discos pulse el boton 4 OPEN CLOSE Para iniciar la reproduction cuando la alimentacion este desconectada funcion de reproduction directs Pulse el boton CD La alimentacion se conectara y la reproduction del de Ios disco s introducido s emPezar La a limentacion se conectara tambien cuando se pulse el botbn 4 OPEN CLOSE Para comprobar el tiempo restante Durante la reproducti...

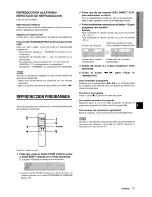
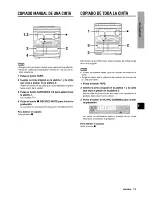
Страница 37: ... el boton PRGM se pulse una vez en el paso 1 la unidad se pondra en el modo PROGRAMA DE KARAOKE pagina 18 2 3 4 5 Pulse uno de Ios botones DISC DIRECT PLAY para seleccionar un disco El disco seleccionado se indica en rojo en el visualizador Vaya al paso siguiente cuando la bandeja deje de girar Pulse Ios botones numerados y el boton 1 Opara programar una cancion Ejemplo Para seleccionar la cancion...

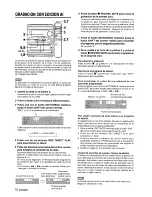
Страница 38: ...dos en el punto deseado Puede aplicarse cuando la fuente de sonido sea TUNER o VIDEO AUX 1 Pulse el boton REC REC MUTE durante la grabacion o en el modo de pausa de grabacion parpadeara en el visualizador durante 4 segundos y la cinta avanzara sin grabarse Despues de 4 segundos la platina entrara en el modo de pausa de grabacion 2 Pulse el boton 11 para reanudar la grabacion Para insertar un espac...

Страница 39: ...acion La reproduction y la grabacion empezaran simultaneamente Para detener el copiado Pulse el boton Esta funcion Ie permitira hater copias exactas de ambas caras de la cinta original m La copia no empieza desde un punto ubicado en medio de la cinta Tenga en cuenta que la grabacion se realizara en una cara de la cinta solamente 1 2 3 Pulse el bot6n TAPE Inserte la cinta original en la platina 1 y...

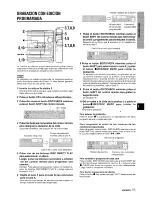
Страница 40: ...rar en el modo de parada de grabacion vaya al paso 7 Pulse el boton EDIT CHECK mientras pulsa el boton SHIFT del control remoto para visualizer el programa para la segunda grabacion Se visualiza B De la vuelta a la cinta de la platina 2 y pulse el boton REC REC MUTE para iniciar la grabacion de la segunda cara Para detener la grabacion Pulse el bot6n La grabacion y la reproduction del disco compac...

Страница 41: ...SHIFT del control remoto para seleccionar la cara B y programe Ias canciones para la cara B Despues de confirmar que B aparezca en el visualizador repita el paso 5 Cara B de la cinta cara trasera I Pulse el botcht EDIT CHECK mientras pulsa el boton SHIFT para seleccionar la cara A y pulse el boton O RECIREC MUTE para iniciar la grabacion La reproduction del disco compacto y la grabacion de Ias can...

Страница 42: ...ya el volumen de OS microfonos Si el sonido de Ios microfonos se pone a un nivel demasiado alto quiza se distorsione En este case disminuya el volumen de Ios microfonos Cuando se cambie la funcion el volumen del microfono y el Volumen del eco se desactivarim Microfonos recomendados Se recomienda utilizar microfonos tipo unidirectional para evitar el aullido Pongase en contacto con su concesionario...

Страница 43: ... Numero de Numero de cancion disco reservado reservada 3 4 Repita el paso 2 para reservar otras canciones Pulse et boton para iniciar la reproduction Despues de reproducer una cancion esta se borrara del programa En Iugar de la cancion borrada podra reservarse otra cancion Numero del disco de Numero de canciones la ultima reserva reservada restantes Disco que esta I I Numero de El numero de la sie...

Страница 44: ...nterrumpe durante mas de 24 horas aproximadamente todos Ios ajustes almacenados en la memoria despues de adquirir la unidad tendran que ajustarse otra vez 1 1 2 2 4 3 6 La unidad podra encenderse a la hors especificada todos Ios alias gracias al temporizador incorporado Preparation Asegurese de que la hors del reloj sea corrects Utilice el control remoto 1 2 3 Pulse el boton TIMER mientras pulsa e...

Страница 45: ...sualizador Para reponer el modo de espera del temporizador pulse de nuevo et boton para visualizer 00 REC Utilization de la unidad mientras este ajustado el temporizador Podra utilizar normalmente la unidad despues de ajustar el temporizador Antes de desconectar la alimentacion repita el paso 5 para preparar la fuente de sonido y ajuste el volumen y el tono La reproduction y la grabacion con tempo...

Страница 46: ...tra el polvo de la toma CD DIGITAL OUT OPTICAL Luego conecte la clavija del cable optico a la toma CD DIGITAL OUT OPTICAL Cuando no se utilice la toma CD DIGITAL OUT OPTICAL Ponga la tapa contra el polvo TOMA SUPER WOOFER 4 Conecte un Subaltavoz Dara Waves activo oPcionai con un amplificador incorporado a esta toma ESCUCHA DE FUENTES DE SONIDO EXTERNAS 1 Pulse el boton VIDEO AUX VIDEO aparece en e...

Страница 47: ...te manual de 1 instrucciones compruebe la guia siguiente GENERALIDADES No hay sonido j LEsta bien conectado el cable de alimentacion de CA f c LHay alguna conexion mal hecha pagina 3 f Puede haber un cortocircuito en Ios terminals de Ios altavoces Desconecte el cable de alimentacion de CA y corrija Ias pZ conexiones de Ios altavoces Se ha pulsado un boton de funcion equivocado Solo sale sonido de ...

Страница 48: ...0 x 309 x 346 mm principal An x Al x Prof Peso de la unidad principal 6 5 kg 23 ESPANOL Sistema de altavoces SX FNA51 Para el NSX A31 Tipo de caja 3 vias rrefleio de waves con Altavoces lmpedan a Nivel de presion acustica de salida Dimensioned An x Al x Prof Peso altavoz de sonido ambiental tipo de blindaje antimagnetic Altavoz para graves Tipo conico de 160 mm Altavoz para agudos Tipo conico de 8...

Страница 49: ......

Страница 50: ...euvent provoquer le renversement ou Iechute de I appareil et du chariot Condensation De la condensation peut se former sur la Ientille du capteur du Iecteur de disques compacts quand I appareil est deplace d un endroit froid a un endroit chaud Ie chauffage vient juste d re mis en marche I appareil est utilise clans une piece tres humide I appareil est refroidi par un climatiseur S il y a de la con...

Страница 51: ...MANDE 6 AVANT L UTILISATION 7 SON REGLAGES AUDIO a m 7 EGALISEUR GRAPHIQUE 8 SYSTEME SURROUND DSP 8 RECEPTION RADIO ACCORD MANUEL 9 MEMORISATION DE STATIONS 9 LECTURE DE CASSETTES OPERATIONS DE BASE 10 LECTURE DE DISQUES COMPACTS OPERATIONS DE BASE 11 LECTURE PROGRAMMED 12 i ENREGISTREMENT v FIL DE DESCENTE DANTENNE ENREGISTREMENT DE BASE 13 DUPLICATION MANUELLE D UNE CASSETTE 14 DUPLICATION DE LA...

Страница 52: ... O Enceintes surround Pour NSX A34 seulement Parties communes Faire attention a connecter Ies cordons d enceinte correctement Des connexions incorrectes peuvent provoquer Telecommande Antenne AM Antenne FM des courts circuits clans Ies bornes SPEAKERS M Ne pas Iaisser d objets produisant un champ magnetique pres f n des enceintes ils pourraient re endommages Ne pas mettre I antenne FM pres d objet...

Страница 53: ...necter Ie cordon de haut parieur surround a la borne SURROUND SPEAKERS Let Ie cordon d enceinte aux bornes SPEAKERS L de la m6me maniere qu a I etape 1 3 Connecter Ies antennes fournies Connecter I antenne FM aux bornes FM 75 Q et I antenne AM aux bornes AM LOOP Antenne cadre AM Le cordon d enceinte rave de blanc doit 6tre connecte a la 4 Brancher Ie cordon secteur a une prise de borne 0 et Ie cor...

Страница 54: ...ux bornes SPEAKERS L Antenne cadre AM Le cordon d enceinte raye de blanc doit re connecte a la borne 43 et Ie cordon noir a la bcirne 0 2 Connecter Ies enceintes surround a I appareil principal Connecter Ie cordon de I enceinte surround droite a la borne SURROUND SPEAKERS R et celui de I enceinte surround gauche a la borneSURROUND SPEAKERS L 4 Brancher Ie cordon secteur a une prise de courant D 3e...

Страница 55: ...a touche appuyer sur cette derniere tout en appuyant sur la touche SHIFT Utilisation de la touche FUNCTION de la telecommande La touche FUNCTION remplace Ies touches de fonction TAPE DECK 1 2 TUNER VIDEO AUX et CD de I appareil principal A chaque pression sur Iatouche FUNCTION la fonction suivante est selectionnee de maniere cyclique CMand il a une cassette clans chacune des deux platines ces dern...

Страница 56: ...L HORLOGE page 19 Pour retablir Ie mode DEMO appuyer de nouveau sur la touche DEMO Fen re clignotante La fenetre situee au somrnet de I appareil s allume ou clignote quand I appareil est mis sous tension Pour eteindre I eclairage de la fen tre superieure appuyer sur la touche tout en appuyant sur la touche CD Pour rallumer SYSTEME SUPER T BASS Le systeme T BASS ameliore Ie realisme du son aux bass...

Страница 57: ...s jusqu a ce que Ie mode SURROUND souhaite soit affiche DISCO LIVE HALL Les courbes d egalisation sent selectionnees automatiquement en fonction des modes surround DSP et euvent aussi tre selectionnees ou annulees comme on prefere Quand la source musicale est monophonique Selectionner LIVE pour obtenir un effet stereo simule Quand DISCO ou HALL est selectionne Ie son n est pas audible par Ies haut...

Страница 58: ... la recherche automatique manuellement appuyer sur la touche DOWN ou UP Utiliser la telecommande pour selectionner Ie num ro de La recherche automatique risque de ne pas s arr6ter sur Ies preregiage directement stations presentant des signaox tres faibles 1 Appuyer sur la touche BAND tout en appuyant Quand une emission FM stereo presente des parasites sur la touche SHIFT pour selectionner une Appu...

Страница 59: ...ment Pour ckmarrer la lecture quand I alimentation est toupee fonctkm de lecture directe Appuyer sur la touche TAPE L appareil est mis sous tension et la lecture de la cassette en place commence Pour mettre ie compteur a 0000 Appuyer sur la touche CLEAR clans Ie mode arr Le compteur est aussi mis a 0000 quand Ie porte cassette est ouvert Quand ii y a une cassette clans chacune des deux platines Un...

Страница 60: ... sur la touche A OPEN CLOSE Pour demarrer la lecture quand I alimentation est toupee fonction de lecture directe Appuyer sur la touche CD L appareil est mis sous tension et la lecture du ales disque s en place demarre Quand on appuie sur la touche OPEN CLOSE I appareil est aussi mis sous tension Pour verifier Ie temps restant Pendant la lecture appuyer sur la touche EDIT CHECK de la telecommande t...

Страница 61: ...uche 1 O programmer une plage Exemple Pour selectionner la vingt cinquieme plage appuyer sur Ies touches 10 10 et 5 Pour selectionner la dixieme plage appuyer sur Ies touches lOet O Temps de lecture total des Numero de programme plages selectionnees I Numero de la plage Nombre total de plages selectionnee selectionnees Repeter Ies etapes 2 et 3 pour programmer d autres plages Appuyer sur la touche...

Страница 62: ...ou on veut dernarrer I enregistrement Remarquer que I enregistrement ne sera fait que sur une face de la cassette 1 Inserer la cassette a enregistrer clans la platine 2 Inserer la cassette avec la face a enregistrer en premier orientee vers I exterieur de I appareil 2 Appuyer sur une des touches de fonction et preparer la source a partir de Iaquelle on veut enregistrer Pour enregistrer a partir d ...

Страница 63: ...strement La lecture et I enregistrement demarrent simultanement Pcrur arrt er la duplication Appuyer sur la touche DUPLICATION DE LA TOTALITE D UNE CASSETTE Cette fonction permet de faire des copies exactes de la cassette originale La duplication ne demarre pas a un point situe au milieu d une face Remarquer que I enregistrement ne sera fait que sur une face de la cassette 1 2 3 Appuyer sur la tou...

Страница 64: ... d enregistrement Passer alors a I etape 7 Appuyer sur la touche EDIT CHECK tout en appuyant sur la touche SHIFT de la telecommande pour afficher Ie programme du deuxieme enregistrement B est affiche Retourner la cassette de la platine 2 puis appuyer sur la touche REC REC MUTE pour demarrer I enregistrement sur la deuxieme face Pour arriMer I enregistrement Appuyer sur la touche L enregistrement d...

Страница 65: ... SHIFT de la telecommande pour selectionner la face B puis programmer Ies plages pour cette face Apres s re assure que B est affiche repeter I etape 5 Face de la cassette face arriere Appuyer sur la touche EDIT CHECK tout en appuyant sur la touche SHIFT pour selectionner la face A puis appuyer sur la touche O REC REC MUTE pour demarrer I enregistrement La lecture de disque compact et I enregistrem...

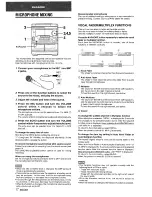
Страница 66: ...nte un bruit de hurlement risque de se produire Le cas echeant eloigner Ie microphone de I enceinte ou baisser Ie volume de microphone Si Ie son des microphones est extr mement fort il peut tre deforme Le cas echeant baisser Ie volume de microphone Quand la fonction est changee Ies reglages de volume de mi crophone et de niveau d echo sent annules FONCTIONS VOCAL FADEFUMULTIPLEX Cet appareil perme...

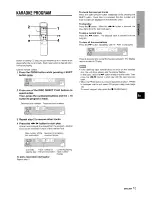
Страница 67: ...erve plage reservee 3 4 Repeter I etape 2 pour n erver d autres plages Appuyer sur la touche pour demarrer la lecture Une fois qu une plage est Iue elle est effacee du programme On peut reserver une autre plage a la plqce de celle effacee Numero de disque de la Nombre de plages derniere reservation reservees restantes Disque en Numero de plage Le numero de la tours de lecture de la derniere plage ...

Страница 68: ...our passer au format de 24 heures g gg i4ie i i J w g i a 3 s r s s ae g B w w p sq wkwaw gzss D g pf g p 14 s 438 Wk ii l k iWw s a k di s J k kB e9 smc w lw 3 t ir q J F 7 Appuyer sur la touche CLOCK tout en appuyant sur la touche d 8 y w r J Ea q s s4 asx lsx l b Q a ads Jw fl s _ P t a s T 8 Eq al m m d a m 8 s m m 4 SHIFT de la telecommande puis appuyer sur la touche clans Une fois que I heur...

Страница 69: ...r 0 ou REC Utilisation de I appareil une fois que la minuterie est reglee On peut utiliser I appareil normalement apres avoir regle la minuterie Avant de couper I alimentation repeter I etape 5 pour preparer la source et regler Ie volume et la tonaiite La lecture et I enregistrement commandes par la minuterie ne se feront pas si I appareil n est pas mis hors tension L appareil connecte ne peut pas...

Страница 70: ...disque magnetoscope televiseur etc Connecter la fiche rouge a la prise R et la fiche blanche a la ptise L Pour connecter un tourne disque Utiliser un tourne disque Aiwa muni d un amplificateur a egaliseur integre PRISE CD DIGITAL OUT OPTICAL Cet appareil peut sortir Ies signaux sonores numeriques de disque compact par cette prise Utiliser un cable optique pour connecter un appareil audio numerique...

Страница 71: ...ion Soin des disques Si un disque est sale I essuyer du centre vers I exterieur avec un chiffon de nettoyage Apres la lecture d un disquej Ie ranger clans son etui Ne pas Iaisser Ie disque clans un endroit chaud ou humide PARTIE TUNER II y a des charges statiques constants en forme cf onde L antenne est elle raccordee correctement page 4 Le signal n est il pas faible Connecter une antenne exterieu...

Страница 72: ...electrique 11OW Dimensions de I appareil principal Lx H x P 260 x 309 x 346 mm Poids de I appareil principal 6 5 kg 23 FRAN AIS Enceintes acoustiques SX FNA51 pour NSX A31 Type de caisson 3 voies bass reflex avec haute parleur surround Type a Haut parleurs Impedance Niveau de pression acoustique de sortie Dimensions Lx H x P Poids blindage magnetique Haut parleur de grave cdne de 160 mm Haut parle...

Страница 73: ......

Страница 74: ... ...

Страница 75: ......

Страница 76: ...ages irldiquees Les parties sent indiquees clans I ordre alphabetique BAND 9 CD 11 w CLEAR 9 10 11 12 CLOCK 19 DEMO 7 bD PRESET 9 10 11 DISC CHANGE 11 DISC DIRECT PLAY 11 DSP DISCO LIVE HALL 8 DOWN 9 10 11 19 ECHO 17 EDIT CHECK 11 15 16 GEQ ROCK POP CLASSIC 8 KARAOKE 17 MIC 17 MIC 1 MlC2 17 MONO TUNER 9 OPEN CLOSE 11 PHONES 7 POWER 7 PRGM 12 18 RANDOM REPEAT 12 REC REC MUTE 13 14 II SET 9 10 11 19...

Отзывы: