– 31 –
Main board
ADJUSTMENT
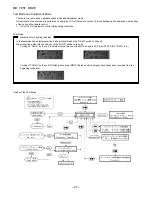
1. Starting up and Terminating the Adjustment Mode
1)
Starting up the adjustment mode
Short TP1 on the main board, then turn on the power (insert
a battery) while pressing the “PLAY/STOP” key.
After the adjustment mode starts up, all the indicators on
the LCD light and [ADJ MODE] appears.
2)
Terminating the adjustment mode
Remove the battery and turn off the power.
Note
•
Be sure to use a clean disk because adjustment may be
impossible if the disk is dirty or scratched.
•
Perform each adjustment with the cassette lid of the unit
facing upward.
•
If the adjustment is not completed, [NO ADJUST!]
appears during normal operations and the unit does not
run.
2. Adjustment procedure
This mode automatically adjusts the servo system and stores the adjustment data in EEPROM.
After replacing the pickup, microprocessor or EEPROM or repairing the mechanism, perform all the adjustment procedures.
1)
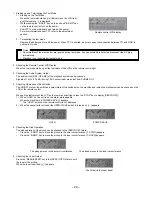
Initializing the EEPROM
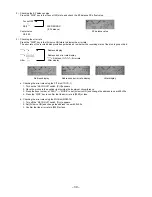
When [ADJ MODE] appears, press the “VOL -” key.
After [COMPLETE] appears, press the “PLAY/STOP” key.
2)
Adjustment by the PIT disk (TGYS-1 test disk)
1. Use the “B-SKIP” and “F-SKIP” keys to move the pickup to almost the
central position of the operable range of the sled.
2. Insert the TGYS-1 and press the “PLAY” key.
3. [ADJUST!] appears on the LCD and the automatic adjustment starts.
4. The [COMPLETE] indication means that the adjustment is completed.
The [SERVO OFF] indication means the adjustment is not completed.
5. Press the “PLAY/STOP” key, then press the “DISP” key twice.
Confirm that each ** of [Gf**ts**] is 50 or less.
3)
Adjustment by the MO disk (MDW-74)
1. Insert the MDW-74 and press the “PLAY” key.
2. [ADJUST!] appears on the LCD and the automatic adjustment starts.
3. The [COMPLETE] indication means that the adjustment is completed.
The [SERVO OFF] indication means the adjustment is not completed.
4. Press the “PLAY/STOP” key, then press the “DISP” key twice.
Confirm that each ** of “Gf**ts**” is 50 or less.
4)
Error rate check
1. Insert the MDW-74 disk on which a signal has already been recorded from
the beginning to the end (disk recorded by 7ZG-9, AZG-4).
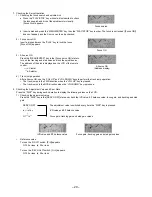
2. Press the “DTP” key to display [ERROR RATE] and start playback.
3. The error rate display starts at 600c00s.
4. Confirm that [0600C XXXX] appears and XXXX is 0050 or less.
5. Remove the MDW-74 and insert the TGYS-1.
6. Press the “DTP” key to display the [ERROR RATE] and start playback.
7. The error rate display starts at 600c00s.
8. Confirm that [0600C XXXX] appears and XXXX is 0050 or less.
During automatic adjustment
During initializing
Completed
Automatic adjustment completed
Adjustment value check
Operation start
Error rate display

