AIS XMP-120 Скачать руководство пользователя страница 6


Audio volume settings 

2.6.

From the 

Main Menu

, select 

Output setting

 to enter the submenu. You can enter the 

sound level

 in percentage 

(%) from 0(quietest) to 100 (loudest) or in decibels (db) from -22 (quietest) to 0 (loudest) 


Video output settings 

2.7.

For best quality, set the output resolution to match your display’s native resolution to avoid image scaling and 
blur. 

If you are connecting to an LCD TV, the resolution setting is most likely 1366x768 or 1920x1080 

 For 1920x1080 displays, we recommend setting the output of XMP-120/130 to 

1280x720

 for the best video 

quality.  

If you are connecting a LCD computer monitor, projector, or plasma display, refer to the device 
documentation for the best matching setting. 

 Press the space bar to fill in the star (*) before pressing the enter key for <OK>. 
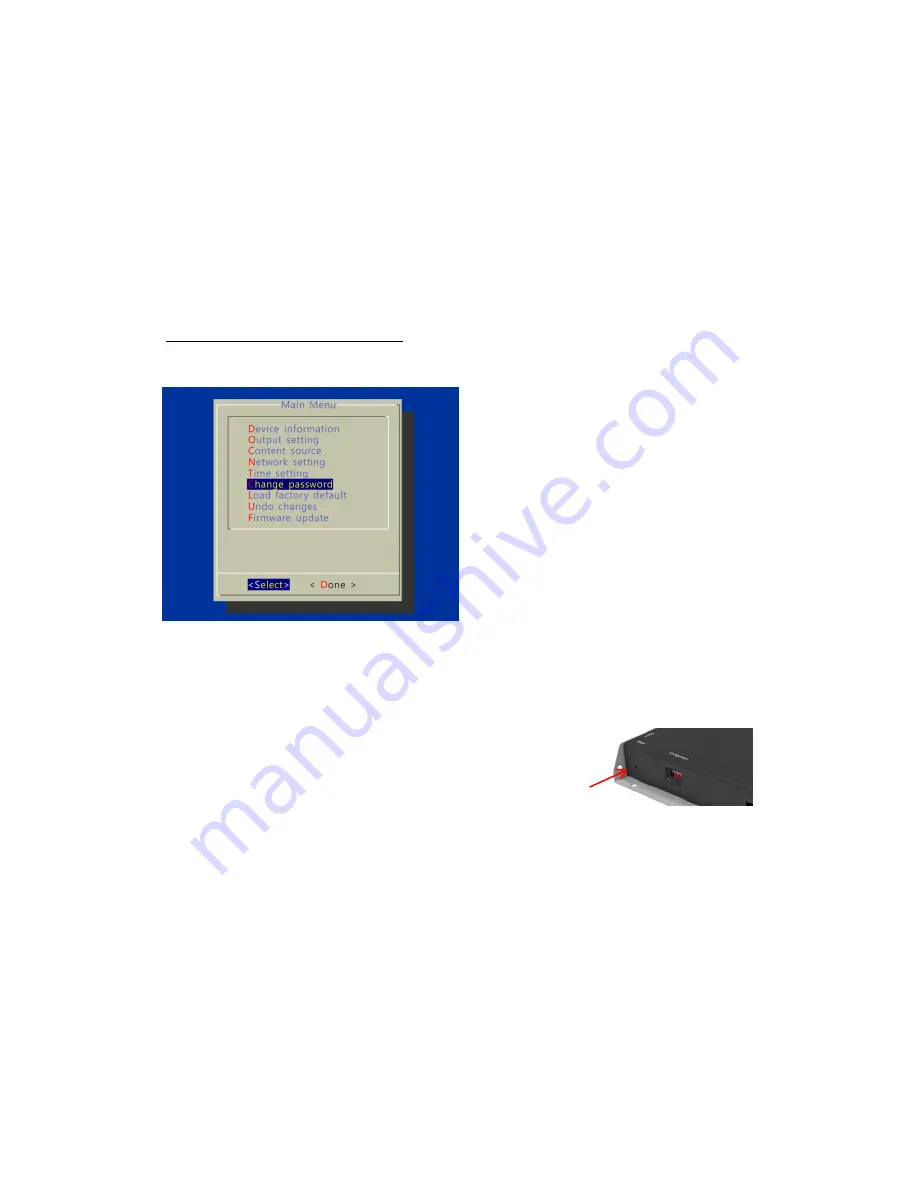
 

Setting a password 

2.8.

To prevent your player settings from being modified by 
unauthorized personnel, set a player password to hide the 
menus.  

From the top level menu, select 

Change password

 to set a 

password.  

Once a password is set, you can only access the menus by 
connecting a USB keyboard and pressing C ALT + 
DELETE (3-key combination) simultaneously. You may 
connect the keyboard at any stage of player operation or 
before/ during boot-up. 

If you forget the password, you will need to reset the device. 
See 

Factory reset


Factory reset 

2.9.

If you forget a system password you have set, you must reset the system to regain access to the player.  

Using the reset button  

1


Press and hold the reset button with a pin 

2


Re-connect the power cord 

3


In about 8 seconds, the status LED flashes 

4


Release reset button and wait for system to initialize 

Using a USB keyboard 

System reset will re-initialize the system, clear passwords, and return settings to their default values. Perform 
the following: 

1


CONNECT

 USB keyboard 

2


REBOOT

 the player and look for the reset instructions on the top left corner of the screen. When it appears, 

PRESS

 the 

Delete key

 on your keyboard 

 If you missed the reset window, unplug power and try again 

3


You should see a menu with a reset confirmation dialogue box. 

SELECT


Yes

 to confirm 

4


WAIT

 while system reboots to complete reset 


Applying firmware upgrades 

2.10.

Firmware updates can be performed using a USB flash drive. Please read the release notes carefully regarding 
the changes that will be made to your player before applying the upgrade 

Reset button 

Содержание XMP-120

Страница 1: ...del variants The XMP 120 and XMP 130 models are based on XMP 120 with the following differences XMP 120 Ethernet only XMP 130 Ethernet Wi Fi Wireless operations apply to XMP 130 only All other aspects of operation are identical for each model ...

Страница 2: ...ating the menus 2 2 3 Connect the XMP 120 130 to your network 2 2 4 Clock and calendar settings 3 2 5 Audio volume settings 4 2 6 Video output settings 4 2 7 Setting a password 4 2 8 Factory reset 4 2 9 Applying firmware upgrades Error 2 10 Bookmark not defined 3 Content Management 6 4 Working with SMIL 7 Introduction 7 4 1 www a smil org for Developers 7 4 2 5 Technical Data 8 Specifications 8 5 ...

Страница 3: ... XMP 130 only Built in wireless b g n network Package contents 1 2 NOT INCLUDED A USB keyboard is required for system setup Mounting options 1 3 The player can be attached to mounting posts on the back of screens or inside cabinetry with the built in 140mm x 75 100mm variable mounting flange For XMP 130 only ATTACH the wireless antenna as shown in physical views Screw the antenna clockwise onto th...

Страница 4: ...B keyboard not supplied to the unit s USB port The player will enter the graphical menu system in approx 30 seconds If you have set up a password the menu will not be displayed until you press Ctrl Alt Del Navigating the menus 2 3 You must attach a USB keyboard not supplied to the XMP 120 130 to configure settings With the player booted up and ready it takes approximately 30 seconds after you plug...

Страница 5: ...the Static IP brackets and press Enter on the keyboard to select OK Proceed to configure an available static IP address Select Wireless configuration or IP configuration as determined by your connection Please consult your network administrator if necessary Clock and calendar settings 2 5 It s important to set the correct time and time zone for schedule playback Highlight Time setting and press En...

Страница 6: ...ssing CONTROL ALT DELETE 3 key combination simultaneously You may connect the keyboard at any stage of player operation or before during boot up If you forget the password you will need to reset the device See Factory reset Factory reset 2 9 If you forget a system password you have set you must reset the system to regain access to the player Using the reset button 1 Press and hold the reset button...

Страница 7: ...USB drive from www digisignage com 2 PLUG the power cord into the device 3 PLUG a USB keyboard to the device to enter menu system 4 Follow on screen instructions and SELECT firmware upgrade option in the menu 5 When instructed PLUG IN the USB drive to begin firmware upgrade ...

Страница 8: ...6 3 Content Management Please consult the software documentation for information specific to your management solution ...

Страница 9: ...mile the language created by W3C for multimedia communications the media player understands the language spoken by professional tools from companies such as Adobe Apple Microsoft and Real Networks What this means is quicker easier and better integration of your players into your digital signage networks opening up avenues of software controls and realizing the full potential of your player hardwar...

Страница 10: ...WPA WPA2 TKIP AES security Mounting solution Metal mounting flange 140mm x 75 100mm pitch Digital Signage Features Power auto on upon power cord attach Automatic error recovery built in WDT Real time clock with 12 hour backup battery Automatic NTP clock adjustment Local storage Internal 2GB NAND flash Memory card slot Secure Digital Card SD SDHC SD card disables internal memory Accessories 3 5mm t...

Страница 11: ...ata used per second to store or play the contents usually expressed in Mbps mega bits per second Video encoded with excessive bit rates will not playback smoothly in the media player likely due to storage i o bottleneck Visit www digisignage com for compatible media format presets The media playback looks different on a PC compared to the media player s screen Wrong aspect ratio The XMP 120 will a...

Страница 12: ...dedicated media players usually lack input devices such as keyboard or mouse like PCs troubleshooting is usually based on user s knowledge and experience with the specific media player First check the on screen message and stats reports Bad play list and timing issues are two major causes of playback problems To determine if the problem is caused by a bad play list just delete the play list and re...

Отзывы: