


2
2.
Setting up the system
System connections
2.1.
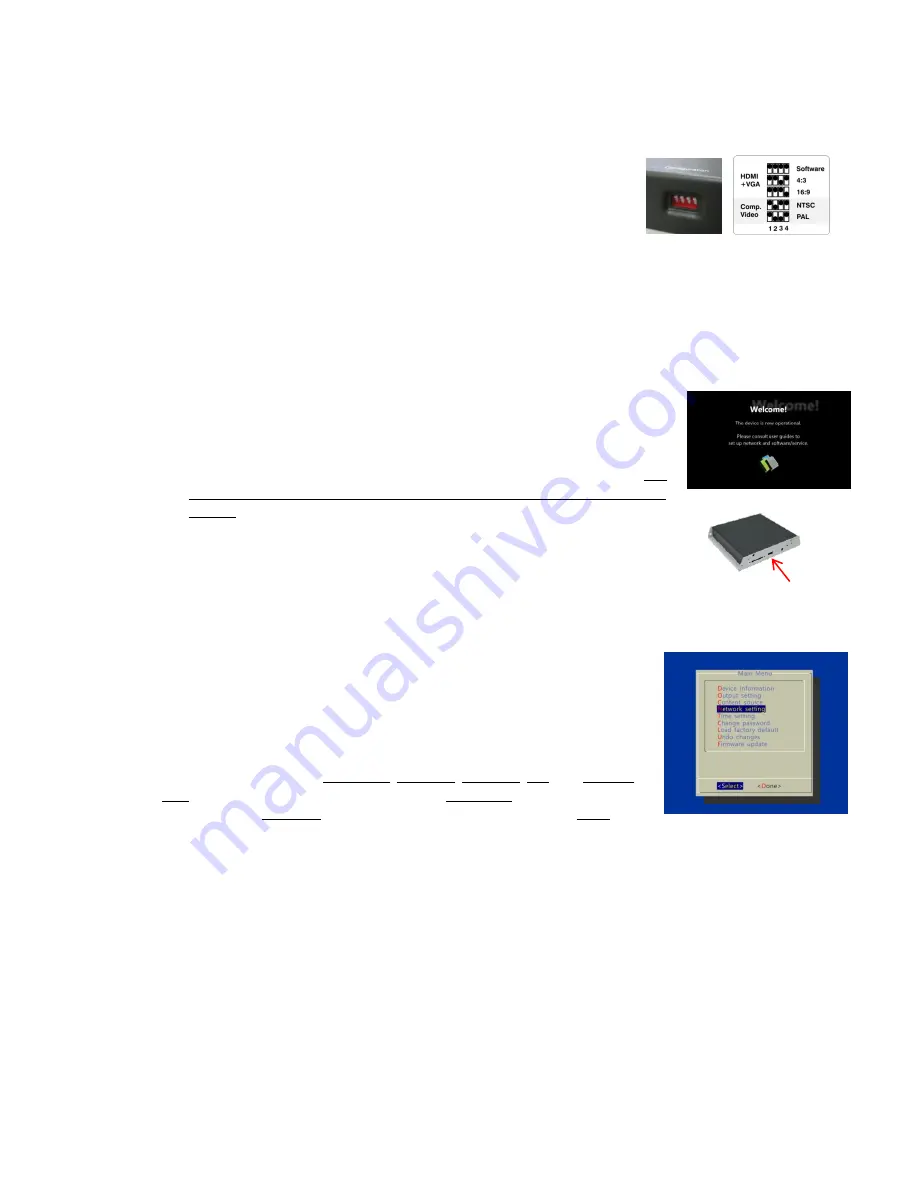
1
(for Composite video only; Skip to step 2 for HDMI or VGA displays)
SET
the output switches to NTSC or PAL
2
CONNECT
the player to your display with an HDMI, VGA, or supplied
3.5mm composite AV cable, and switch your display on to the
corresponding input mode.
3
ATTACH
the AC power adapter
→
main unit status LED lights up and you should see “Starting up” on screen
4
WAIT
while player boots up (~ 90 seconds)
→
once you see “Welcome” on screen, the unit is ready for content update or menu configuration
Entering menu configuration via USB keyboard
2.2.
Initially,
the player will boot into the “Welcome!” screen.
PLUG IN
a USB keyboard
to enter configuration menus. The menu and blue background will appear in
about 30 seconds.
If you have already loaded media contents into the player, contents will play back
immediately after boot up, and the “Welcome!” screen will not be shown. You
can still plug in a USB keyboard at any time during playback to enter the menu
system.
→
PLUG IN a USB keyboard (not supplied) to the unit’s USB port. The player will enter
the graphical menu system in approx. 30 seconds
If you have set up a password, the menu will not be displayed until you press Ctrl-Alt-
Del
Navigating the menus
2.3.
You must attach a USB keyboard (not supplied) to the XMP-120/130 to
configure settings. With the player booted up and ready, it takes approximately
30 seconds after you plug in the keyboard for the following menu to be
displayed:
Navigate the menus using arrow keys, space bar, enter key, ESC, and numeral
keys on your USB keyboard. Use the keyboard arrow keys to highlight menu
items, press the space bar to move the star (cursor), and then press enter to
confirm (<OK>) or reject (<Cancel>) any changes.
Connect the XMP-120/130 to your network
2.4.
Wireless connection (XMP-130 only)
The player will scan for wireless signals nearby during boot up. If the network requires authentication, you will
be asked to provide the password for access.
Wired connection
To use the wired Ethernet connection, connect an Ethernet cable and the Wi-Fi (XMP-130) will be disabled.
Player IP address
You will also need an IP address for the player on your network. This could be set automatically (DHCP) or
manually (static IP):