AirPro P2501 Скачать руководство пользователя страница 4

1

. To reduce the risk of electric shock, insure electricity has been turned 

off at the circuit breaker or fuse box before beginning.

2

. All wiring must be in accordance with the National Electrical Code and 

local electrical codes. Electrical installation should be performed by a 
qualified licensed electrician.

3. WARNING: 

To reduce the risk of electrical shock and fire, do not use 

this fan with any solid-state fan speed control device.

4. WARNING: 

To reduce the risk of personal injury, use only the two steel 

screws (and lock washers) provided with the outlet box for mounting to 
the outlet box. Most outlet boxes commonly used for the support of 
lighting fixtures are not acceptable for fan support and may need to be 
replaced, consult a qualified electrician if in doubt.

7

.   Do not operate reversing switch while fan blades are in motion. Fan 

must be turned off and blades stopped before reversing blade  
direction.

8

.    Avoid placing objects in the path of the blades.

9

.    To avoid personal injury or damage to the fan and other items, be 

cautious when working around or cleaning the fan.

10.  Do not use water or detergents when cleaning the fan or fan blades.  A 

dry dust cloth or lightly dampened cloth will be suitable for most 
cleaning.

11.  After marking electrical connections, spliced conductors should be 

turned upward and pushed carefully up into outlet box. The wires 
should be spread apart with the grounded conductor and the 
equipment-grounding conductor on one side of the outlet box.

12.  Electrical diagrams are reference only. Light kit that are not packed 

with the fan must be UL Listed and marked suitable for use with the 
model fan you are installing. Switches must be UL General Use 
Switches. Refer to the Instructions packaged with the light kits and 
switches for proper assembly.

WARNING

TO REDUCE THE RISK OF FIRE, ELECTRIC SHOCK OR PERSONAL 

INJURY, MOUNT FAN TO OUTLET BOX MARKED ACCEPTABLE FOR 

FAN SUPPORT.

5

. The outlet box and support structure must be securely mounted and 

capable of reliably supporting a minimum of 35 pounds. Use only UL 
Listed outlet boxes marked 

FOR FAN SUPPORT.

6

. The fan must be mounted with a minimum of 7 feet clearance from the 

trailing edge of the blades to the floor.

WARNING

TO REDUCE THE RISK OF PERSONAL INJURY, DO NOT BEND THE 

BLADE BRACKETS (ALSO REFERRED TO AS FLANGES) DURING 

ASSEMBLY OR AFTER INSTALLATION. DO NOT INSERT OBJECTS IN 

THE PATH OF THE BLADES.

NOTE

READ AND SAVE ALL INSTRUCTIONS!

1. Safety Rules

Содержание P2501

Страница 1: ...P2501 Ceiling Fan Installation Manual...

Страница 2: ...G WILL NOT ASSUME LIABILITY OR RESPONSIBILITY FOR DAMAGES INCLUDING INCIDENTAL OR CONSEQUENTIAL CAUSED BY THE IMPROPER INSTALLATION OR OPERATION OF THE UNIT OR ITS COMPONENT PARTS OR BY THE FAILURE OF...

Страница 3: ...Safety Rules Unpacking Your Fan Installing Your Fan Care of Your Fan Troubleshooting Specifications Operating Your Fan 1 2 3 9 10 11 12 Table of Contents...

Страница 4: ...hen cleaning the fan or fan blades A dry dust cloth or lightly dampened cloth will be suitable for most cleaning 11 After marking electrical connections spliced conductors should be turned upward and...

Страница 5: ...re Balancing kit b Blade bracket attachment hardware 11 screws with lock washers 3 plastic wire connectors 1 Pull chain Blade balancing kit a b c 3 1 2 5 6 4 d 1 2 Mounting plate located inside canopy...

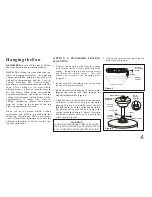
Страница 6: ...5 If the canopy touches downrod remove the decorative canopy bottom cover and turn the canopy 180 before attaching the canopy to the mounting plate To hang your fan where there is an existing fixture...

Страница 7: ...N 1 STANDARD CEILING MOUNTING 3 Route the wires exiting the top of the fan motor through the canopy and then through the ball downrod assembly Figure 6 4 Align the holes at the bottom of the downrod w...

Страница 8: ...te as shown in Fig 9 3 Tighten the two screws on the outlet box securely 4 Carefully life the fan assembly up to the ceiling mounting plate and hang the fan on the hook provided by utilizing one of th...

Страница 9: ...the ball downrod assembly is not used 6 Figure 9 Figure 10 Mounting screws supplied with electrical box Ceiling mounting plate UL Listed electrical box 120V Wires Washers WARNING WHEN USING THESTANDA...

Страница 10: ...ng screwsfirmly 7 SUPPLYCIRCUIT Ground Conductor Outlet Box Green Ground Lead Ground to Downrod BLACK WHITE WHITE BLACK BLUE GREEN WHITE BLUE BLACK WHITE Figure 11 Diagram indicates optional light kit...

Страница 11: ...13 Motor Blade arm Blade blancing deviation 3 Use the enclosed Blade Balancing Kit if the blade wobbleis still noticeable 4 If the blade wobble is still noticeable interchanging two adjacent side by s...

Страница 12: ...d settings for warm or cool weather depend on factors such as the room size ceiling height numberof fans andso on The slide switch controls directions forward switch down or reverse switchup Warm weat...

Страница 13: ...g the finish The plating is sealed with a lacquer to minimize discoloration or tarnishing Do not use water when cleaning This could damage the motor or the wood or possibly cause an electrical shock 3...

Страница 14: ...st each otheror the interiorwall of theswitch housing CAUTION Make suremain power isoff 4 Allowa 24 hour breaking in period Most noiseassociated with anew fan disappearduring this time 5 If usingan op...

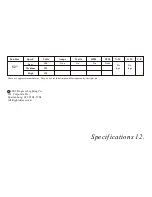
Страница 15: ...andWattage used by the light kit RPM CFM N W G W C F 52 120 Xx kgs Xx kgs Xxx Xx Xx Xxxx 120 120 Fan Size Speed Volts Amps Watts Low Medium High Specifications 12 2005 Progress Lighting Co 101 Corpor...

Отзывы: