background image

5. Appendix 


AirLive BU-3025 Manua

58

(3). After the columns show up at the left side, click “

Create Account

”. 


(4). Fill the application agreement and necessary information. 

a. Username 
b. E-mail address and confirmation 
c. Password and confirmation 
d. Submit all the input information and finish creating an account 


Содержание BU-3025

Страница 1: ...AirLive BU 3025 Manual 1 BU 3025 3 MegaPixel Outdoor 25 meter IR IPCAM User s Manual ...

Страница 2: ...n the spaces provided below Refer to these numbers whenever you call upon your dealer regarding this product Model No ____________________ Serial No ____________________ To prevent fire or shock hazard do not expose the unit to rain or moisture For AC Adaptor to avoid electrical shock do not open the cabinet Refer servicing to qualified personnel only ...

Страница 3: ...an be determined by turning the equipment off and on the user is encouraged to try to correct the interference by one or more of the following measures Reorient or relocate the receiving antenna Increase the separation between the equipment and receiver Connect the equipment into an outlet on a circuit different from that to which the receiver is connected Consult the dealer or an experienced radi...

Страница 4: ...es on our website Please go to Hwww airlive comH and go to the Support GPL menu to download source code WE PROVIDES NO WARRANTY WITH REGARD TO THIS MANUAL THE SOFTWARE OR OTHER INFORMATION CONTAINED HEREIN AND HEREBY EXPRESSLY DISCLAIMS ANY IMPLIED WARRANTIES OF MERCHANTABILITY OR FITNESS FOR ANY PARTICULAR PURPOSE WITH REGARD TO THIS MANUAL THE SOFTWARE OR SUCH OTHER INFORMATION IN NO EVENT SHALL...

Страница 5: ...WirelessUT 9 TU2 2 UPnP of Windows XP Vista or 7UT 9 TU2 3 Install the Device behind a NAT RouterUT 10 TU2 4 Access the Device from the Internet Explorer for the First TimeUT 11 TU2 5 Logging in as an UserUT 12 TU2 6 Logging in as an AdministratorUT 12 TU3 Operating the Network CameraUT 13 TU4 Administrating the DeviceUT 16 TU4 1 SystemUT 17 TU4 2 SecurityUT 18 TU4 3 NetworkUT 19 TU4 3 1 GeneralUT...

Страница 6: ... 13 MaintenanceUT 41 TU4 14 LanguageUT 42 TU5 AppendixUT 43 TUAppendix A Alarm I O ConnectorUT 43 TUAppendix B Troubleshooting Frequently Asked QuestionsUT 44 TUAppendix C PING IP AddressUT 50 TUAppendix D Bandwidth EstimationUT 51 TUAppendix E SpecificationsUT 52 TUAppendix F Configure Port Forwarding ManuallyUT 53 TUAppendix G DDNS ApplicationUT 56 TUAppendix H Power Line FrequencyUT 63 TUAppend...

Страница 7: ...ance and security applications This 3 0MP IP camera offers many improvements in image quality as comparing to the conventional surveillance cameras Users are able to view live video streaming over the Internet and it is not the only one of the benefits for using AirLive IP Camera It is also designed to offer high performance surveillance and it is equipped with PoE port which allows power and data...

Страница 8: ... 20fps at QXGA Resolution and up to 30fps 1080p Full HD z Support 802 3af Power over Ethernet Standard z Mechanical IR Cut Filter Removable z Built in SD SDHC Memory Card Slot for Local Storage z IP 66 Weatherproof Housing for Most of Environments z Equips High Illuminate IR LED Project up to 25 Meters z Support H 264 MPEG MJPEG z Support Two Way Audio Minimum System Requirements z VGA Monitor Res...

Страница 9: ...upply with a different voltage than the one included with the Network Camera will cause damage and void the warranty for this product 1 3 Physical Overview and Connections 1 RJ45 LAN socket Connect to PC or Hub Switch For connections to 10Base T Ethernet or 100Base TX Fast Ethernet cabling This Ethernet port built N Way protocol can detect or negotiate the transmission speed of the network automat...

Страница 10: ...s Name Cable Color Function GND Black GND Sensor IN 1 Blue Digital signal input Alarm OUT 1 Green Digital signal output RS485 D Orange RS485 data RS485 D Yellow RS485 data 3 DC in Jack The input power is 12VDC Note that supply the power to the Network Camera with the power adapter included in package 4 MIC in audio in Connect a microphone to the network camera 5 Line out audio out Connect a loud s...

Страница 11: ...xternal power supply to Camera Connect the attached power adapter to the DC power jack of the camera Note Use the power adapter 12VDC included in the package and connect it to wall outlet for AC power Once you have installed the camera well and powered it on the power LED orange will turn on later The power LED turns on which means the system is booting up successfully Furthermore if you have a pr...

Страница 12: ...easy ways to search your Camera by IP Wizard II or UPnP discovery Here is the way to execute IP Wizard II to discover Camera s IP address and set up related parameter in a Camera 2 1 1 Search When launch the IP Wizard II a searching window will pop up IP Wizard II is starting to search Network Cameras on the LAN The existed devices will be listed as below ...

Страница 13: ...rs of wired interface please select the device you want to configure and click the LAN button Relative settings will be carried out as below You could modify the relative settings of the selected device Click button will quit the LAN setting procedure and click button will move to next page as below ...

Страница 14: ...our setting accordingly Click button will go back to previous page If you like to change username and or password of the device just click the check button Then the related fields will show up as below After keying in new username and password click Submit button to perform your setting accordingly Click button will go back to previous page ...

Страница 15: ...uipment software and peripherals This device is an UPnP enabled device If the operating system Windows XP Vista or 7 of your PC is UPnP enabled the Network Camera will be very easy to be found Please refer to Appendix J to enable UPnP settings only if your operating system of PC is running Windows XP Note Windows 2000 does not support UPnP feature To discover your device go to your Desktop and cli...

Страница 16: ...e which will attempt to automatically configure the router to allow access to the camera Installing the device with an UPnP router on your network is an easy 3 step procedure 1 Enable UPnP option of your NAT router 2 Enable UPnP NAT traversal option of the Network Camera default 3 Access your Network Camera by DIPS 1 Enable UPnP option of your NAT router To use UPnP IGD function NAT traversal you ...

Страница 17: ...ME and PASSWORD textbox For the first time use default value input the User Name admin Password airlive After typing in admin on the USERNAME and airlive on the PASSWORD click OK button to start the main menu 3 According your browser s security setting the IE Web Page may prompt the Security Warning window If so select Yes to install and run the ActiveX control into your PC Otherwise the system wi...

Страница 18: ...gging in as an User If you log in the Camera as an ordinary User Configuration function will be not accessible 2 6 Logging in as an Administrator If you log in the Camera as the Administrator you can perform all the settings provided by the device ...

Страница 19: ... ordinary users or an administrator Configuration Click for configuring the camera settings Language The device can provide multiple languages to meet customer s requirement Stream The device supports multi profile function for H 264 MEPG4 and JPEG simultaneously A user can choose the proper and or preferred profile which is listed here ...

Страница 20: ...sable audio uploading function Enable audio uploading function Volume Click Speaker button to activate this function Scroll the control bars to adjust the audio attribute Original size Preview Size Switches live image view between original size full size 3MegaPixels and preview size smaller size Digital Zoom From 1X to 10X so you can see objects in video in detail Please note that digital zoom use...

Страница 21: ...ll be prompted to indicate the folder on your computer to save image file If you changed your mind and don t want to save image file click Cancel Record Click Record to activate this function Press Record button to start recording The video file is saved as ASF format into your local PC While you want to stop it press Stop to stop recording Recording Location Select Recording Location to select th...

Страница 22: ...nd UPnP IP Filter You can enter different user s IP address which are allowing enter or denying by the device Video Configure bit rate and frame rate of video profiles Audio Configure audio parameters Motion Setup Motion detection PTZ Control Configure Pan tilt control via RS 485 connection Event Setup Event server Motion Detection I O Ports and Event configuration Recording Setup External storage...

Страница 23: ...ame You can enter the name of this unit here It s very useful to identify the specific device from multiple units The information will be shown on IP Wizard II once the device is found z Indicator LED Turn on or off Indicator LED z Time Zone Set the time difference from Greenwich Mean Time in the area where the device is installed z Daylight Saving Disable or enable the daylight saving adjustment ...

Страница 24: ...e setting z Synchronize with computer time Click this option to enable time synchronization with PC time z Synchronize with NTP Server Click this option if you want to synchronize the device s date and time with those of time server called NTP server Network Time Protocol z Set Manually Click this option to set time and date manually When you finish with above settings click Apply button to save c...

Страница 25: ... s video and see settings but can t make any change z Guest A guest can view IP camera s video only There can be multiple users but only one administrator is allowed and you can t change administrator s user name it will always be administrator 4 3 Network In this menu you can configure IP camera s network setting 4 3 1 General Setup the IP address for BU 3025 This IP camera supports both IPv4 and...

Страница 26: ...nput DNS server s IP address Secondary DNS Input backup DNS server s IP address you can leave this field blank You can leave this field blank if you only wish to use IPv4 or IPv6 IP address Enable UPnP Discovery Check this box to enable other devices on network to discover the presence of this IP camera by UPnP It s recommended to enable this function Enable UPnP Port Mapping When UPnP is enabled ...

Страница 27: ...ices NVR or CMS software so they can receive this IP camera s video z RTP Data Port Input RTP data port number here When you finish with above settings click Apply button to save changes 4 3 2 Advanced You can setup advanced network settings in this page This page is intended for advanced settings only and this IP camera will work fine even you don t make any changes to this page ...

Страница 28: ... Enable QoS to improve the data transfer priority of this IP camera Your local area network must support QoS You can select Video Audio s QoS DSCP value 0 to 63 or both video and audio z DDNS Enable DDNS support if your ISP assigns dynamic IP address to you You must register a dynamic IP service first Currently this IP camera supports Dyndns and TZO dynamic IP service Provider Select dynamic IP se...

Страница 29: ...o disable this function z Accepted IP list Here lists all IP address that can build connections to this IP camera If you want to remove a set of IP address from the list click on the IP address and click Remove button z IP Address Accepted IP list Input the starting and ending IP address of IP address you wish to accept connections here IP camera will only accept connections established from these...

Страница 30: ...ss and click Remove button z IP Address Deny IP list Input the starting and ending IP address of IP address you wish to deny connections here IP camera will deny connections established from these IP address If you want to specify one IP address only input the same IP address in both field Click New button to add IP address into deny IP list 4 5 Video 4 5 1 Image Setting You can adjust the image p...

Страница 31: ...ers automatically Night You ll be using this IP camera in dark places where lights are insufficient z TV Out Click Enable box to enable its VIDEO OUT function for connections and video sending to TV monitors or DVRs z IR cut An IR cut filter is built in this IP camera to reduce the effect of IR lights which will change the color of image and makes it looks different than what you see through your ...

Страница 32: ...oder is H 264 When network speed is insufficient selecting a lower frame rate will help z Rate Control Select video bit rate You can control bit rate by both Video quality and Bitrate Video quality There are 5 levels of video quality select very high to improve video quality but consumes more network bandwidth and select very low will decrease video quality and consumes less network bandwidth Bitr...

Страница 33: ... the text for Time Stamp Check this box to remove time stamp s background color You may find this will help the readability of time stamp text in some cases z Enable Text Display Check this box to display certain text on video this will help when you need to identify certain IP camera when you have a lot of IP cameras Please input the text in Text field You can input up to 15 characters z Remove t...

Страница 34: ...note that there are certain restrictions Select bmp jpg jpeg image files only Image s resolution should be less than 160 x 128 and can be divided by 4 Do not upload image files that size is greater than 64KB 4 6 Audio You can adjust audio input output parameters here z Enable Microphone Check this box to enable microphone If you don t want to hear voice from IP camera you can uncheck this box to d...

Страница 35: ... to enable speaker If you don t want people at IP camera to hear you you can uncheck this box to disable it z Audio Type Speaker The format is fixed as G 711 4 7 Motion This IP camera is capable to detect object s motion so IP camera will only record when there s motion and save disk storage space Motion detection is performed by examine the movement of objects in rectangular motion detection area...

Страница 36: ...ebars top bottom left and right z Title Window 1 to Window 3 Input characters in title field to change motion detection area s title text so you can identify it z Percentage Select the percentage of pixel change that will trigger motion detection alert Select a lower percentage and you can detect tiny changes in motion detection area z Sensitivity Select the sensitivity level that will trigger mot...

Страница 37: ...efine the protocol Baud Rate Select data baud rate of RS 485 interface that pan tilt camera cradle will accept When the length of RS 485 connection is very long longer than 200M it s not recommended to use high speed connection greater than 2400bps Data Bits Select data bits of RS 485 connection Parity Select parity bit odd even or space Stop Bit Select stop bit 1 or 2 Home Up Down Left Right Inpu...

Страница 38: ...s 1 Setting Define a new event and manage events 2 Media Define what kind of media file should be saved on designate media 3 Event Server Define the details of remote server Please refer to following sections for detailed instructions 4 9 1 Image Setting This page lists all existing events You can click Modify button to edit an existing event or Remove to delete an existing event To create a new e...

Страница 39: ...escription text for this event so you can identify it quickly You can use alphabets numbers and symbols include _ no spaces allowed z Trigger by Select the triggered sources z Enable Schedule Time Define the feasible time slot z Action Define the actions once event triggered ...

Страница 40: ...th before and or after the time when event is triggered in Pre Event and Post Event For example if you set Pre Event to 10 and Post Event to 5 and an event is triggered at 14 10 30 then the video file will be 15 seconds long starting from 14 10 20 to 14 10 35 UTips You may want to know what happened before event is triggered in many cases especially when object is outside of motion detection windo...

Страница 41: ...stand alone network file servers also support samba server function UFTP Server z FTP Server FTP server s IP address or hostname z Port Input FTP server s port number In most cases it should be default value 21 z User Name Input FTP server s username z Password Input FTP server s password z File Path Name Input the path where you want to save file on FTP server like upload record If you want to sa...

Страница 42: ... and may help when you have anti spam software installed you can set this Email address to White List in your anti spam software z Receiver 1 Email Address Input primary recipient s Email address This field is required z Receiver 2 Email Address Input primary recipient s Email address This field is optional z Subject Input Email title that will appear in the Email send by IP camera This will help ...

Страница 43: ...save file on Samba server like upload record If you want to save file on this user s home directory you can leave this field blank z User Name Input Samba server s username z Password Input Samba server s password z Test SMB Click this button to test Samba server settings above immediately UTips Some samba servers do not have username and password check you can just input samba server address and ...

Страница 44: ...e from 1MB to 50MB IP camera will start a new video file when a recording video file reaches the size limit stated here z Recording Schedule Define the recording schedule You can check Sun to Sat boxes to represent a weekday and specify time period in From and To field Select Always to record 24 hours in selected weekday s ...

Страница 45: ...l 39 4 11 Log You can check the usage log of IP camera here In this page you can click 1 First page Final page Jump to first final page of log 2 Previous Next Jump to previous or next page of log 3 Remove Clear log You ll be prompted for confirmation ...

Страница 46: ...3025 Manual 40 4 12 Device info You can check the information and network settings of this IP camera This information is very useful when you need to repair or fix the problem of this IP camera An example of device info page looks like below ...

Страница 47: ...l settings of IP camera and reset to factory default setting z Backup Backup IP camera s setting and save it on your computer z Backup to SD card device Backup IP camera s setting and save it on SD card A SD card must be inserted into SD card slot when you click this button or you ll receive an error message z Restore Restore a previous saved configuration file in your computer Click Browse button...

Страница 48: ...revious saved in SD card z Upgrade Upgrade IP camera s firmware Click Browse button to select a firmware image file on your computer first then click Upgrade button 4 14 Language You can change the display language of web interface Click Language button and select one language More languages may available in latest firmware file ...

Страница 49: ...the external sensor can be a door switch or an infrared motion detector These devices are customer provided and are available from dealers who carry surveillance and security products Electrically they must be able to provide a momentary contact closure This Camera provides wires for general I O terminal and RS485 interface as below Cable for I O connectors Name Cable Color Function Sensor IN Blue...

Страница 50: ...olution codec type frame rate and bandwidth Obviously the performance of the each connected client will slow down when many users are logged on The device can be used outdoors or not The device is not weatherproof It needs to be equipped with a weatherproof case for outdoors using However equipped with a weatherproof case might disable the audio function of the device Install this device Status LE...

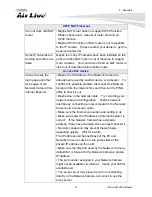
Страница 51: ...e by using the IP Wizard II program or by UPnP discovery IP Wizard II program cannot find the device Re power the device if cannot find the unit within 1 minutes Do not connect device over a router IP Wizard II program cannot detect device over a router If IP address is not assigned to the PC which running IP Wizard II program then IP Wizard II program cannot find device Make sure that IP address ...

Страница 52: ...t the Network Camera from the network first and then run the PING utility to check it out Maybe due to the network cable Try correcting your network cable and configuration Test the network interface by connecting a local computer to the Network Camera via a crossover cable Make sure the Internet connection and setting is ok Make sure enter the IP address of Internet Explorer is correct If the Net...

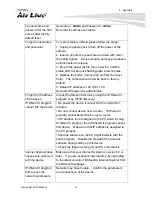
Страница 53: ...ulty Contact your dealer for further help Image or video does not appear in the main page The first time the PC connects to Network Camera a pop up Security Warning window will appear to download ActiveX Controls When using Windows XP or Vista log on with an appropriate account that is authorized to install applications Network congestion may prevent the Image screen from appearing quickly You may...

Страница 54: ...rectly The unreadable characters are displayed Use the operating system of the selected language Set the Encoding or the Character Set of the selected language on the Internet Explorer Frame rate is slower than the setting The traffic of the network and the object of the image affect the frame rate The network congestion causes frame rate slower than the setting Check the bandwidth of Internet con...

Страница 55: ...ust stain etc on the lens can degrade the image quality The color of the image is poor or strange Adjust White Balance To insure the images you are viewing are the best they can be set the Display property setting color quality to 16bit at least and 24 bit or higher if possible within your computer The configuration on the device image display is incorrect You need to adjust the image related para...

Страница 56: ...d or if the IP address conflicts with any other devices over the network If you want to make sure the IP address of the device utilize the PING command as follows z Start a DOS window z Type ping x x x x where x x x x is the IP address of the device The replies as illustrated below will provide an explanation to the problem If you want to detect any other devices conflicts with the IP address of N...

Страница 57: ...range of data sizes for JPEG mode Average bit rate for MPEG4 mode Average bit rate for H 264 mode 160 x 120 QQVGA 3 6k byte per frame 64kbps 256kbps 30fps 32kbps 192kbps 30fps 320 x 240 QVGA 8 20k byte per frame 256kbps 768kbps 30fps 192kbps 512kbps 30fps 640 x 480 VGA 20 50K byte per frame 512kbps 2048kbps 30fps 384kbps 1536kbps 30fps 1280x1024 SXGA 100 200k byte per frame NA 512kbps 3076kbps 15f...

Страница 58: ... Clinet UPnP Audio Audio Encoder RTSP G 711 64kbps Audio Streaming One way or Two way Microphone External Microphone Audio Output External Speaker Network Supported Protocols HTTP TCP IP IPv4 UDP SMTP FTP DHCP DDNS NTP DNS ARP RTSP RTP Samba Clinet UPnP Security Password protection user access log Ethernet 10 100M auto negotiation System Integration Application Programming Interface Open API for s...

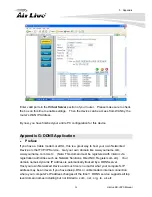
Страница 59: ...sta 7 Browser IE 6 0 or later Firefox 2 0 or later Safari Cell Phone With 3GPP player Video Player VLC Quick Time Real Player Core Player Software Search Installation IP Wizard II Bundled NVR Program CamPro Express 64 CamPro Professional Appendix F Configure Port Forwarding Manually The device can be used with a router If the device wants to be accessed from the WAN its IP address needs to be setu...

Страница 60: ...ttings of the router by following the steps outlined in the router s Quick Installation Guide If you have cable or DSL service you will most likely have a dynamically assigned WAN IP Address Dynamic means that your router s WAN IP address can change from time to time depending on your ISP A dynamic WAN IP Address identifies your router on the public network and allows it to access the Internet To ...

Страница 61: ...Virtual Server function on the router The Virtual Server ports used by the camera must be opened through the router for remote access to your camera Virtual Server is accessed by clicking on the Advanced tab of the router screen Follow these steps to configure your router s Virtual Server settings Click Enabled Enter a unique name for each entry Select Both under Protocol Type TCP and UDP Enter yo...

Страница 62: ...d Device or other TCP IP Service Get your own domain like www yourname com www yourname com tw etc Note This domain must be registered with Internic via registration authorities such as Network Solutions DirectNIC Register com etc Your domain name s dynamic IP address is automatically tracked by a DDNS server Host your own Networked Device and much more no matter what your computer s IP address ma...

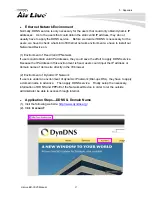
Страница 63: ...k If users could obtain valid IP addresses they could save the effort to apply DDNS service Because the IP address in this environment is fixed users could input the IP address or domain name of demo site directly in the IE browser 2 Environment of Dynamic IP Network If users is under an environment of dynamic IP network Dial up xDSL they have to apply a domain name in advance Then apply DDNS serv...

Страница 64: ...columns show up at the left side click Create Account 4 Fill the application agreement and necessary information a Username b E mail address and confirmation c Password and confirmation d Submit all the input information and finish creating an account ...

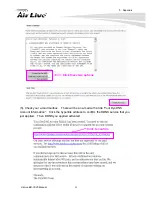
Страница 65: ...eck your e mail mailbox There will be an e mail with a title Your DynDNS Account Information Click the hyperlink address to confirm the DDNS service that you just applied Then DDNS you applied activated Click these two options Click to confirm ...

Страница 66: ...ain Input your username and password that you just applied to login administration interface of DDNS server 7 If the correct username and password are input you can see the following picture at the top right of the login page 8 Click the Services 9 Click the Dynamic DNS Input your account ...

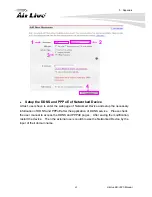
Страница 67: ...hout any charge at this step First we input the host name Pink No 1 Then we pick a domain that is easy to remember Pink No 2 The 3rd step is to click Offline Hostname from Service Type Pink No 3 Finally click the Create Host to submit the domain name information and finish DDNS application Pink No 4 ...

Страница 68: ... of Networked Device and setup the necessary information of DDNS and PPPoE after the application of DDNS service Please check the user manual to access the DDNS and PPPoE pages After saving the modification restart the device Then the external users could browse the Networked Device by the input of their domain name 1 2 3 4 ...

Страница 69: ...stria 230V 50 Hz Brazil 110 220V 60 Hz 127V found in states of Bahia Paran including Curitiba Rio de Janeiro S 緌 Paulo and Minas Gerais though 220V may be found in some hotels Other areas are 220V only with the exception of Fortaleza 240V Canada 120V 60 Hz China People s Republic of 220V 50 Hz Finland 230V 50 Hz France 230V 50 Hz Germany 230V 50 Hz Hong Kong 220V 50 Hz India 230V 50 Hz Italy 230V ...

Страница 70: ...e this function work Note that to use the 3GPP function it strongly recommends to install the Networked Device with a public and fixed IP address without any firewall protection RTSP Port Port 554 is the default for RTSP service However sometimes some service providers change this port number for some reasons If so user needs to change this port accordingly Dialing procedure 1 Choose a verified pl...

Страница 71: ...one Please contact your dealer to get the approved list of compatible 3G phone Appendix J Enable UPnP of Windows XP Use the following steps to enable UPnP settings only if your operating system of PC is running Windows XP Go to Start Settings Click Control Panel ...

Страница 72: ...5 Appendix AirLive BU 3025 Manual 66 Click Add or Remove Programs Click Add Remove Windows Components The following screen will appear Select Networking Services Click Details ...

Страница 73: ...5 Appendix AirLive BU 3025 Manual 67 Select Universal Plug and Play Click Ok Click Next ...

Страница 74: ...5 Appendix AirLive BU 3025 Manual 68 Please wait while Setup configures the components Click Finish ...

Отзывы: