background image

Section 1

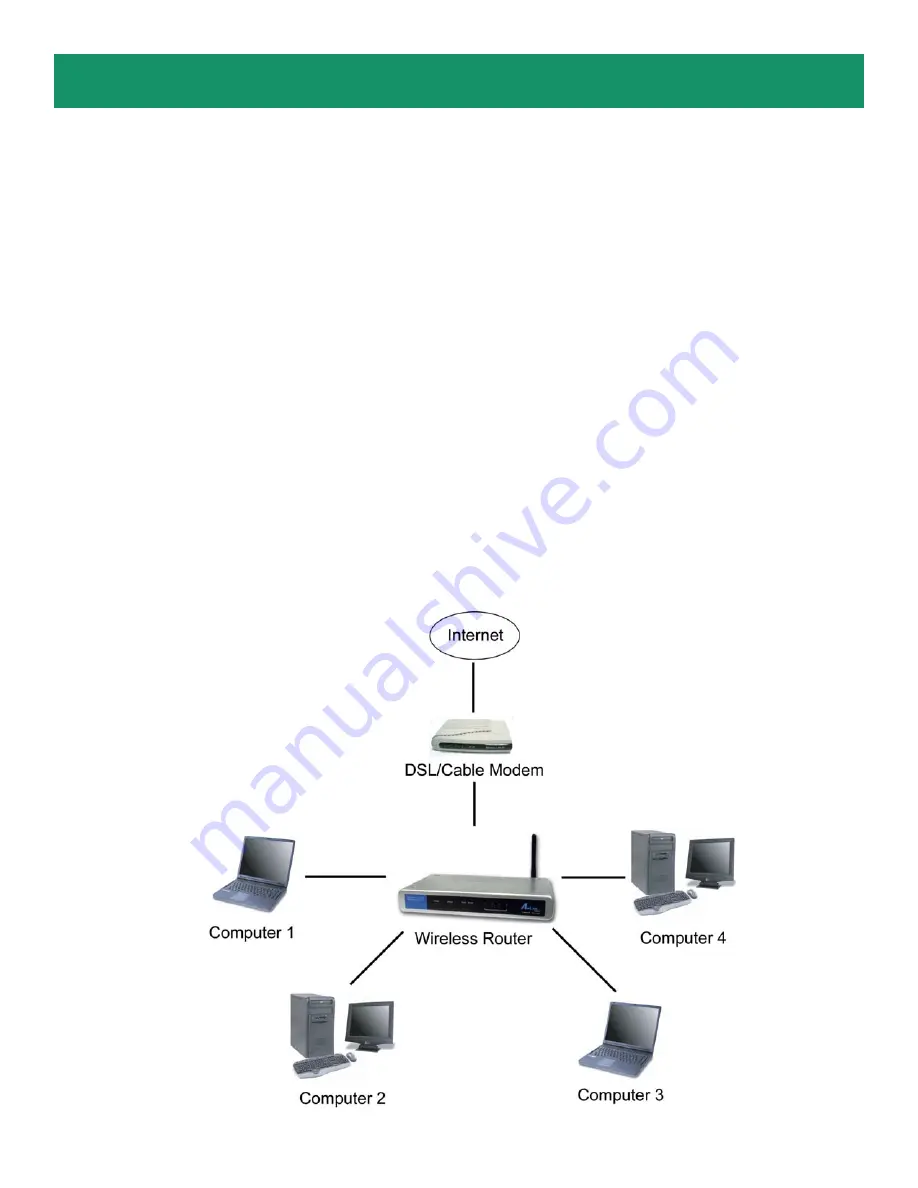
Connecting the Router

Note

: Prior to connecting the router, be sure to power off your computer, DSL/Cable modem, and the

router. You should setup the router with a wired connection first before attempting to setup any wireless
connection.

Step 1

 Connect one end of a network cable to the 

WAN

 port of the router and connect the other end of

the cable to the DSL/Cable modem.

Step 2

 With another network cable, connect one end of the cable to your computer’s network card and

connect the other end to one of the 

LAN

 ports of the router.

Step 3

 Power on the DSL/Cable modem and wait for the lights on the modem to settle down.

Step 4

 Power on the router by connecting one end of the supplied power adapter to the power jack of the

router and connecting the other end to an electrical outlet.

Step 5

 Power on your computer.

Step 6

 Make sure the 

WAN

WLAN

, and the 

LAN 

port that the computer is connected to are lit. If not, try

the above steps again.

This Quick Installation Guide only provides the basic instructions. For more
detailed information, please refer to the user’s manual on the supplied CD.

Содержание AR410W

Страница 1: ...Quick Installation Guide Model AR410W Ver 1A...

Страница 2: ...ur computer s network card and connect the other end to one of the LAN ports of the router Step 3 Power on the DSL Cable modem and wait for the lights on the modem to settle down Step 4 Power on the r...

Страница 3: ...8 1 1 and press Enter You should get four reply responses back Step 3 If you get Request timed out or Destination host unreachable double check the network cable connection between the computer and th...

Страница 4: ...on 3 Configuring the Router If you don t get an IP address reset the router by holding in the reset button at the back of the router for 10 seconds while it is ON and try ipconfig renew again Step 6 F...

Страница 5: ...get an IP address reset the router by holding in the reset button at the back of the router for 10 seconds while it is ON and try Renew again Section 3 Configuring the Router Step 1 Open the web brow...

Страница 6: ...don t see the Setup Wizard click on the button on the menu bar Step 4 Change the router s password by removing the bullets and typing in your new password OR you may keep the current password admin a...

Страница 7: ...of WAN setting your DSL Cable Modem has You may follow steps 8a through 8f to configure your WAN type Note If you are certain that your WAN type is different from the one detected you should manually...

Страница 8: ...ur ISP and click Next Proceed to Step 9 Step 8c For PPPoE to obtain IP automatically enter the User Name and Password required to get online and click Next Proceed to Step 9 You may need to include th...

Страница 9: ...d required to get online and the IP address provided by your ISP and click Next Proceed to Step 9 You may need to include the domain name with your user name Ex username sbcglobal net Step 8e For PPTP...

Страница 10: ...click Next Step 9 Choose to Enable or Disable the wireless function of the router Click Next to accept the default Wireless Network ID default or change the existing name to fit your current wireless...

Страница 11: ...Step 10 Click Restart to apply the settings Step 11 Click Close and close the web browser...

Страница 12: ...on the button Step 2 Verify that the status for the WAN connection says Connected Note If the status is disconnected click on DHCP Renew for Cable Modem or Connect for DSL Modem If it is still discon...

Страница 13: ...sword Some ISP s require you to include the domain name along with your User name for the User name field Step 3 Complete the Setup Wizard and then verify the Connection Status as described in Section...

Страница 14: ...chnical Support E mail support airlink101 com Toll Free 1 888 746 3238 Web Site www airlink101 com Section 6 Connecting to the Router Wirelessly Below are the default wireless settings of the router Y...

Отзывы: