background image

A1

FEATURES

Please disconnect the unit under these conditions:

Do not overload wall outlets, extension cords or convenience receptacles beyond their capacity,
since this can result in fire or electric shock.
Do not use suitable outlet, it might be dangerous.
Check the connection regularly. If any rupture or failure in insulation, call for a maintenance man
to replace them.

To ensure reliable operation, and to protect it from overheating, the unit must be put in somewhere
well ventilated.
Do not use power-line operated sets near water *for example, near a bathtub, washbowl, kitchen
sink, or laundry tub, in a wet basement, or near a swimming pool, etc.
Do not place the unit on an unstable object. The set may fall, causing serious injury to a child or
an adult, and serious damage to the unit.
Never let any liquid spattered on the unit. It might cause electric shock or fire hazard.
Never place the unit near or over such objects: for example, radiator, heat register, stove or other
heat sources. (including amplifier)
Unplug the unit from the wall outlet before cleaning or polishing it. Do not use liquid cleaners or
aerosol cleaners. Use a cloth lightly dampened with water for cleaning the exterior of the unit.
Never place heavy object on the unit.

To reduce the risk of fire and electrical shock, do not remove the cover of this unit. Please refer all
servicing difficulties to qualified technicians .

Use of controls or adjustments or performance of procedures other than those specified may result

in hazardous radiation exposure.

Where the MAINS plug or an appliance coupler is used as the disconnect device, the disconnect

device shall remain readily operable.

LASER PRODUCT - This marking indicates the presence of laser beams used in this unit, and CLASS

I

 refers to laser beams of the weaker class. There is no danger of hazardous radiation outside this

unit.

CAUTION:

CLASS

I

:

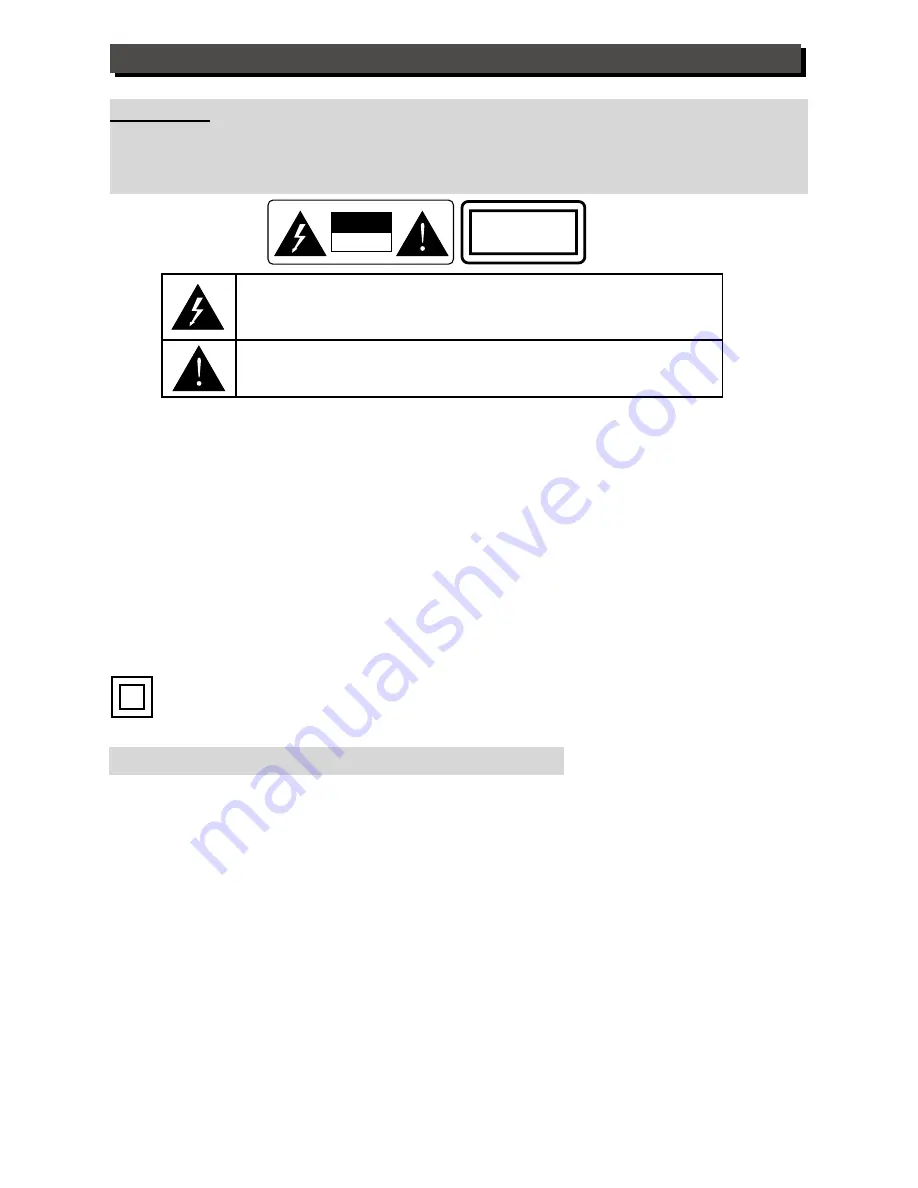
The lightning flash with arrowhead symbol, within an equilateral triangle, is

intended to alert the user to the presence of uninsulated “dangerous voltage”

within the product’s enclosure that may be of sufficient magnitude to constitute

a risk of electric shock to persons.

The exclamation point within an equilateral triangle is intended to alert the user

to the presence of important operating and maintenance (servicing) instructions

in the literature accompanying the appliance.

WARNING:

To reduce the risk of fire or electric shock, do not expose this appliance to   rain or moisture.
The apparatus shall not be exposed to dripping or splashing and that no objects filled with liquid,
such as vases, shall be placed on the apparatus.

Double insulation

This is class II apparatus

CLASS 1

LASER PRODUCT

CAUTION

RISK OF ELECTRIC SHOCK

DO NOT OPEN

Содержание LW 108T

Страница 1: ...ENGLISH INSTRUCTION MANUAL LW 108T ...

Страница 2: ...ACK C1 C5 SYSTEM SETUP E1 E6 TROUBLE SHOOTING F1 SPECIFICATIONS G1 ADDITIONAL INFORMATION H1 CONTENTS DVD DVB T REMOTE CONTROL I1 BASIC OPERATION J1 REMOTE KEY FUNCTION EXPLAIN D1 D7 SYSTEM SETUP K1 K6 REMOTE KEY FUNCTION EXPLAIN L1 L3 TROUBLESHOOTIN M1 ...

Страница 3: ...risk of fire and electrical shock do not remove the cover of this unit Please refer all servicing difficulties to qualified technicians Use of controls or adjustments or performance of procedures other than those specified may result in hazardous radiation exposure Where the MAINS plug or an appliance coupler is used as the disconnect device the disconnect device shall remain readily operable LASE...

Страница 4: ...atus near water Clean only with dry cloth Do not block any ventilation openings Install in accordance with the manufacturer s instructions Do not install near any heat sources such as radiators heat registers stoves or other apparatus including amplifiers that produce heat Do not defeat the safety purpose of the polarized or grounding type plug A polarized plug has two blades with one wider than t...

Страница 5: ... Coaxial Output 9 Digital Optical Audio Output 10 Left Front Channel Output 11 Left Surround Channel Output 12 Center Channel Output 13 Right Front Channel Output 14 Right Surround Channel Output 15 Subwoofer Output 16 SCART 17 ANT IN 18 LOOP OUT 9 5 6 7 8 10 11 1 2 12 3 131415 4 16 17 18 1 Power on off 2 LED display unit 3 Receiver window 4 Disc tray 5 Open close 6 Play Pause 7 Skip backward 8 Sk...

Страница 6: ...fier separately If connected to Digital Decode amplifier please connectCoaxial outputontheunittoCoaxialinputon theamplifier correspondingly NOTICE Before connecting the cables please turn off the unit power Illustration of system connection is only for reference Operation Interface Stereo amplifier Component Video Connecting Wire Green Blue Red Green Blue Red o e d i V e t i s o p m o C e r i W g ...

Страница 7: ... Video output Connect Component Video output Cb Cr Y on the unit to Component Video input on the TV Monitor with component connecting wires Progressive Scan Component Video output Connect Component Video output Pb Pr Y on the unit to Component Video input on the TV Monitor with component connecting wires Note only AV cable included High definition component output connect the Y Pb Pr output termin...

Страница 8: ... card reader in the market through the USB jack it can playback all kinds of multi media files such as MP3 JPEG MPEG1 MPEG2 Divx On STOP or NO DISC state insert USB FLASH or card reader press USB on the remote control the DVD player will read the file list as below If the file is too big normally it will cost sometime long After reading the file list you can select your desired file by direction k...

Страница 9: ... MPEG2 DIVX XVID OGG OGM etc When the dvd player in state of STOP or NO DISC insert the memory card then press the CARD key of remote control the dvd player will read the card If the files are more it is normal that the reading time will be more After reading out the flies list you can press UP and DOWN keys to choose your desired file and press PLAY key to play the file When the card is in STOP s...

Страница 10: ... indication 16 OPEN CLOSE open or close disc tray 17 CLEAR clear function 18 MARK memory play 19 TEXT ANG select different angle what you want 20 CHANNEL switch among 2 CH 5 1 CH and other channel output models 21 AUDIO choose output channel for VCD choose different output language for DVD 22 ENTER confirm the selection 23 REPEAT repeat play the current chapter 24 TITLE enter to title playback 25 ...

Страница 11: ...IVX OGM file into CD R RW DVD R RW DVD R RW discs 2 Put the burned disc into the DVD player tray then the DVD player will read the disc menu as the following picture 3 Move the cursor to the DIVX file and press ENTER key to playback Choose Subtitle If the DIVX file includes one or multi subtitles press SUBTITLE key during playback to choose different subtitles showing on the screen or hidden from ...

Страница 12: ... 8 track you can just press the number key 8 when you want the No 12 track you can press the number key 1 2 Play VCD or SVCD disc 1 Place the disc in 2 After reading the disc the PBC menu will display on the TV screen 3 Choose the chapter you want by number keys directly NOTICE PBC indicates the disc hold the PBC signal which is a kind of playing signal recorded on the VCD SVCD disc In the course ...

Страница 13: ...ll folders of a MP3 OGG JPEG disc When the unit reads the contents press PROG key the TV screen will show as follows All tracks of the MP3 OGG JPEG disc will be listed on the menu orderly You can use direction key or number key to select desired tracks and press ENTER key to confirm C3 BASIC PLAYBACK PLAY MP3 OGG JPEG DISC When load a MP3 disc the unit read it and show on TV screen as follow 00 00...

Страница 14: ...llow cursor to the track you want to delete then press CLEAR key to delete it 3 Skip Skip key only be used to change page instead of play next previous tracks during MP3 OGG JPEG playing 4 Fast backward Fast forward During MP3 OGG JPEG playing press Fast forward key to play forward speedily The class as follow Press Fast backward key to play back ward speedily The class as follow 5 Searching Press...

Страница 15: ...the next picture key skip to the last picture Play enter key enter mode of playing picture Direction key rotate picture 90 degree in reverse Direction key rotate picture 90 degree in sequence Zoom key change the zoom mode zoom in picture zoom out picture Direction keys move the center point of the picture when zooming in the picture Play JPEG disc After the unit reading the content of e album disc...

Страница 16: ... it is in the normal playing state press this key to pause playing when the unit is playing the play indicator light on the panel is on STOP Press STOP one time memorizing the stopped position When the unit continues playing It will play from the stopped position Press STOP the second time the unit stops play and gives up the memorized position MENU In play DVD mode press MENU key the first time b...

Страница 17: ...Clear memory playing Select the memeory position you want to play by direction press then press selection direction to play Note If power off or disc out all the memorized position will giving up automatically REPEAT Press this key to repeat some title some chapter some track or the full disc press repeat key when playing back DVD the TV screen will show as follows chapter Repeat Title Repeat Repe...

Страница 18: ... position to play Press this key the screen will be disply picture 1 One playing press ENTER key for the first time the first blank will display 01 it means to play the first memory position Then press direction key to select the second blank press ENTER key to play the second memory position The same you can select 12 times memory position playing picture 2 PROG TT CH TT TITLE CH CHAPTER 01 TT __...

Страница 19: ...is mark to resume the normal play Step Every press next is to move the picture one frame Slow Press it to slow the speed of the normal play Skip Press skip forward or skip backward to different chapter or title Fast Pause AUDIO Refer to the AUDIO key for detailed information Subtitle If the DVD disc has multi angle you can switch observation angle Press the angle mark to change as follows when pla...

Страница 20: ...r key to choose the desired chapter directly On playing SVCD VCD discs press this key and the screen will appear browse menu picture2 Press direction key to switch the cursor to the desired digest type and then press the select key The select digest types are as follows Track digest choose this item to show every track of the disc on the TV screen in order and press number key to choose the desire...

Страница 21: ... time directly Chapter Time in chapter time searching state press the number key to choose the desired time directly Repeat in repeat selecting state press the number key to choose the desired repeat state and press the select key to confirm it Time Display in time display selecting state press the number key to choose the desired display state and press the select key to confirm it On playing SVC...

Страница 22: ... 720p and 1080i etc Connect different display equipments when select different modes Note in YUV YPbPr mode CVBS and S Video has video output in 720p and 1080i mode if connect with CVBS TV screen can display High Definition Mode CVBS and S Video doesn t have video output Video output Interleaving chromatism output Progressing chromatism output TV screen display YCbCr YPbPr Progressing chromatism o...

Страница 23: ...is showed on the whole screen but a part is cut B Normal LB When the unit connects with TV set playing wide image there are black bands showed on the up and down screen C Wide Choose this when the unit connects with wide screen TV set Angle Mark Select display angle when playing multi angle DVD disc OSD Language Select operation language Captions This function is ineffective if no caption record i...

Страница 24: ...center speaker and rear speaker on this page cannot setup only can if in 5 1 channel output mode Test Tone In 5 1channel output mode this item can setup in state of opening disc tray or stopping play Dialog volume In LT RT or stereo output mode set up this item to adjust voice within the range from 0 to 20 Channel trim setup Enter channel volume setup press direction key to select center channel l...

Страница 25: ...reo amplifier please select this item when it playbacks disc of Dolby digital MPEG the coaxial or optical output will output in 2 channel mode modulated by PCM Dynamic If watching large dynamic scope movie program at night select this mode to reduce the volume meantime keep the little minutia EQ high level thus it can avoid troubling neighbors without detracting volume quality LPCM out Setup diffe...

Страница 26: ...ogic II setup On or Auto item Mode is available When playing 2channel music disc please setup Music when playing movie please setup Movie Reverb Mode This item setups reverb mode in 3D processing and there are 7 types available e g when in living room mode the system speaks reverberative effect in living room Channel Delay If you are not satisfied with the above reverb modes you can choose manual ...

Страница 27: ... range from 0T to 1T Gamma Setup this item to adjust the image available range as high medium ow none Video Setup Page Brightness 00 Brightness Hue 00 Hue Contrast 00 Contrast Saturation 00 Saturation Sharpness MID High Medium Low Luma Delay 1T 0T 1T Gamma None High Medium Low None Filter This setup can change output sample rate when playing HDCD disc Setup for 44 1K the system can output all sign...

Страница 28: ...r changing the password press the select key to finish TV TYPE The unit can correspond with erery type of TV all over the world Select your TV type on this item Auto Select TV type according to the color system of the playing disc automatically NTSC Taiwan Japan and USA use this type PAL HongKong China and Europe use this type When TV type is inconsistent with this setup the screen will be in blac...

Страница 29: ... function Power wave or other abnormal phenomeno such as static disturbs the normal condition Do not point remote control at the remote sensor directly Remote control is too far from DVD unit Batteries are exhausted Solution s Connect them well Set up TV in correct mode Connect them well Connect them well Power it on Set it in correct mode Clean the disc or try another one Sometimes the tiny disto...

Страница 30: ...75 450 1 8 0 2 10K 80dB 80dB Fs 48KHz PCM 4Hz 22KHz Fs 96KHz PCM 4Hz 44KHz Fs 44 1KHz PCM 4Hz 20KHz 110 240V 50Hz 60Hz 15W 0 C 40 C Level manipulation 430x 241 5 x 48 mm L W H 3 0kg Video OutputVp p V Level Definition TV line Power Supply Audio Guide Line Audio Frequency Response Dimension Temperature Condition Operating Condition Weight DVD PLAYER OUTPUT ...

Страница 31: ...s well as sloutions which contain benzene thinner or any other vaporizing substances as they may damage the disc surface Storage of disc Do not keep the disc in the direct sunlight near the heat source in the dusty places or moisture kitchen bathroom Keep the disc vertically in the disc storage case Heavy objects on the disc case will cause deformation to the disc Copyright Attention Copy broadcas...

Страница 32: ...DVB INTRODUCTION ...

Страница 33: ...OR KEYS for adjust teletext 8 DIGEST scan all the DVB channels currently being broadcast 9 DISPLAY press for current channel information such as time indication 10 TEXT ANG open TEXT function 11 CHANNEL select audio Left Right Stereo Mono 12 AUDIO select DVB audio 13 PREV NEXT select DVB channels 14 A B DVB MODE switch between DVB Radio and Favorite mode 15 DVB DVD switch between DVB T DVD format ...

Страница 34: ...B reciever as atena TV set and adaptor 2 Turn on the power enter the setup menu to search for the TV programs first for the detailed operation please refer to setup instruction 3 When search is finished select the program you want directly by the number beys or keys on the remote control J1 ...

Страница 35: ...set correctly before watch program Select the Time Zone option using the arrow buttons Press the ENTER button to select the Change option The following menu will display Press the buttons until the correct Hour is displayed Press the ENTER button to confirm your selection the hili will jump to Minute option automatically Press the buttons until the correct Minute is displayed Press the ENTER butto...

Страница 36: ...lay like right Fig If select Cancel you can return to Channel setup Page If select OK you can access to following Auto Scan Page and start to scan channels The machine will scan for all the digital TV and Radio stations available in your area and list them as above There is also a progress bar shown as a percentage When all the digital TV and Radio stations have been found the scan progress will a...

Страница 37: ...Please confirm that the area you choose is correct before auto scan Otherwise you may not search any channels When manual scan is finished the scanned channels will be list at the end of the exit channels the old channels can not be covered DVB T Setup Page Time Zone Auto Scan Adjust Channel Channel Remap Reserve Channel Area ENG Parental Age 12 Manual Scan Start Mannual Scan Status Found Channels...

Страница 38: ...OW key to set protected channel the right hand side menu will display Enter the pin code then select OK to confirm a yellow icon will display beside channel name Select Cancel to return Select Exit then press the ENTER button you can exit the menu Default code 8806 If play the program which is protective you should open the code first DVB T Setup Page Time Zone Auto Scan Manual Scan Channel Remap ...

Страница 39: ...be marked red Use buttons to remove cursor to your target place press the ENTER button to confirm You will see the channel list after remap from following picture Left picture is before remap the right one is after remap You can switch to next page by press key or select Next option then press the ENTER key You can switch to previse page by press key or select Prev option then press the ENTER butt...

Страница 40: ...gram page Exit then press ENTER button to return to channel setup page In channel setup page select Notify time option press ENTER key the right hand side menu display Press keys until the correct time is displayed to confirm the selection by use ENTER button DVB T Setup Page Time Zone Auto Scan Manual Scan Adjust Channel Area ENG Parental Age 12 Channel Remap Reserve Channel Start Notify time OK ...

Страница 41: ...an on off subtitle or change to a different subtitle by Pressing the SUBTITLE button Please note that this feature is not available on all channels This function depends on the program broadcast TELETEXT You can pressing the TEXT ANG button to turn on off teletext stream display Please note that this feature is not available on all channels Press or keys to change pages Press RED key to select red...

Страница 42: ...in the day To access the EPG Menu Pressing PROGRAM key on the remote control The right hand side menu will display Select Channel by press key then press ENTER button you will see channel list To view a different channel press keys Press ENTER button to confirm which you want to select Press key to return to the EPG menu To see what is going to be broadcast after this program press keys to select ...

Страница 43: ...ess the button will make the volume of the set top box louder Press the button will make the volume of the set top box quieter CHANGING TO A DIFFERENT CHANNEL You can change to a different channel by using or keys on the remote control You can change to a different channel by using all number keys on the remote control To return to the previously viewed channel press the RETURN button L3 REMOTE KE...

Страница 44: ...nt panel obstructed Hand set batteries exhausted Plug in and turn on plug Aimhandset at front panel Check for obstructions Replace handset batteries Forgotten channel lock code Re install channels to cancel channel lock Forgotten menu lock code Contact help line The remote control will not operate your STB 1 The batteries in your remote control need replacing 2 There is an obstruction blocking the...

Отзывы: