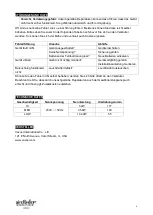
aireRyder FN72238 Скачать руководство пользователя страница 3

3

1.

Pass the supply wires through

the hole in the mounting bracket.
Secure the mounting bracket to a
ceiling joist or other structural
ceiling element with two screws,
spring washers and flat washers.
Ensure that the support for the
mounting bracket is capable of
safely holding the moving weight
of the fan.

2.

Lift the fan assembly and

hand onto the hook on mounting
bracket. This will permit you to
make the electrical connections
without having to hold the fan up
as well.

3.

There  is  a  frequency-setter

respectively in the transmitter and
receiver.  This  "DIP Switch"  is  a  4
key unit. All keys were set
at "ON" position in the beginning.
Set the keys to a different code.
Make sure the same numbered
keys are switched "ON" for both
DIP Switches. Take note that the
"ON" position may have different
orientation in each.

4

. Make wire connections. Follow diagram above and make sure that all exposed wires are tighten by

screw on terminal block.
Note: Wires from house may vary in color and may not included ground wire (green). After wiring is
completed, gently push wires into junction box with terminal block upward.

5-1.

After the splicing has been made, gently

place the receiver into the canopy and secure it
in place using double-sided adhesive tapes
which pre-adhered on the back of the receiver.

5-2.

Take off side screws (one of each across)

on mounting bracket first, then loosen the other
two.

6-1.

Push up the canopy until the two screws on

mounting bracket are engaged with L type slot holes
on canopy.

6-2.

Rotate the canopy slightly until the two screw

heads are in the L type slot holes.

6-3.

Tighten 4 screws firmly.

From Fan

From mounting bracket

Orange(For light kit)

Orange

Brown (Motor-L)

Blue (Motor-N)

Brown

Blue

Blue

Brown

Green/Yellow

Blue

Brown

Green/Yellow

Terminal block on
Mounting bracket

From House

Содержание FN72238

Страница 1: ...are prohibited This product is not intended for use by persons including children with reduced physical sensory or mental capabilities or lack of experience and knowledge unless they have been given s...

Страница 2: ...1 Motor housing 2 Fan blades 3 Canopy 4 Fan light housing 5 Glass shade 6 Switch for rotating direction UNPACK THE FAN Unpack the fan and check that contents of are complete Dispose of packaging see a...

Страница 3: ...n in each 4 Make wire connections Follow diagram above and make sure that all exposed wires are tighten by screw on terminal block Note Wires from house may vary in color and may not included ground w...

Страница 4: ...screws provided from hardware bag 8 3 Adjust the light kit to the right position for blade assembly repeat the above step 8 2 until 4 blades assembled well 9 Re attach the plate in place after blade i...

Страница 5: ...rotation This changes the direction of air movement In cold weather Push the switch RIGHT so that the fan will circulate the warm air trapped near the ceiling to move downwards throughout the room In...

Страница 6: ...does not turn Fan switched off Switch on fan No mains voltage Check circuit breaker Batteries of remote control empty Install new batteries Fan vibrates Fan not installed properly Install fan thorough...

Страница 7: ...por personas ni os incluidos que tengan las capacidades sensoriales o ps quicas limitadas ni por personas con poca experiencia o conocimientos a menos que sean supervisadas o hayan recibido instruccio...

Страница 8: ...Embellecedor 4 Caja de la l mpara 5 Pantalla de cristal 6 Conexi n para la direcci n de rotaci n DESEMBALAJE DEL VENTILADOR Desembale el ventilador y compruebe que el contenido est completo Tire el e...

Страница 9: ...floje primero los tornillos de la regleta de tal manera que los cables puedan encajar Siga las instrucciones como en el gr fico Aseg rese de que las puntas de los cables se encuentran completamente de...

Страница 10: ...Coloque la pantalla de cristal a la caja de la l mpara y gire cuidadosamente la pantalla en el sentido de las agujas del reloj hasta quedar fija FUNCIONAMIENTO Revise el ventilador antes de encenderlo...

Страница 11: ...el ventilador origine una brisa y haga circular el aire por la habitaci n LIMPIEZA Riesgo de da os Desconecte siempre la corriente desde el interruptor autom tico principal y espere hasta que el vent...

Страница 12: ...do Encienda el ventilador No llega corriente Revise el interruptor autom tico Las pilas del mando a distancia est n gastadas Coloque pilas nuevas El ventilador vibra El ventilador no est instalado ade...

Страница 13: ...ien Betrieb sicherzustellen Umbauten eigenm chtige Ver nderungen am Ger t sowie die Verwendung nicht zugelassener Teile sind untersagt Kinder Personen mit eingeschr nkten geistigen F higkeiten sowie P...

Страница 14: ...eh use 5 Leuchtenschirm 6 Richtungsschalter AUSPACKEN Ger t auspacken und auf Vollst ndigkeit pr fen Verpackung entsorgen siehe auch Entsorgung Lieferumfang Gebrauchsanweisung Schrauben Montageb gel F...

Страница 15: ...erschiedlich sein kann 4 L sterklemmenverbindung L sen Sie zun chst die Schrauben an den L sterklemmen so dass die Kabel aufgenommen werden k nnen Folgen Sie dann der nachfolgenden Abbildung Stellen S...

Страница 16: ...schraube 8 3 Drehen Sie das Leuchten geh use und wiederholen Sie Schritte 1 und 2 bis alle Rotorbl tter verschraubt sind 9 Verschrauben Sie die gekr mmte Metallabdeckung wieder im Leuchtengeh use mit...

Страница 17: ...gsschalter Bet tigen Sie den Richtungsschalter am oberen Teil des Motorgeh uses um die Drehrichtung des Deckenventilators zu ndern Dies ndert die Richtung der Luftumw lzung Bei warmem Wetter Richtungs...

Страница 18: ...inschalten Keine Netzspannung Sicherung pr fen Batterien der Fernbedienung leer Neue Batterien einsetzen Ger t vibriert Ger t nicht richtig montiert Ger t sorfgf ltig gem Installationsanleitung montie...

Отзывы: