October 2006
-
6
-
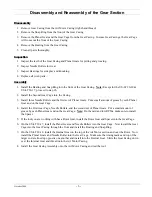
Disassembly and Reassembly of the Gear Section
Disassembly
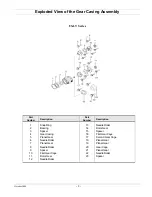
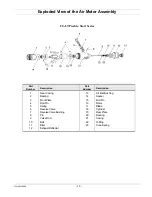
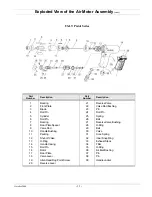
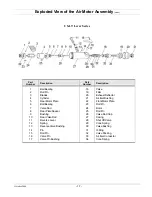
1. Remove Gear Casing from the Air Motor Casing (right-hand thread).
2. Remove the Snap Ring from the front of the Gear Casing.
3. Remove the Planet Gears and the Gear Cage from the Gear Casing. In some Gear Casings, the Gear Cage
will come out the front of the Gear Casing.
4. Remove the Bearing from the Gear Casing.
5. Clean all parts thoroughly.
Inspection
1. Inspect the teeth of the Gear Casing and Planet Gears for pitting and grooving.
2. Inspect Needle Rollers for wear.
3. Inspect Bearings for side play and knocking.
4. Replace all worn parts.
Assembly
1. Install the Bearing and Snap Ring into the front of the Gear Casing.
Note:
Except for the US-LT20-18 &
US-LT30-17, proceed to step #6.
2. Install the Second Gear Cage into the Casing.
3. Install three Needle Rollers and the first set of Planet Gears. Put a small amount of grease by each Planet
Gear and on the Gear Cage.
4. Install the First Gear Cage, Needle Rollers, and the second set of Planet Gears. Put a small amount of
grease by each Planet Gear and on the Gear Cage.
Note:
On the mid and low RPMs, make sure to install
the Spacer.
5. If the tool you are working with has a Rotor Gear, install the Rotor Gear and Spacer into the Gear Cage.
6. On the US-LT30-17, install the Planet Gears and Needle Rollers into the Gear Cage. Now install the Gear
Cage into the Gear Casing through the front and install the Bearing and Snap Ring.
7. On the US-LT20-18, install the Internal Gear on the top of the Air Motor section and over the Rotor. Now
install the Planet Gears and Needle Roller into the Gear Cage. Make sure the timing marks and top of the
larger end are lined up opposite one another and install into the Internal Gear. Slide the Gear Casing down
over the Internal Gear and thread onto the Air Motor Casing.
8. Install the Gear Casing Assembly onto the Air Motor Casing and test the tool.
Содержание Lite-Touch Series
Страница 2: ......


