


SmartyCam
User Manual
Release 1.11 – firmware version 1.00.44
17
www.smartycam.com
2 8
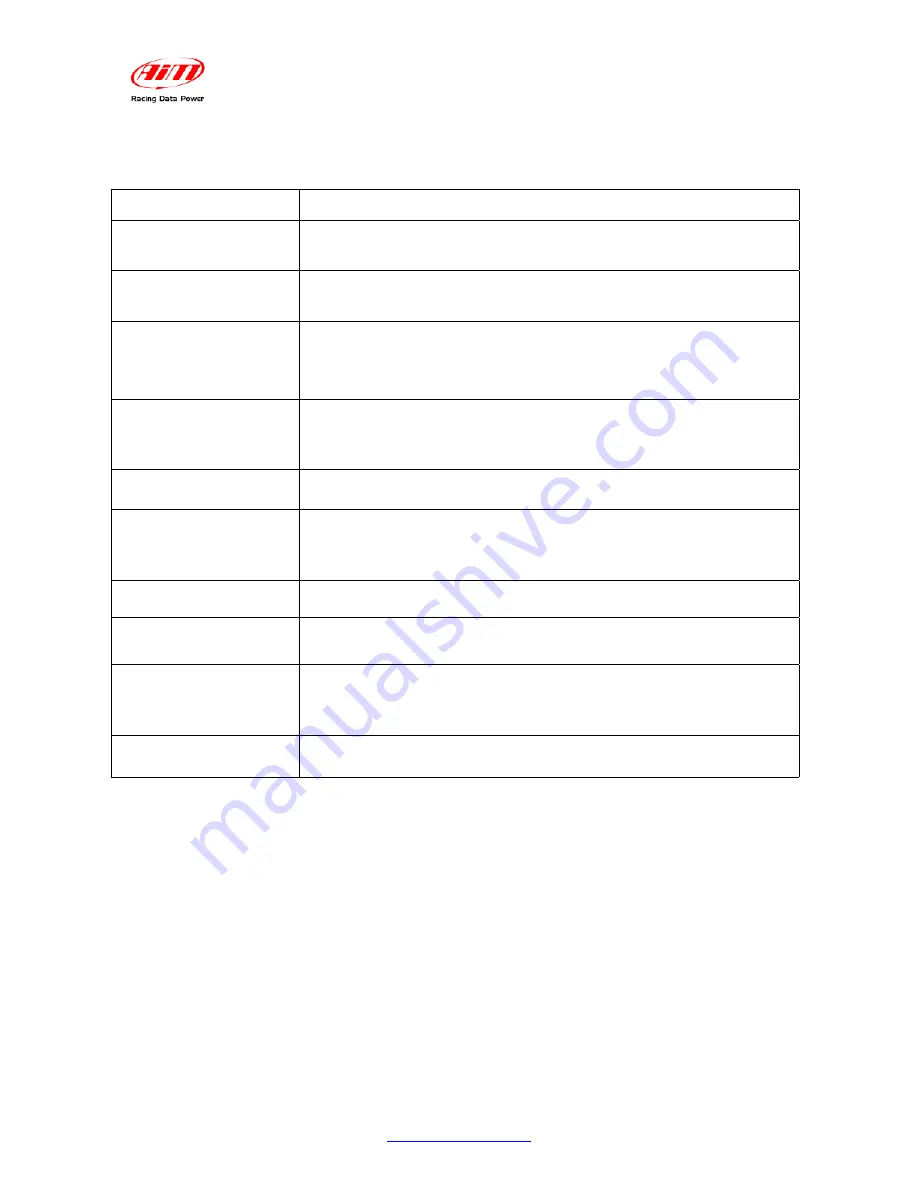
6.3.1 – “SETTINGS” option
As anticipated, clicking “
SETTINGS
” several options appear:
LANGUAGE
Chooses the desired language.
DISPLAY T.out
Switches off the display after 30” while
SmartyCam
is recording
to avoid battery consumption. Recording does not stop.
TIME SETTING
Chooses the time zone and enables/disables daylight saving
time. Default setting is Greenwich Time.
CONF LOAD
Imports overlay setting – OVERLAY CONF – from the micro SD
to the camera database; this configuration will be used in the
following recordings. It imports parameters configuration –
SMARTYCONF – too (at present only FILE NAME. AVI).
OVERLAY
Selects a pre-defined overlay configuration among a list
previously created through
SmartyManager
. Each configuration
is identified by the name associated through the software.
INFO
Info page showing camera technical data.
VIDEO SET
Sets some Video options useful to maximize lightness and
recording quality in case of:
SmartyCam
use on vehicle roof or
onboard (choosing the spot light settings), zoom or not.
AUDIO SET
Adds an external microphone.
ACCEL CALIBR
Calibrates the 3D accelerometer: samples acceleration and
tunes
SmartyCam
frame (paragraph 6.3.1.1.)
AUTO REC
Chooses manual vs. automatic recording: it is useful to start/stop
recording automatically when the threshold value of fixed
parameters is reached/overcame (paragraph 6.4.2).
AUTO POWEROFF
Enables/disables automatic power-off of the camera after a fixed
period of inactivity (paragraph 6.2)
6.3.1.1 – Accelerometer calibration: “ACCEL CALIBR” option
Great attention must be given to the accelerometer calibration procedure, because it
impacts on acceleration data accuracy and on correct frame choice.
To set calibration parameters place the camera on a plane surface, switch it on, select
“
ACCEL CALIBR
” option and click “
Calibr
”.
To keep correct calibration parameters even once
SmartyCam
is installed on the vehicle,
these steps must be followed:
•
install the camera;
•
select “ACCEL CALIBR”;
•
the 2 coordinate axis appear: balance point can be fixed referred to the axes and
pressing “
Calibr
” or pressing “
Prev
” and making the image be perfectly ranged and
centred: press “
Calibr
” to fix calibration point.
Содержание Smartycam
Страница 1: ...SMARTYCAM User Manual...


