Mini Merlin Installation, Operation & Maintenance
Rev: 03 05-22
6
Mounting & Cabling
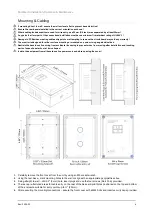
If mounting direct to wall - ensure the wall surface is flat to prevent base distortion!
Ensure the rear base is installed in the correct orientation as shown!
Where cable glands/conduits are used for wire entry, use 20mm (3/4 inch) max separated by at least 20mm!
Any parts that form part of the connections/installation must have a minimum fire retardant rating of UL94V-1!
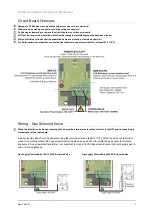
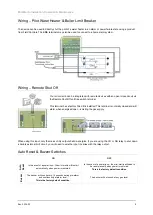
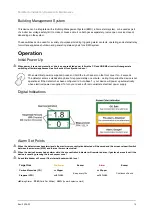
Damage to PCBs when creating cable entry points or attempting to remove the circuit board may void any warranty!
The monitor is designed for either surface mounting or mounted on a one or two gang electrical box.
Restrain the hazardous live wiring from accidental loosening
to prevent wires from moving after installation and touching
parts of opposite polarity or at low voltages!
Isolate the equipment from all hazardous live power sources before opening the cover!
1.
Carefully remove the front cover from the unit by using an M3 socket wrench.
2.
Using the rear base - mark mounting holes to the wall or align with an appropriate gang/pattress box.
3.
Fixing straight to wall
–
drill
0.2” (
5mm) hole, insert plugs and use the four screws (No.4 Pozi) provided.
4.
There are pre-fractured areas for cable entry on the rear of the base and pilot holes positioned on the top and bottom
of the enclosure suitable for entry points up to ¾” (20mm).
5.
After executing the mounting/connections
–
secure the front cover with all M4 bolts and insert security caps provided.


