PRECAUTIONS
14
PRODUCT DESCRIPTION
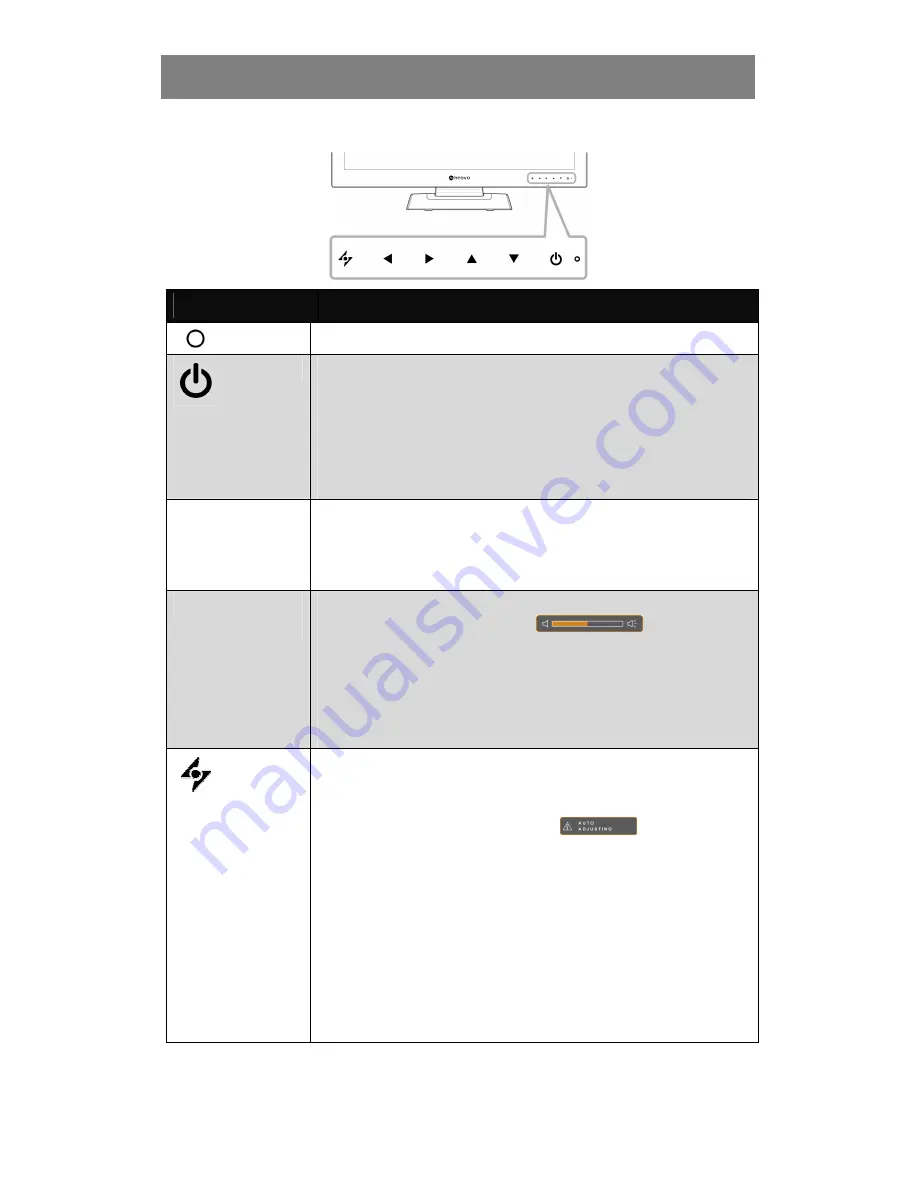
1.3 Control Buttons
Button
Description
LED Indicator
LED lights green during normal operation and lights amber when on standby mode.
Power ON/OFF
•
Touch once to turn the display ON.
•
Touch again to turn the display OFF.
Note:
Using the Power button does not turn off power completely. To turn off power
consumption (0 watt), press the power switch at the rear of the LCD display.
Refer to page 16.
▲▼
Up / Down
Buttons
On Screen Display (OSD)
•
Touch to call out the OSD menu
During OSD menu
•
Use to scroll through the menu options.
◄►
Left / Right
Buttons
Volume Bar
•
Touch to call out the volume bar.
Touch
►
to increase the volume and
◄
to decrease the volume.
During OSD menu
•
Use to select an option and adjust the settings.
Note:
During volume or menu setting adjustment, touch and hold the button to change
the values continuously.
Auto Button
Auto Adjustment
(available in VGA input only)
Touch to perform auto adjustment. This function automatically tunes the LCD display to
its optimal setting, including horizontal position, vertical position, clock, and phase.
When auto adjustment is initiated, the message
is displayed on the
screen. When the message disappears, auto adjustment is completed.
NOTE:
•
During auto adjustment, the screen will slightly shake for a few seconds.
•
It is recommended to use the auto adjustment function when using the LCD
display for the first time or after a resolution or frequency change.
During OSD menu
•
Use to close the OSD menu or exit a submenu.
During volume adjustment
•
Use to close the volume bar.
Содержание U Series
Страница 1: ......
Страница 2: ......
Страница 33: ...PRECAUTIONS 33 SPECIFICATIONS 6 2 Display Dimensions HDMI 100mm 100mm ...


