background image


5

Getting Started 

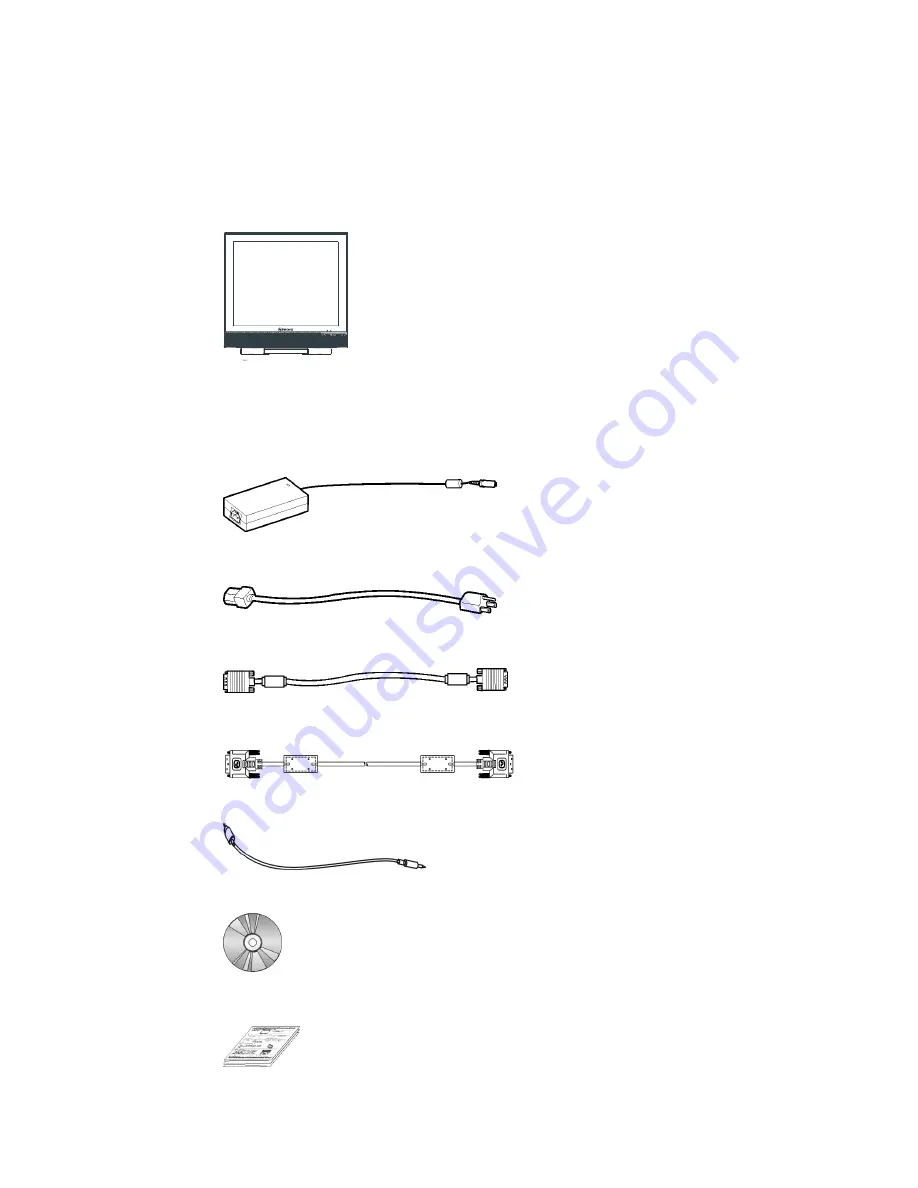
Unpacking Your LCD Display 

After you have unpacked your LCD display, make sure that the following items are included in 
the package. 

• 

LCD display 


• 

Adaptor  
E-17: Must use one of the following adaptors: 

Linearity

 LAD6019AB4, LAD6019AB5 or 

Li 

Shin

 LSE9901B1260, 0217B1250. 

E-19: Must use one of the following adaptors: 

Linearity

 LAD6019AB4, LAD6019AB5 or 

Li 

Shin

 LSE9901B1260, 0218B1255. 


• 

Power cord 


• 

D-sub 15-pin VGA cable  


• 

DVI-D digital cable 

(Optional)


• 

Audio cable 


• 

CD-ROM (containing Windows information file and user’s manual) 


• 

Quick Guide 


Содержание E-19A

Страница 1: ......

Страница 2: ...our LCD display Viewing Angle 3 Wall mounting 4 Getting Started 5 Unpacking Your LCD Display 5 Control Buttons 6 Installation 7 Adjusting Your LCD Display 8 Selecting OSD Features 8 Warning Messages a...

Страница 3: ...the monitor and be easily accessible Do not allow anything to rest on the power cord Disconnect the power plug from the power outlet in the following circumstances If you will not use the monitor for...

Страница 4: ...pillars on the bottom of base and fold to 90 degrees as shown in the illustration below The maximum tilt angle of the monitor is 25 the monitor can not be pushed down any further when the tilt angle...

Страница 5: ...unt kit or arm First remove rear cover Insert a coin or flat screwdriver into the rear cover slot and pull out the rear cover Second unlock base assembly 1 Unlock two screws 2 Remove base assembly Thi...

Страница 6: ...E 17 Must use one of the following adaptors Linearity LAD6019AB4 LAD6019AB5 or Li Shin LSE9901B1260 0217B1250 E 19 Must use one of the following adaptors Linearity LAD6019AB4 LAD6019AB5 or Li Shin LS...

Страница 7: ...ding screen size color brightness and contrast We recommend that you use the auto adjustment function for the first time use after resolution or frequency change The Auto button also closes the OSD Mo...

Страница 8: ...other end to the adaptor 6 Turn on your PC 7 Turn on your LCD display If the power LED is yellow and there is no display on the screen please refer to the Warning Messages and Troubleshooting Guide in...

Страница 9: ...justment function every time after you have changed the resolution or frequency of your display Selecting OSD Features 1 Push button to call out the OSD window 2 Push or button to select a feature 3 T...

Страница 10: ...utton to choose 9300K 6500K User or Auto Color You can select USER in the color temperature menu to fine tune the red green blue picture settings according to your preference or specific application P...

Страница 11: ...ent Use Analog Input or Use Digital Input Press button to operate the selected function The Auto Adjustment function lets you adjust the display size clock and phase to obtain the best viewing setting...

Страница 12: ...T No signal is detected from ANALOG port Check if your PC is ON Check if the D Sub 15 pin cable is correctly connected to the ANALOG port at the back of your LCD display Check if the D Sub 15 pin cabl...

Страница 13: ...t display Check if the resolution is set at 1280x1024 Push button to enable auto adjust Adjust Clock and Phase in the OSD Display Adjust menu See Adjusting Your LCD display section of this manual for...

Страница 14: ...g 16 1 lb AC 100 240V 50 60 Hz Power Consumption 50 W ON 2 W Standby 1 W OFF 17 Size 17 0 431 8mm diagonal Panel Resolution max 1280 x 1024 Frequency Horizontal 24kHz 80kHz Vertical 49Hz 75Hz Input Si...

Страница 15: ...radio frequency energy therefore installation or use without following the instructions given may cause damaging interference to radio communication Nonetheless it is not possible to state with certa...

Страница 16: ...ipment recycling For information about your recycling drop off area please contact your local related electrical and electronic equipment waste management authority or the retailer where you bought th...

Отзывы: