


BEFORE
YOU
BEGIN
14
INTRODUCTION
IMPORT
ANT
PRECAUTIONS
ASSEMBL
Y
BEFORE
YOU
BEGIN
TREADMILL
OPERA
TION
LIMITED
W
ARRANTY
TROUBLESHOOTING
&
MAINTENANCE
CONDITIONING
GUIDELINES
ASSEMBL
Y
BEFORE
YOU
BEGIN
BEFORE YOU
BEGIN
ASSEMBL
Y
ASSEMBL
Y
15
INTRODUCTION
IMPORT
ANT
PRECAUTIONS
TREADMILL OPERA
TION
CONDITIONING GUIDELINES
TROUBLESHOOTING &
MAINTENANCE
LIMITED WARRANTY
ASSEMBL
Y
BEFORE YOU
BEGIN
IMPORT
ANT
PRECAUTIONS
BEFORE YOU BEGIN
CONGRATULATIONS!
on choosing your treadmill. You’ve taken an important step in developing and
sustaining an exercise program! Your treadmill is a tremendously effective tool for achieving your personal
fitness goals. Regular use of your treadmill can improve the quality of your life in so many ways.
HERE ARE JUST A FEW OF THE HEALTH BENEFITS OF ExERCISE:
• Weight Loss
• A Healthier Heart
• Improved Muscle Tone
• Increased Daily Energy Levels
The key to reaping these benefits is to develop an exercise habit. Your new
treadmill will help you eliminate obstacles that prevent you from exercising.
Inclement weather and darkness won't interfere with your workout when you
use your treadmill in the comfort of your home. This guide provides you with
basic information for using and enjoying your new machine.
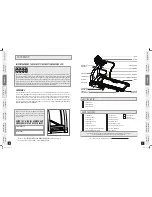
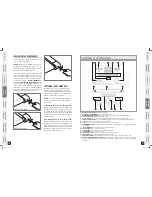
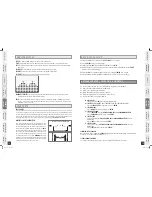
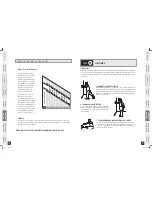
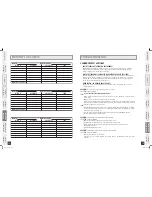
LOCATION OF THE TREADMILL
Place the treadmill on a level surface. There should be 6 feet of clearance
behind the treadmill, 3 feet on each side and one foot in front for folding
and the power cord. Do not place the treadmill in any area that will block
any vent or air openings. The treadmill should not be located in a garage,
covered patio, near water or outdoors.
LEVELING
The treadmill should be level for optimum use. Once you have placed the treadmill where you intend to use
it, raise or lower the adjustable levelers located on the treadmill base frame. Once you have leveled the
treadmill, lock the levelers in place by tightening the nuts against the frame. To assure the treadmill is level,
a carpenter’s level is recommended.
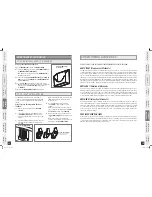
SAFETY KEY
Your treadmill will not start unless the safety key is placed in position. Attach the clip end securely to your
clothing. This safety key is designed to cut the power to the treadmill if you should fall. Check the operation of
the safety key before every use.
3 feet
6 feet
3 feet
1 foot
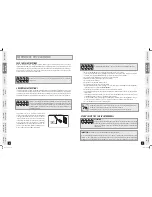
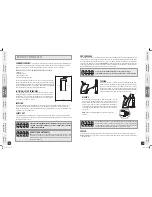
WARNING
DO NOT STAND ON THE BELT
While you are preparing to use the treadmill, do not stand on the belt. Place your
feet on the side rails before starting the treadmill. Start walking on the belt only
after the belt has begun to move. Never start the treadmill at a fast running speed
and attempt to jump on!
WARNING
NEVER USE THE TREADMILL WITHOUT SECURING THE SAFETY KEY CLIP TO YOUR
CLOTHING. PULL ON THE SAFETY KEY CLIP FIRST TO MAKE SURE IT WILL NOT
COME OFF YOUR CLOTHING.
PROPER USAGE
Your treadmill is capable of reaching high speeds. Always start off using a slower speed and adjust the speed in
small increments to reach a higher speed level. Never leave the treadmill unattended while it is running. When
not in use, remove the safety key and keep out of reach of children, turn the on/off switch to off and unplug
the power cord. Make sure to follow the MAINTENANCE schedule located in this manual. Keep your body and
head facing forward. Do not attempt to turn around or look backwards while the treadmill is running. Stop your
workout immediately if you feel pain, faint, dizzy or are short of breath.
Do not operate the treadmill if the power cord or plug is damaged.
If the treadmill appears to not be working properly, do not use the treadmill.
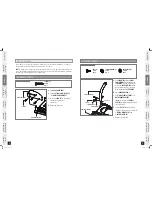
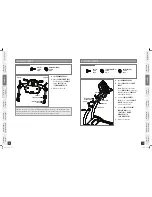
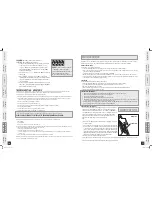
FOLDING
Firmly grasp the back end of the treadmill. Carefully lift the end of the
treadmill deck into the upright position until the foot lock latch engages
and securely locks the deck into position. Make sure the deck is securely
latched before letting go. To unfold, firmly grasp the back end of the
treadmill. Gently press down on the foot lock latch with your foot until the
lock latch disengages. Carefully lower the deck to the ground.
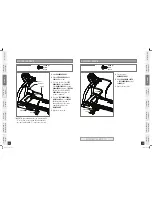
MOVING
Your treadmill has transport wheels built into the frame. To move,
make sure the treadmill is folded and securely latched. To unlock
wheels, push down on the top lever of the rear wheel locks located on
the rear corners of the base frame. Then firmly grasp the handlebars,
and slowly move the treadmill. After moving to the desired location,
push down on the bottom lever of the rear wheel locks to lock the
rear wheels.
NOTE
: Both rear wheel locks MUST be locked before using the
treadmill.
Our treadmills are heavy, use care and additional help if necessary when moving.
Do not attempt to move or transport treadmill unless it is in the upright, folded
position with the lock latch secured. Do not attempt to disassemble machine and
transport. Failure to follow these instructions could result in injury.
POWER
The power cord must be plugged into the power jack, which is located in the front of the machine below the
MOTOR COVER. Make sure the power switch is in the ON position. After use, the power switch should be turned
to the OFF position.
WARNING
WARNING
WHEEL LOCKS
5.0AT_Rev.1.7.indd 14-15
4/28/08 2:03:52 PM